
iceadmin is an admin user that has sudo privileges and is mainly meant for configuration and management of VMware Pulse IoT Center components. The VMware Pulse IoT Center components are generally system services and the iceadmin account will be used to install/start/stop/restart the services as the situation demands. This service management requires a user with admin privileges. The default password for this account is vmware without the quotes.
After installation, the IoT support needs to be enabled in Settings | Device & Users | Advanced | IOT Support:
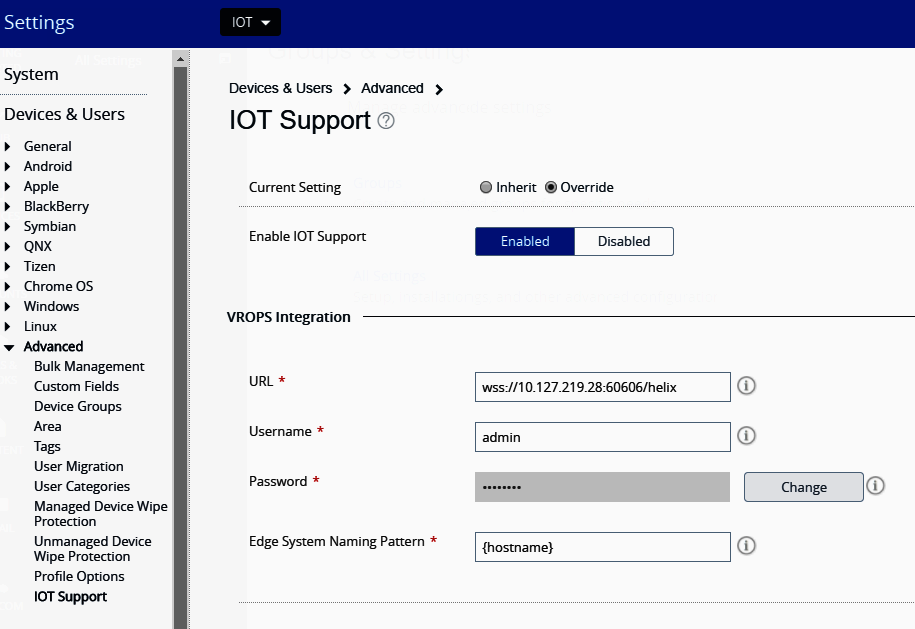
This section should be configured only after the IoT API server has been installed. The VMware Pulse IoT API registers for notifications from VMware Pulse Device Management Suite to speed up refreshing the resources, rather than relying on the sync interval. This helps the Pulse IoT API to maintain resources to a reasonable accuracy. These notifications are sent from VMware Pulse Device Management Suite to the Pulse IoT API whenever one of the following events happens:
- A new device is enrolled
- A device is unenrolled
- A device changes its organization group
VMware Pulse Device Management Suite and the Pulse IoT API honor the device's attribute change notification, such as asset number, device-friendly name, organization group ID, user email address, ownership, OS, phone number, or device MCC, only when the device's attribute-change flag is enabled in the events section. VMware Pulse Device Management Suite only supports organization group changes, which is done within the same OG tree, that is, in its child OGs. The event for the same is notified to the listener after some time.
While installing the Pulse Device Management Suite console in a Windows server, the VMware Pulse Device Management Suite installer suggests you enable TLSv1.2. Make sure to enable TLSv1.2, or, if the step is missed, perform the manual steps as outlined previously. Always confirm the following key is persisted in the registry. This is a mandatory registry entry for the device notifications to be notified to the VMware Pulse IoT API server.
Check out the following registry keys in the Pulse Device Management Suite physical server:
"HKEY_LOCAL_MACHINE\SYSTEM\CurrentControlSet\Control\SecurityProviders\SCHANNEL\Protocols
 TLS 1.2 Client"
 Value name : DisabledByDefault
 Type : DWORD (32-bit) value
 Value : 0
 Value name : Enabled
 Type : DWORD (32-bit) value
 Value : 1
Use this registry file to create the settings in the registry if they are missing. Just right-click the file on the Windows server as an admin user and choose merge. If the Pulse IoT API is installed using a self-signed certificate, make sure to add the root CA certificate of the self-signed certificate in the Windows System Certificate stored under Trusted Root Certificates on the machine where Pulse Device Management Suite is installed as per the following steps:
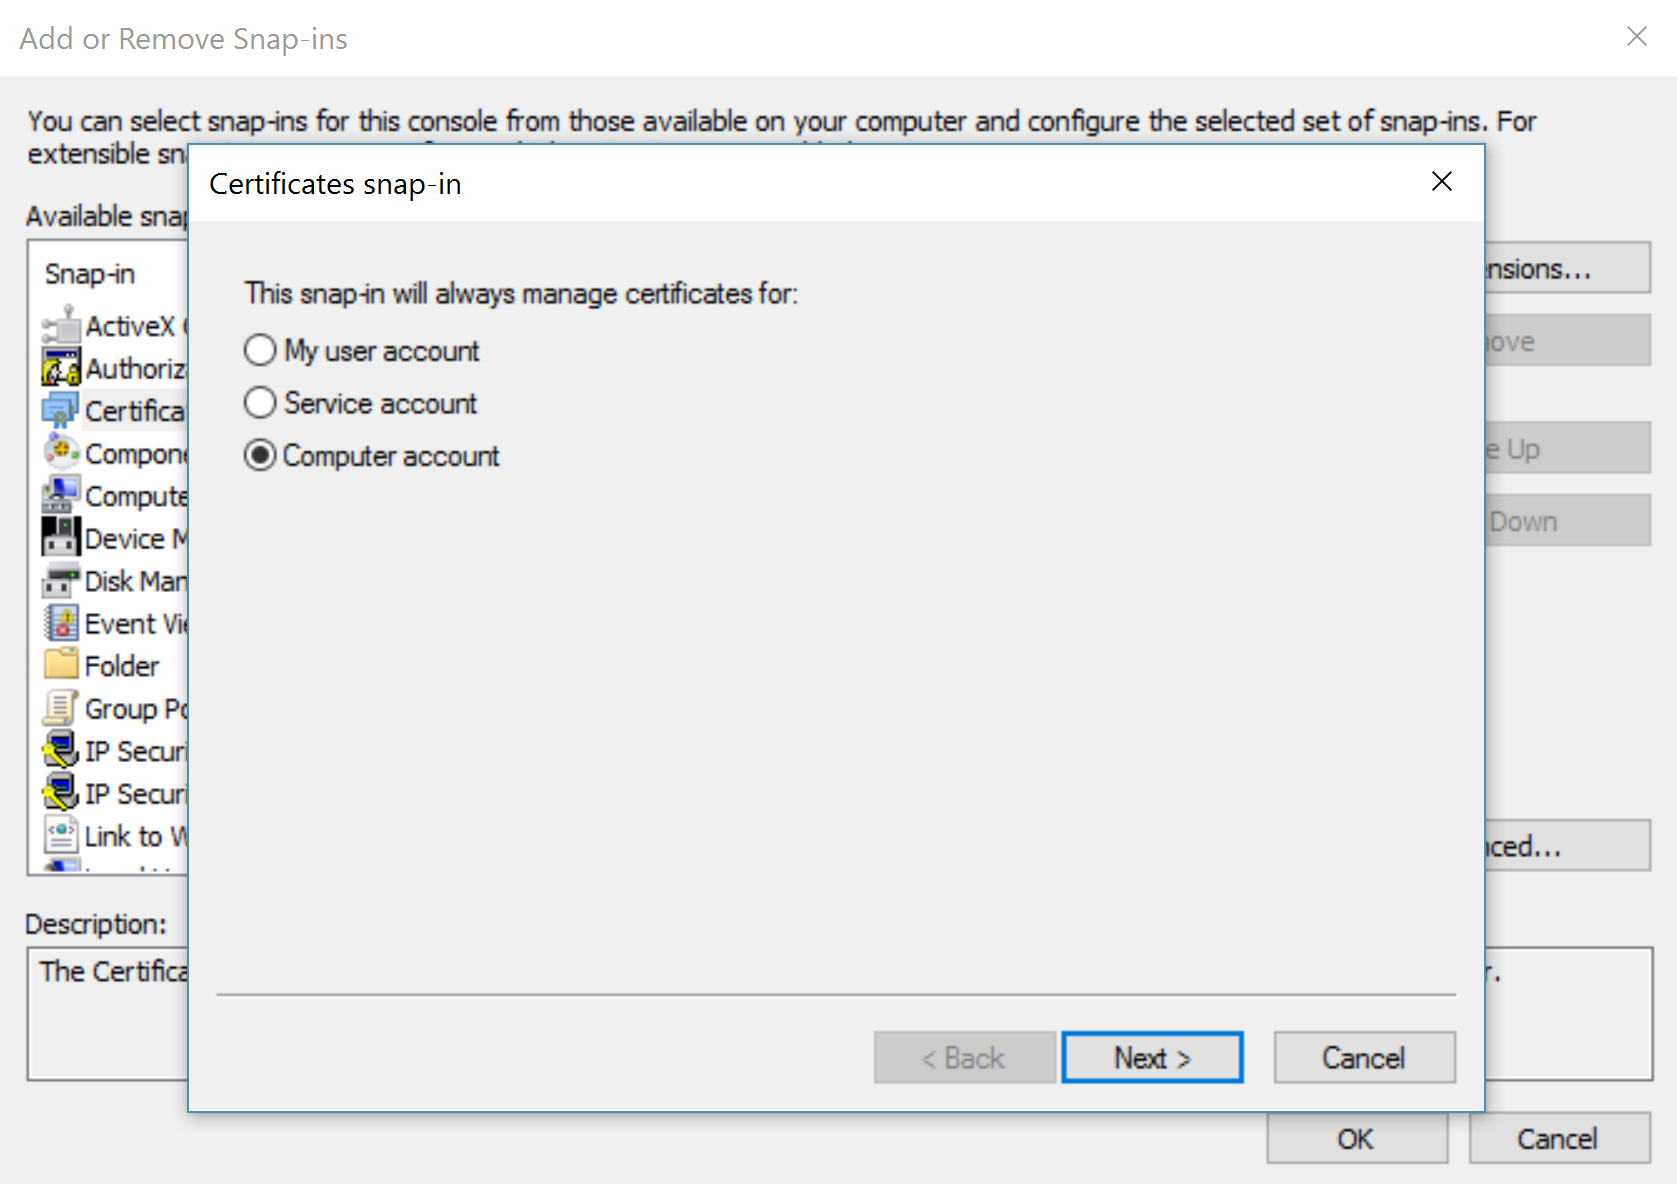
- Choose Add/Remove Snap-in... from the File menu:

- Choose Certificates from the Available snap-ins, then click Add>:

- Choose Computer account and hit Next:
- Make sure Local computer is selected. Click Finish and hit OK:

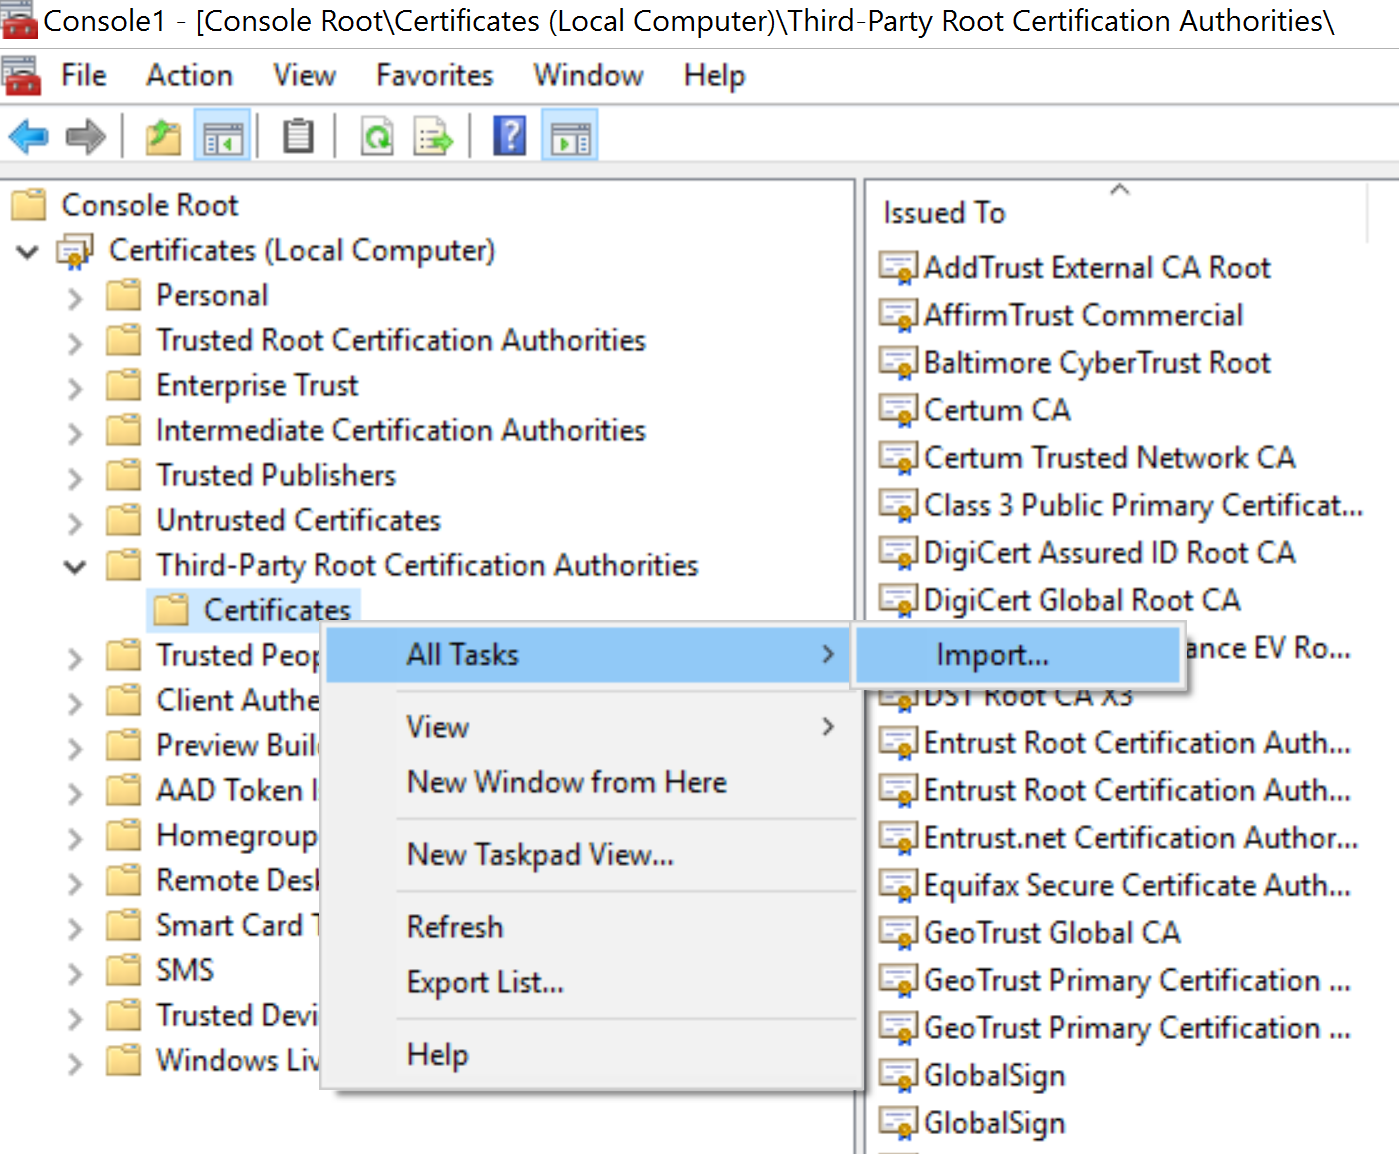
- Go to the Certificates node under Third-party Trusted Root Certificates Authority and right-click to import the certificate:

- Follow the import wizard to save the private CA certificate that was saved from the browser:
This will help the SSL validation to succeed when Pulse Device Management Suite makes an SSL call into the Pulse IoT API to deliver notifications. Just adding the certificates will not allow the SSL invocation to succeed, unless the hostname used by the VMware Pulse Device Management Suite API to reach Pulse IoT API matches with the actual certificate configured for the Pulse IoT API service.
VMware Pulse Device Management Suite needs to reach out to the following:
- The VMware Pulse IoT API server, to send notifications
- VIDM (if configured)
VMware Pulse system, if available through an internal route from the Windows VM, adds an alias in the %SystemRoot%driversetchosts file to either of the machines that are using the external DNS name to avoid a round trip. The DNS name is important for the SSL validation to happen, as each of these servers is invoked over HTTPS.
A custom-built version of the VMware Pulse operational analytics backend, based on VROPs 6.6, can be downloaded from the link in the IOT release artifacts. To log into the VM, the default password for the root user will be empty. Hence, just press Enter and set a new password on first login. This login should happen from the Terminal console where the OVA is deployed. SSH is disabled by default. Once deployed and powered on, access the vROPs instance web UI at https://<IP-address>, which will guide you through the basic installation steps of vROps. You can select Install/ Express Installation and provide a password for the vROps instance. You will need to obtain a license key to use vROPs.