Another interesting and different way of creating collaborative writing is designing a Wiki using the following website: http://www.wikispaces. It enhances students' way of learning. Thus, we, as teachers, use several resources in order to avoid routine. Another option is to use Wikis in Moodle 2.0, which are a bit different from the ones belonging to the previous version.
Click on Create a free classroom wiki in the aforementioned site, as shown in the following screenshot:

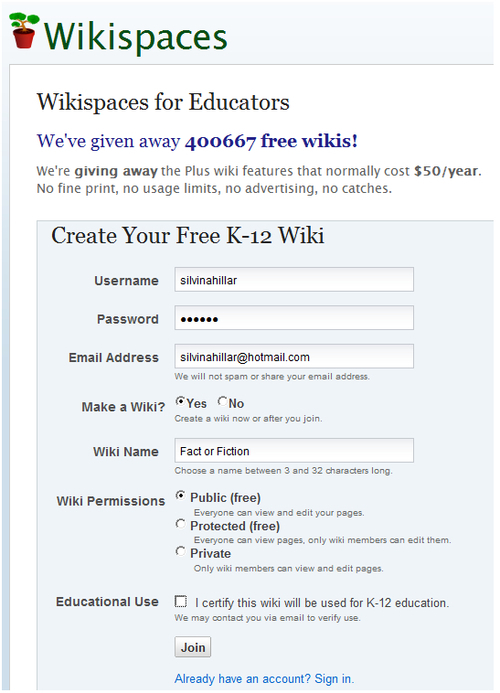
When we click the previously mentioned link, we come across the following link where some specific information is required; therefore, follow these steps in order to start designing the Wiki:
- Complete all the blocks fields, as shown in the following screenshot:
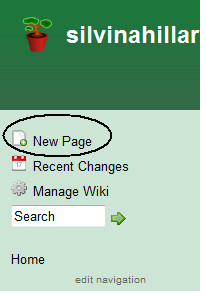
- Another page appears, click on username, in this case silvinahillar, in order to start designing the Wiki.
- Click on New Page, on the left margin, as shown circled in the following screenshot:
- Complete the Page Name and Add Tags blocks. Then, the New Page URL is given underneath these blocks.
- Click on Create.
- An editor appears in order to create the Wiki. The editor is shown in the following screenshot:

- The editor is similar to any editor that we have been working with, the only different item to give special attention to is Widget. When clicking on the said icon, the following are the widgets that can be added to our Wiki, as shown in the following screenshot:
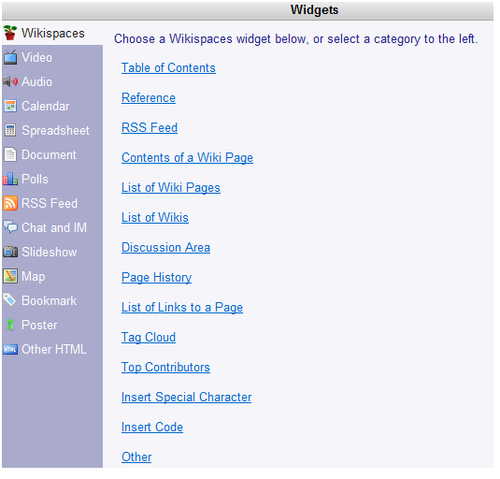
- We can add any of these previously shown widgets in our Wiki. The instructions are shown when we click on any of these items. Many multimedia assets can easily be uploaded to the wiki.
- After designing the Wiki, click on Preview, in case you want to edit something. When ready, click on Save.
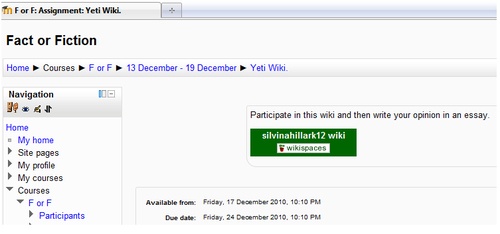
We have just designed our Wiki. It is time to embed it in our Moodle course. We can design either an activity or create a resource because the Wiki that we have just created is part of an activity. Students should also write their opinions after discussing with their classmates. Therefore, follow these steps in order to use this Wiki in our virtual classroom:
- Click on the Wiki that you have just created | Manage Wiki.
- Click on Badges within Tools.
- Choose the badge that you want to insert and copy the HTML code.
- It is time to start our Moodle course. Click on Add an activity | Offline activity within Assignments.
- Complete the Assignment name and Description blocks.
- Click on the HTML icon and paste the code. Therefore, create the activity by pasting the HTML code and inserting the badge.
- Click on Save and display.
- The activity looks as shown in the following screenshot: