In this recipe, we continue working with GIMP. We apply different effects and filters to the photographs. We can also work with paintings from our own students or famous painters as well. However, in this case, we will deal with photos that we have done in the previous recipes.
First of all, choose the pictures that we want to work with. They can be personal pictures, like the ones that I chose previously, or work with photos from the Internet, but bear in mind the copyright issues. Let's change our photos.
Run GIMP and choose a photo to work in our Moodle course. The sort of effects that we could apply depends on the type of activity that is to be designed. These are the steps to follow:
- Open the file that you are going to work with. Click on File | Open and browse for the photo.
- Click on Filters | Artistic | Apply canvas.
- There appears the Apply Canvas pop-up window.
- Choose the Depth of the canvas; it is circled in the screenshot. You can change the Depth from 1 to 50 by clicking on the arrows, as shown inside the square in the following screenshot:
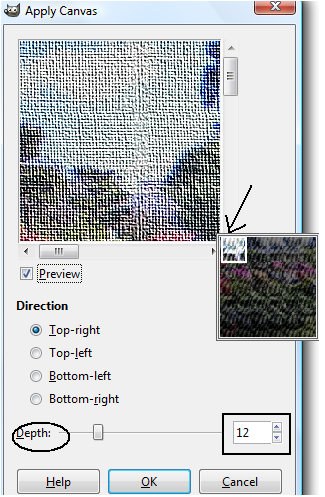
- Preview is ticked in the previous screenshot; therefore, if you click on the four point's arrow, which is not seen in the screenshot but pointed with an arrow, you have the preview of the canvassed photo.
- When you agree with the changes, click OK.
- Now the photo has the appearance of a canvas. Save the file. Click on File | Save| Save.
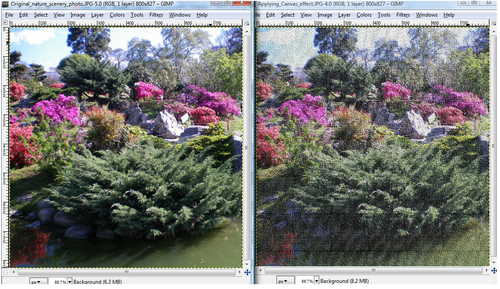
We are going to compare both photos before and after applying the canvas effect. We have worked with a picture of a scenery—the same used in the previous recipe. It would also be a great idea to work with a picture of the face of a person to change that photo into a portrait. So, let's compare the before and after applying the effect. The screenshot shows the photo on the left and the canvas on the right:
We can also apply other effects on the photos. For example, add the photocopy effect, or change a new picture into an old photo or combine a film strip. Exploring GIMP alternatives to the changes that we can apply to a photo can take a whole chapter of the book, but this is not the aim. The appropriate effect should be selected in relation to the design and/or aim of each activity. Let's explore one more alternative.
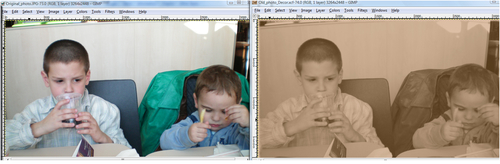
We are going to work with the old photo effect. In this case, we will work with the picture of two little children. Follow these steps:
- Click on File | Open and browse for the picture that you want to work with.
- Save the photo with a new name. Click on File | Save as and write a new name for the photo.
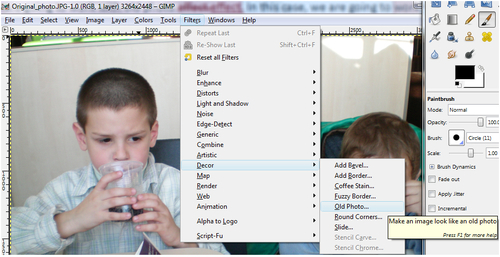
- Click on Filters | Decor | Old Photo, as shown in the following screenshot:
- There will appear a pop-up window and you may add the changes to the way you want the photo effect, as shown in the following screenshot:

- Click on OK. The following screenshot shows the same photo before on the left and after on the right: