
In this recipe, we will learn how to record our voice using a microphone as well as a software. Therefore, using this software we can not only record live audio, but also convert tapes and records into digital recordings among other features for our Moodle courses. Also, be aware of copyright issues of the material that you are using to be recorded.
As we will record audio from a microphone using the Audacity software, download it from the following website: http://audacity.sourceforge.net/download/. Bear in mind that this software works with different OS, therefore, click on the OS that is installed in your computer.
After downloading and installing Audacity onto your computer, record the instructions of an activity or record; something that is more interesting to listen to. For example, as the baseline topic of this chapter is Sounds and music around the world, focus on different accents of spoken English. Therefore, follow these steps to design the activity:
- Start Audacity.
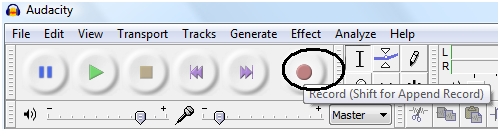
- Click on the Record button within the Audio Control and Editing Toolbars, as shown in the following screenshot:
- When you finish recording, click on the Stop button.
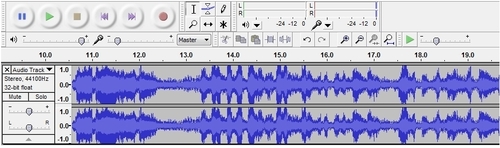
- The digital representation of the voice (wave form) is shown in the audio track portion within the Project view, as shown in the following screenshot:
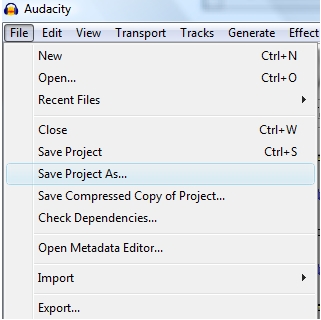
- Click on File | Save Project as, as shown in the following screenshot:
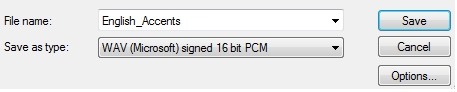
- Click on File | Export, and save the file as WAV type. Then, embed the podcast in our Moodle course. It is shown in the following screenshot:
- Click on Save | OK.
We need to upload the podcast to our Moodle course. To do this, choose the weekly outline section where you want to insert it and follow these steps:
- Click on Add an activity | Online text within Assignments.
- Complete the Assignment name and Description blocks.
- Click on the Moodle Media icon | Find or upload a sound, video or applet... | Upload a file | Browse |. Look for the file that you want to upload and click on it. Remember to upload the file with
WAVextension; that is to say look for the circled icon, as shown in the following screenshot: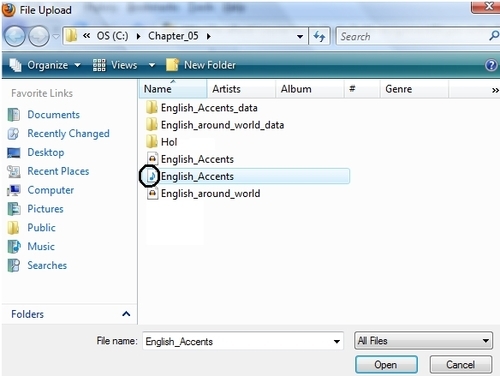
- Click on Open | Upload this file | Insert.
- Click on Save and return to course.
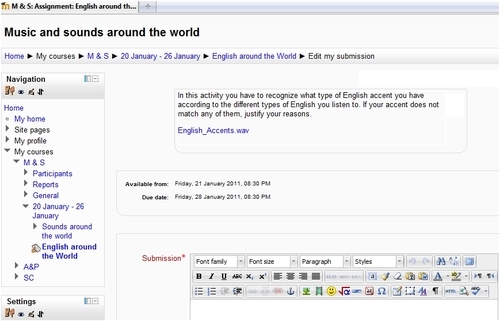
- Click on the activity. It looks as shown in the following screenshot:
- When students click on the name of the file, they will see the following media player toolbar, as shown in the following screenshot:

- When students click on Play, they will listen to what we have recorded.