In this activity, we are going to use an interactive website in which we choose a map to work with. It is a very simple one, but we could enhance it by adding interesting ingredients to the recipe. We will use a software for drawing a region on the map, and highlight a region for our students to work with. As it was pointed out before, we are not going to focus on geographical features, though you can add this ingredient yourself when designing the activity.
We open our default web browser and work with the following website: http://www.fusioncharts.com/maps/Default.asp. We click on Map Gallery and choose a map to work with. In this case, we choose a map of the world and highlight five regions, one for each continent. You can modify it and work with different regions within a continent or a country too.
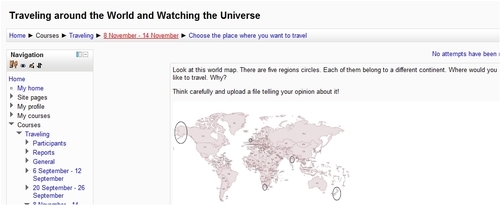
We look for the desired map. We can find different types of maps to work with. Everything depends on what type of activity we have in mind. In this case, as the topic of this chapter has to do with traveling, we circle five regions and ask our students to choose where they would like to go. First of all, we have to find the map and save it as an image so that we can draw the regions and upload it to our Moodle course. Therefore, follow these steps:
- Click on click here | World Map with countries on the aforementioned site.
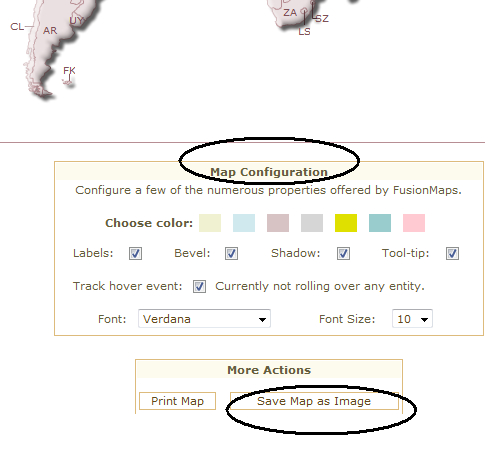
- Another pop-up window appears, displaying a map of the world with the countries. There appears a Map Configuration block where you can customize some features, as shown in the next screenshot.
- Click on Save Map as Image, as shown in the following screenshot:
- Another pop-up window will appear. Click on Save.
- Complete the File name block.
- Click on Save.
- Click on Open.
- A pop-up window displaying the map will appear. Click on File |Copy.
- Paste the map in Paint or Inkscape. Click on Edit | Paste from and browse for the name of the file.
- Select the file and click on Open.
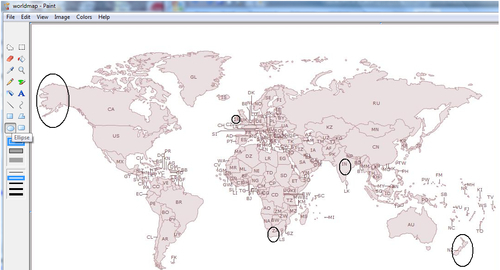
- Use the resources available to draw the regions that you want students to work with, as shown in the following screenshot:
- Click on File | Save as and write a name for the file.
- Click on Save.
We have already drawn the regions that we want our students to work with. We have chosen one country from every continent; you can choose another or design it in a different way. We can add a writing activity in which students choose where they would like to travel using the previous map.
Select the weekly outline section where you want to add the activity and follow these steps:
- Click on Add an activity | Upload a single file within Assignments.
- Complete the Assignment name and Description blocks.
- Click on the Insert/edit image icon | Find or upload an image | Browse.
- When you find the image that you want to upload, click on Open | Upload this file.
- Complete the Image description block.
- Click on Insert.
- Click on Save and return to course. The activity is ready!
- When students click on the activity, it looks as shown in the following screenshot: