
We are going to change the color in our pictures. In this recipe, it would be a good idea to work with the art of your students or with a well-known painting as well, for example to add light or dark to a picture in order to change the perceived time of day.
Choose a photo or a painting for which we want to change its color. We add a bit of our art in order to alter the image. It is a very simple recipe. So, let's see how to do it!
After choosing the photo or painting, run GIMP. Follow these steps in order to edit color curves:
- Click on File | Open and browse for the picture that you are going to work with.
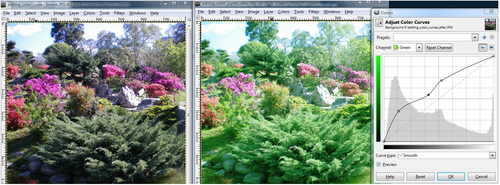
- Click on Colors | Curves. A pop-up window will appear displaying the curves that you can change.
- Move the linear histogram to make the image darker or lighter.
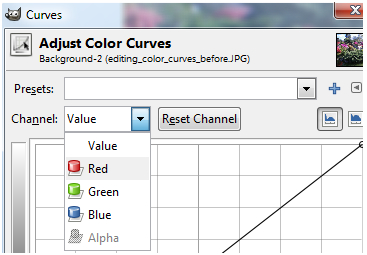
- You can also work with individual channels, that is to say add a value and increase one of the colors shown in the following screenshot. Add green value because the picture shows vegetation. Click on the downwards arrow in Value | Green, as shown in this screenshot:
- When you have finished adjusting color curves, click on OK.
- Save the changes to the photo. Click on File | Save | Save.
..................Content has been hidden....................
You can't read the all page of ebook, please click here login for view all page.