In this activity, we are going to create a map with sceneries. Therefore, we could either browse our files for pictures from our trips or holidays, or we can search for sceneries on the Web. After selecting the pictures, we create a new folder in Windows Explorer, for example C:Images_Traveling. In this folder, we save all the pictures so as to organize our work.
We will use the following well-known website: http://earth.google.com/ to design a map using the pictures we have saved in the folder that we have just created. Let's get ready!
In this activity, we will work with the previously mentioned website. Therefore, we need to open the web browser and enter it. Click on Download Google Earth 6. Read the Google Maps/Earth Terms of Service and if you agree, click on Agree and Download. The icon of Google Earth will appear on your desktop, as shown in the following screenshot:

We have already carried out the first steps for this activity. Now, we have to design the maps with the pictures that we want to add. There are also some pictures that are available in the maps; you can also work with them, though the aim of this activity is to upload images in the map. Follow these steps in order to create a folder and find images for the activity:
- Click on the icon on your desktop and open Google Earth.
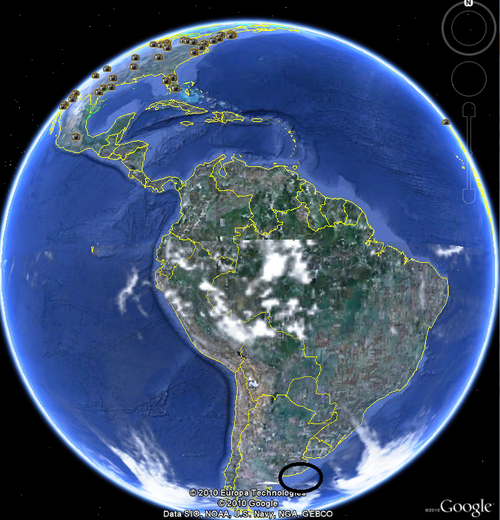
- Bring the Earth closer with the icons on the right. Locate a remote city in the southern hemisphere, as shown in the following screenshot:
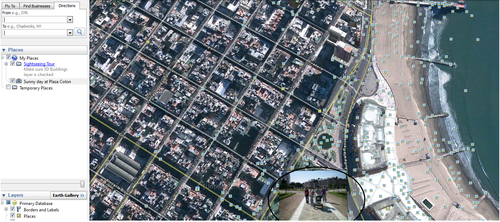
- In the Fly to block, write "Mar del Plata", or any other remote city. Then press Enter or click on the magnifying glass next to the block.
- You will travel virtually to the desired city. Bring the map forward and locate the place where the picture to be uploaded was taken.
- Click on Add | Photo.
- Complete the Name block.
- Click on Browse. Search for the picture that you want to upload and click on it.
- Complete the other blocks: Description | View | Photo.
- Click on OK.
- The picture will appear, as shown in the following screenshot:
- You can repeat the same process as many times as the number of pictures you want to upload.
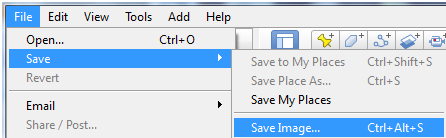
- After uploading all the pictures, click on File | Save | Save Image, as shown in the following screenshot:
- Complete the File name block and click on Save.
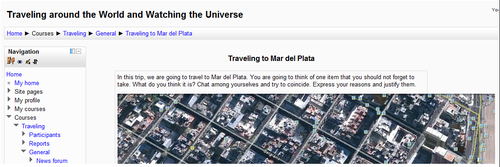
After uploading the desired pictures to the map, we can create an activity. We could start this course with a little social interaction. We ask our students to think about what element they shouldn't forget if they happen to go to this place. They may not know this city, for sure, unless they live nearby. This is the most interesting part of inserting a remote city that they may want to know more about it! Therefore, a Chat is a good idea to have where all the students will be invited in order to discuss the city.
We upload the map that we have created with the images to our activity within the Moodle course. Choose the weekly outline section where you want to insert this activity and follow these steps:
- Click on Add an activity | Chat.
- Complete the Name of this chat room and Introduction text blocks.
- Click on the Insert/edit image icon | Find or upload an image | Browse and look for the image that we have just saved.
- Click on Upload this file.
- Complete the Image description block and click on Insert.
- Click on Save and return to course. The activity looks as shown in the following screenshot: