
Configure eDiscovery and Holds
When a compliance review or a legal case requires that specific documents be retrieved from an EDRMS, this is referred to as an eDiscovery. An eDiscovery involves finding and securing documents that are required to be held in a read-only state for the duration of the review or case that requires them. Since there may be several eDiscovery efforts ongoing at any given time, EDRMSs use a method called a hold to lock the documents. Unlike other forms of protection, such as permissions or record declaration, multiple holds can be placed on the same document successively. As long as at least one hold applies to a document, it cannot be edited or deleted and any retention policies that might affect it are deferred. Once all holds have been removed from a document, policies will once again take effect. To make use of these functions in SharePoint 2010, you must enable the hold and eDiscovery site feature.
Creating a Hold Definition
Before placing any items on hold, it is necessary to create a hold definition in the site where the documents reside. Once the hold and eDiscovery feature is activated, a new section of commands called Hold And eDiscovery appears on the Site Settings page. To create a hold, click the Holds link and then click Add New Item. Enter a title, a description, and the person who is managing the hold; then click OK.
Searching for Items to Hold
To populate a hold with a large number of items, the easiest method is to conduct a search for content:
1. On the Site Settings page, in the Hold And eDiscovery section, click Discover And Hold Content, which opens the Search And Add To Hold page shown in Figure 12.22.
Figure 12.22: Searching and adding documents to hold
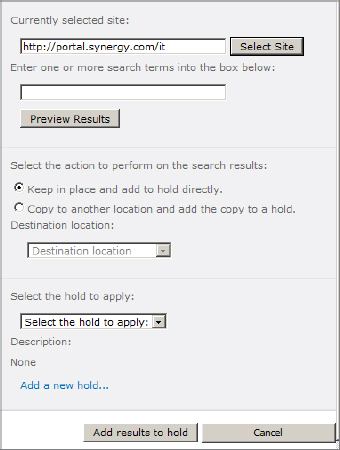
2. In the Search Criteria section, select the site you want to search and then enter a keyword or phrase to search for and click Preview Results. This will open a search results page showing the range of content that is covered by the search term entered. Refine the keywords to capture the relevant content for the discovery.
3. In the Local Hold Or Export section, select whether you want to keep the content in its existing location and place a lock on it, or copy the content to another location and place a lock on the copy. The locations available will be any Send To connections configured for the current web application.
4. In the Relevant Hold section, select the hold you want to apply to the content and click the Add Results To Hold button.
Holding and Releasing Individual Items
In many cases, the eDiscovery approach we just described will not capture every relevant document. To add a specific document to a hold, locate the document in the library and click the context menu, then select Compliance Details. On the Compliance Details page (shown in Figure 12.4, earlier in this chapter), click the Add/Remove from hold link. In the Add Or Remove From Hold section, shown in Figure 12.23, click the option Add To A Hold and select the hold you want to place on the document. Then click Save.
Figure 12.23: Adding or removing documents from a hold
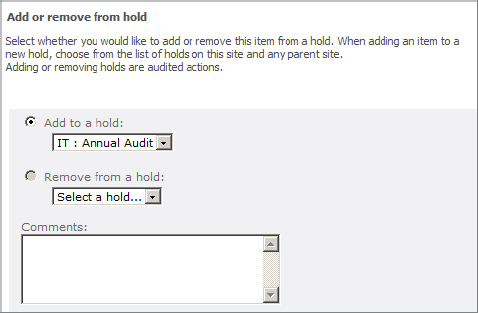
To remove an item from a hold, open the same page and click the option Remove From A Hold; then select which hold you want to remove and click Save.