
Positioning Graphical Objects Relative to Cells
As you've seen earlier in this chapter, you can drag a graphical object to wherever in the worksheet you need it to appear. But you can also connect the graphical object to the cells over which it appears, so that when you move the cells, the object moves too. This setting is handy when you need to keep the graphical object with particular cells. You can also have Excel resize the object when you resize the cells.
To control whether a graphical object moves and changes size with cells, follow these steps:
- Ctrl+click or right-click the graphical object, and then click the Properties command on the context menu to display the Format dialog box. For example, Ctrl+click or right-click a picture, and then click the Format Picture command to display the Format Picture dialog box.
- In the left pane, click the Properties item to display the Properties pane (see Figure 9–24).
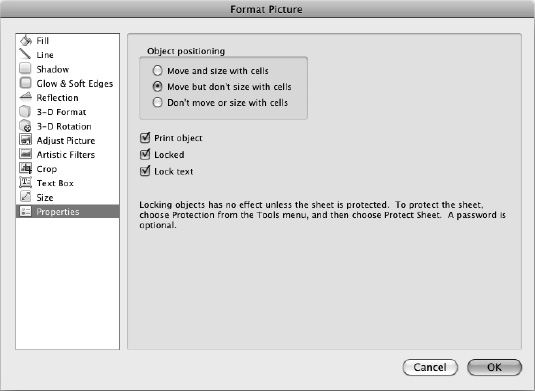
Figure 9–24. In the Properties pane of the Format dialog box, choose whether to move and resize the graphical object with cells. You can also choose whether to print the object, lock it, or lock its text.
- In the Object positioning box, select the Move And Size With Cells option button, the Move But Don't Size With Cells option button, or the Don't Move Or Size With Cells option button, as appropriate.
NOTE: In the Properties pane of the Format dialog box, you can also clear the Print object check box if you want to avoid printing the graphical object. You can also select the Locked check box to lock the object, or the Lock text check box to lock the object's text; these settings take effect only when you protect the worksheet against changes.
- Click the OK button to close the Format dialog box. Excel applies your choices to the graphical object.