
Adding and Formatting a Shape
If a workbook needs a drawing, you can create it from scratch by using shapes. Excel provides a wide variety of shapes, from arrows and basic shapes to stars, banners, and callouts.
To insert a shape, follow these steps:
- Display the area of the workbook where you want to add the shape. When adding a shape, you don't need to position the insertion point or make a selection.
NOTE: You can also insert a shape by choosing
Home
Insert Shapefrom the Ribbon to display the Shape panel, clicking the category of shape (for example, Lines and Connectors), and then clicking the type of shape. But in general the Shape Browser gives you an easier way to access shapes. - Click the Media button on the Standard toolbar or choose
View
Media Browserfrom the menu bar to display the Media Browser. - Click the Shapes button in the toolbar to display the Shapes Browser pane (see Figure 9–10).
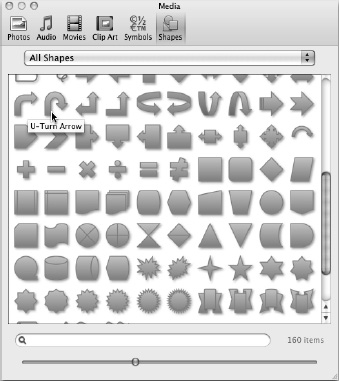
Figure 9–10. Choose the type of shape from the Shapes Browser pane in the Media Browser. Hold the mouse pointer over a shape to see a ScreenTip showing its description.
- In the pop-up menu at the top of the Shapes Browser, click the category of shapes you want to see: All Shapes, Rectangles, Basic Shapes, Lines and Connectors, Block Arrows, Equation Shapes, Flowchart, Stars and Banners, or Callouts.
- Click the shape you want. Excel changes the mouse pointer to a crosshair.
- With this crosshair, click where you want to place one corner of the shape, and then drag to the opposite corner (see Figure 9–11). It doesn't matter which corner you place first, because you can drag in any direction, but placing the upper-left corner first is usually easiest.
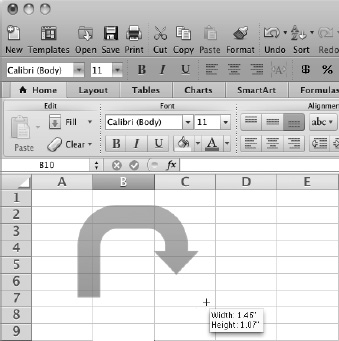
Figure 9–11. Click and drag with the crosshair to place and size the shape you're inserting.
When you release the mouse button, the shape appears with selection handles around it, so you can work with it as described in the following sections. When the shape is selected, Excel adds the Format tab to the Ribbon, which provides controls for formatting the shape.
Close the Media Browser window by clicking its Close button (the red button in the upper-left corner) unless you need to insert more shapes or other objects.
Applying a Style to a Shape
After inserting a shape, you can apply a style to it from the Shape Styles box or panel in the Shape Styles group on the Format tab of the Ribbon. If the style you want appears in the Shape Styles box, click it; otherwise, move the mouse pointer over the Shape Styles box so that the panel button appears, and then click the button to display the panel (see Figure 9–12). You can then click the style you want.
To refine the shape, open the Fill panel, the Line panel, or the Effects drop-down panel in the Shape Styles group, and then click the option you want. For example, choose Format ![]()
Shape Styles ![]()
Shape Effects ![]()
3-D Rotation, and then click one of the 3D rotation effects (see Figure 9–13).
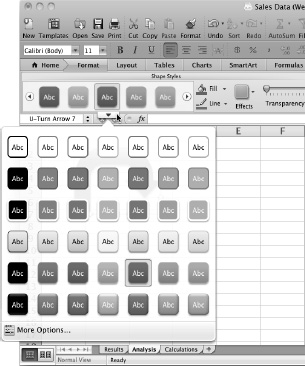
Figure 9–12. To change a shape's style, open the Shape Styles panel on the Format tab of the Ribbon, and then click the style you want.
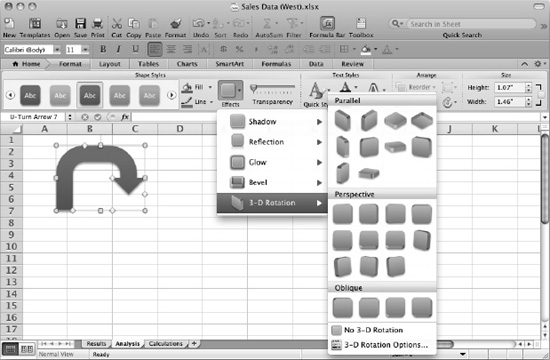
Figure 9–13. Use the Fill panel, the Line panel, or the Effects panel (shown here) to make the shape look the way you want.