
Inserting Pictures in Your Workbooks
Clip art is fine for basic illustrations, but everybody has access to the same collection of pictures. To make your workbooks unique, you can insert your own photos and other pictures, too.
You can insert either pictures you've added to iPhoto or pictures that are in your Mac's file system but not in iPhoto. Because iPhoto is Mac OS X's standard application for importing photos from a digital camera and editing them, you'll probably want to use it much of the time.
Inserting Pictures from iPhoto
To insert a picture from iPhoto, follow these steps:
- Click the Media button on the Standard toolbar or choose
View
Media Browserfrom the menu bar to open the Media Browser. - Click the Photos button on the toolbar to display the Photos Browser pane (see Figure 9–8).
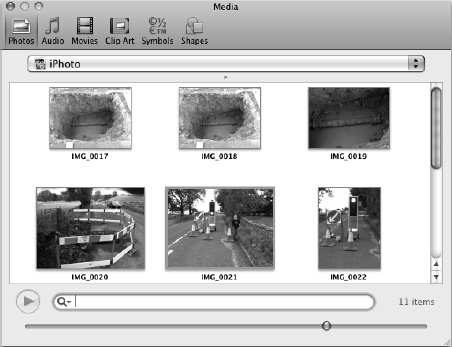
Figure 9–8. Use the Photos Browser pane in the Media Browser to add a picture from iPhoto to a workbook.
- In the pop-up menu, choose the source of the pictures. For example, choose iPhoto to see all pictures in iPhoto, choose Events to see a list of Events you've created in iPhoto, or choose Last Import to see the photos you last imported.
- Click the photo you want, and then drag it to the workbook window, dropping it where you want it to appear.
- Leave the Media Browser window open if you want to use it further. Otherwise, click the Close button (the red button in its upper-left corner) to close it.
Inserting Pictures from Your Mac's File System
To insert a picture that's not in iPhoto but is stored in your Mac's file system or on a network drive, follow these steps:
- Position the insertion point or selection where you want the picture to appear.
- Choose
Insert Photo Picture from Filefrom the menu bar to display the Choose a Picture dialog box (see Figure 9–9).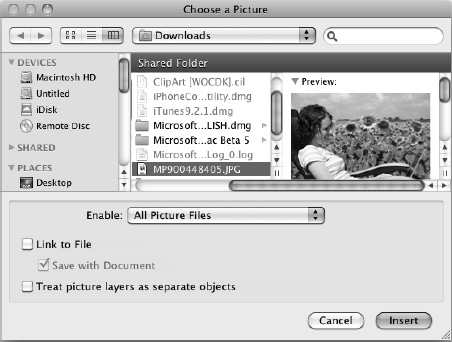
Figure 9–9. From the Choose a Picture dialog box, you can choose whether to link the picture to the workbook. For some picture types, you can also choose to treat the picture layers as separate objects so that you can manipulate them independently.
- Navigate to the folder that contains the file, and then click the file.
- If you want to link the picture file to the workbook rather than insert it, select the Link to File check box. When you do this, you can select the Save with Document check box to store the latest version of the picture file in the workbook. See the sidebar “Linking a Picture to a Workbook” for advice about linking.
- If you want to be able to manipulate each layer of the picture separately, select the Treat picture layers as separate objects check box. This feature is available only for some types of pictures, such as JPEGs.
- Click the Insert button. Excel closes the Choose a Picture dialog box and inserts the picture in the workbook.
TIP: You can also insert a picture file by dragging it from a Finder window to a workbook.
LINKING A PICTURE TO A WORKBOOK