
In this section, we will discuss program8 (refer to chapter4_tutorials/src/program8.cpp on GitHub), which implements a basic camera capture program using OpenCV and ROS binding to convert cv::Mat images into ROS image messages. This node publishes the image messages from camera frames in the /camera topic and enables us to display images coming from a camera on-the-fly. We will discuss more about source code and implementation in the upcoming chapter, or interested readers could refer to the online resources (https://docs.opencv.org/3.0-beta/modules/videoio/doc/reading_and_writing_video.html).
However, we can run the node using the launch file:
$ roslaunch chapter4_tutorials program8.launch
We can't use rostopic echo /camera, since the amount of information in the plain text would be huge and cannot be read by humans. Hence, ROS provides the image_view node, which shows the images in the specific topic in a window:
$ rosrun image_view image_view image:=/camera
By pressing the right button of the mouse in the window, we can save the current frame to the disk, usually in ~/.ros.
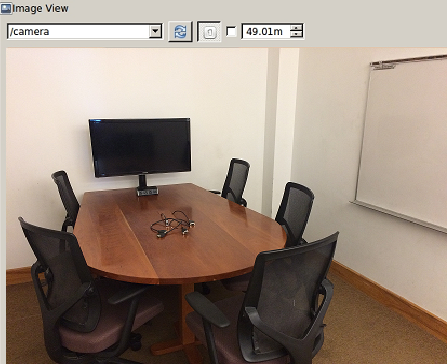
Moreover, ROS Kinetic provides the rqt_image_view tool, which supports viewing multiple images in a single window but does not support saving images by right-clicking on them:
$ rosrun rqt_image_view rqt_image_view
Here, we can select the image topic manually from the GUI in the drop-down menu, as shown in the following screenshot:
ROS provides several interfaces that are built on top of the OpenCV for solving computer vision problems. We can refer to the online resources for more details, but this is out of the scope of this book.
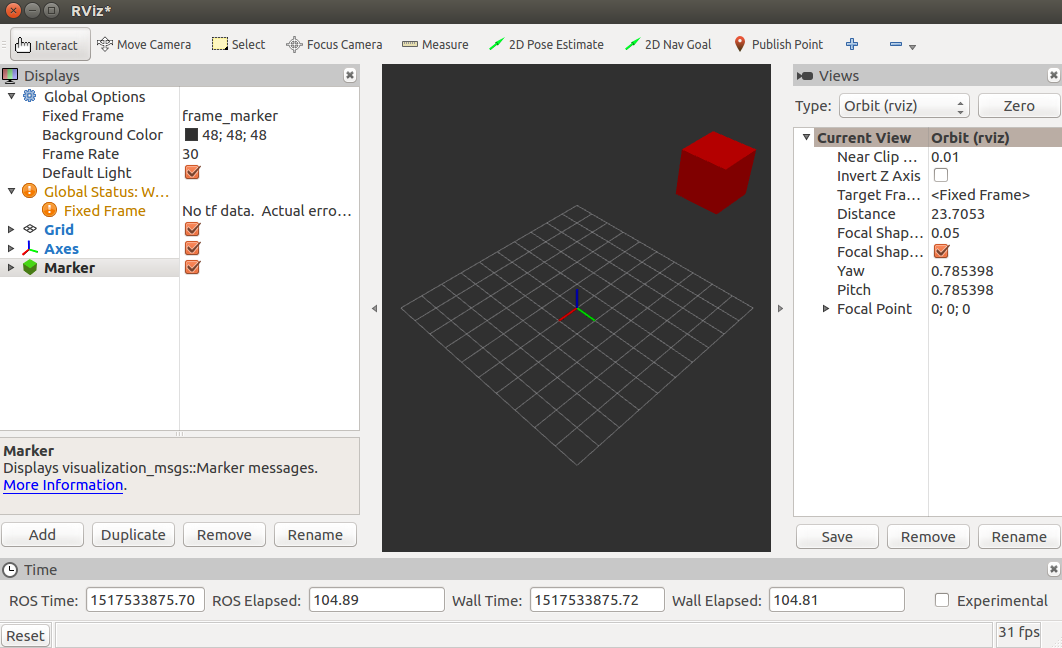
We discussed RViz and plugin development in the previous chapter. Nevertheless, we will learn how to visualize 3D data in ROS using rqt_rviz, which is a powerful 3D visualization tool. We will start rqt_rviz while roscore is running to see the graphical interface of the following screenshot, which is a simple layout:

Here, on the top left-hand side, we have the Displays panel, which has a tree list of several elements in the world. However, in this case, we can observe a set of elements that have already loaded into the layout, which is saved in the config/program9.rviz file. We have to load the elements into the File | Open Config menu.
Additionally, we have the Add button below the Displays panel, which allows us to add more elements by topics and their type. In the case of program9, as an example, we would add Marker and PointCloud2. We also have a menu bar for configuring 2D Nav Goal, 2DPose Estimate, Interact, Move Camera, Measure, and so on. Similarly, the Views menu provides different view types, such as Orbit, TopDownOrtho, and so on, with some other information regarding viewing the parameter.
At this moment in time, we will start the program9 node using the following command:
$ roslaunch chapter4_tutorials program9.launch
In rqt_rviz, we will set the fixed frame to frame_marker, which will look like a red cubic marker is moving, as shown in the following screenshot:
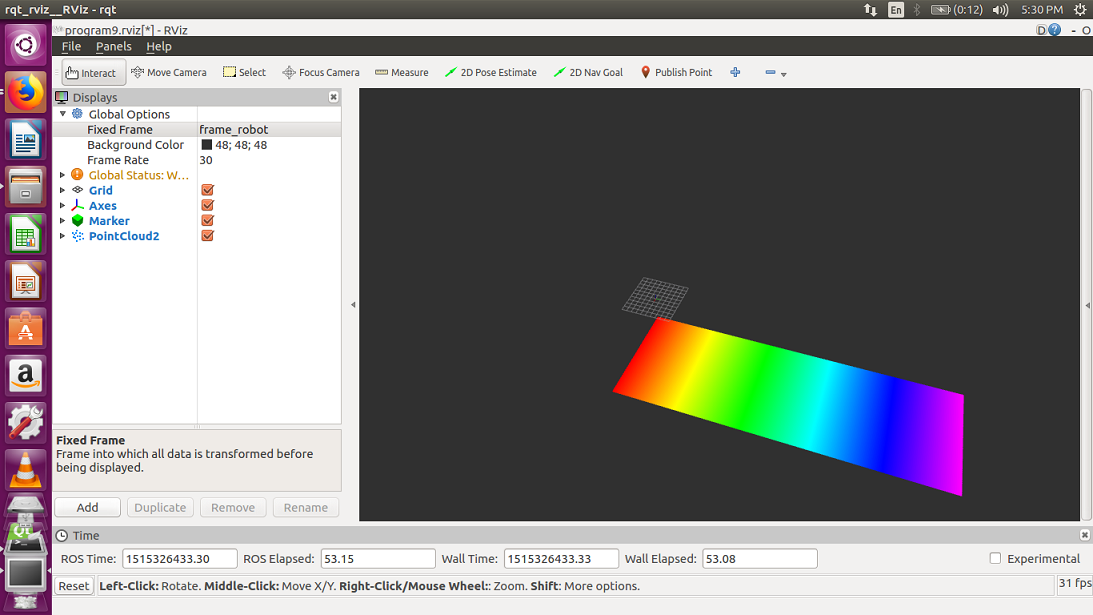
Similarly, if we set the fixed frame to frame_robot, we will see a rainbow of point cloud panes, as shown in the following screenshot:
rqt_rviz also provides the interactive marker:
$ roslaunch chapter4_tutorials program10.launch
We have the program10 node, which shows a simple interactive marker, as shown in the following screenshot:

Here, we will notice a marker that can move in the interactive mode of rqt_rviz. It is an example program that shows how its pose can be used to modify the pose of another element in the system, such as the joint or position of a robot.
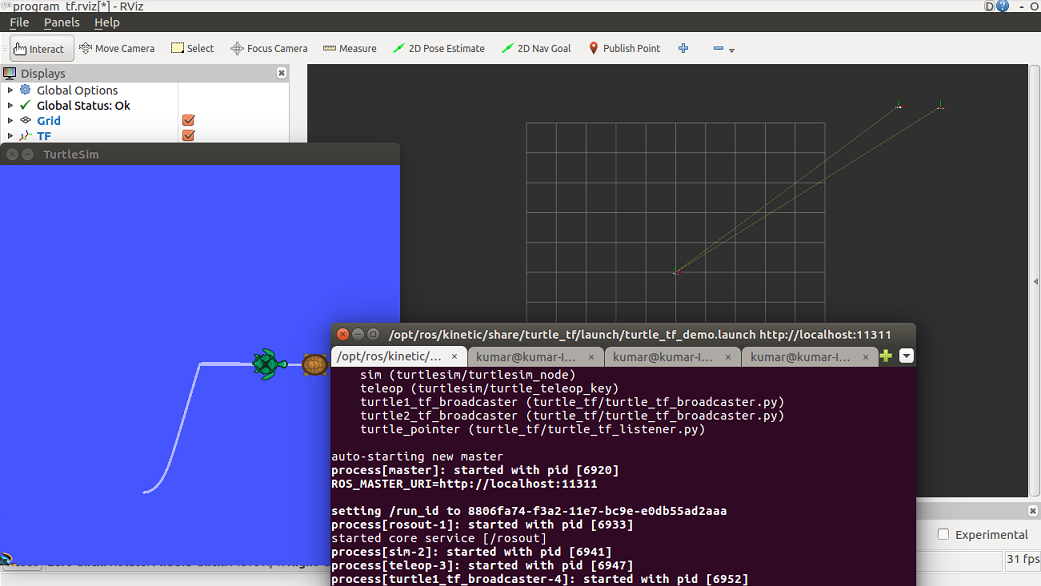
In the previous chapter, we discussed the ROS Transform Frame (TF), where we were able to visualize the frame of the lead and follower turtle in Rviz, as shown in the following screenshot:
rqt_rviz is an unusually powerful visualization tool, and it would not be possible to discuss all of its features and properties in the limited pages of this book. However, as a starter, we will try and provide an overview of the generic features. The interested and advanced reader should refer to the online resources for more information.