
The best solution to install OpenRAVE today is to build it from source, which fortunately is not so difficult. The instructions in the following section are for Ubuntu 16.04 and 18.04.
First, we have to make sure that the following programs are installed on our system:
$ sudo apt-get install cmake g++ git ipython minizip python-dev python-h5py python-numpy python-scipy python-sympy qt4-dev-tools
Next, we will have to to install the following libraries from the official Ubuntu repository:
$ sudo apt-get install libassimp-dev libavcodec-dev libavformat-dev libavformat-dev libboost-all-dev libboost-date-time-dev libbullet-dev libfaac-dev libglew-dev libgsm1-dev liblapack-dev liblog4cxx-dev libmpfr-dev libode-dev libogg-dev libpcrecpp0v5 libpcre3-dev libqhull-dev libqt4-dev libsoqt-dev-common libsoqt4-dev libswscale-dev libswscale-dev libvorbis-dev libx264-dev libxml2-dev libxvidcore-dev
The next dependency is collada-dom, which we can clone from GitHub and build from source as well:
$ git clone https://github.com/rdiankov/collada-dom.git
$ cd collada-dom && mkdir build && cd build
$ cmake ..
$ make -j4
$ sudo make install
Another dependency that we'll be using is OpenSceneGraph:
$ sudo apt-get install libcairo2-dev libjasper-dev libpoppler-glib dev libsdl2-dev libtiff5-dev libxrandr-dev
$ git clone https://github.com/openscenegraph/OpenSceneGraph.git
$ cd OpenSceneGraph && mkdir build && cd build
$ cmake ..
$ make -j4
$ sudo make install
In new versions, the OpenRAVE defaults also require that we install the Flexible Collision Library:
$ sudo apt-get install libccd-dev
$ git clone https://github.com/flexible-collision-library/fcl.git
$ cd fcl
$ mkdir build && cd build
$ cmake ..
$ make -j4
$ sudo make install
Once all of the software is installed, we have to clone the latest_stable branch of OpenRAVE from GitHub:
$ git clone --branch latest_stable https://github.com/rdiankov/openrave.git
$ cd openrave && mkdir build && cd build
$ cmake .. -DOSG_DIR=/usr/local/lib64/
$ make -j4
$ sudo make install
Finally, we have to add OpenRAVE to our Python path by adding these two lines in .bashrc or .zshrc to save this configuration between sessions:
$ export LD_LIBRARY_PATH=$LD_LIBRARY_PATH:$(openrave-config --python-dir)/openravepy/_openravepy_
$ export PYTHONPATH=$PYTHONPATH:$(openrave-config --python-dir)
We can check that our installation works by running one of the default examples:
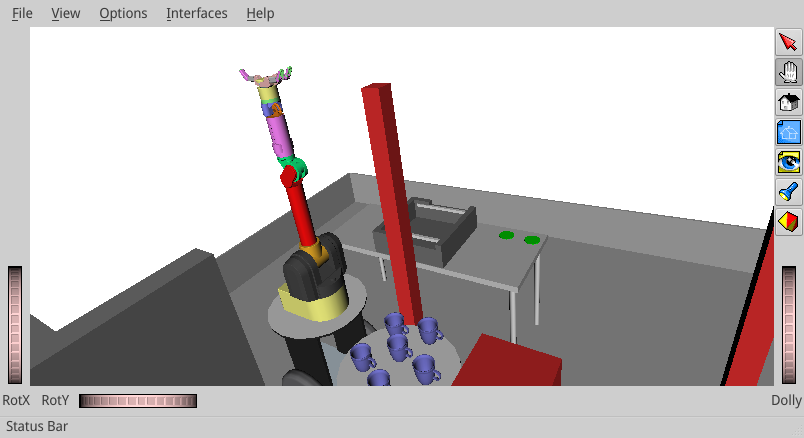
$ openrave.py --example graspplanning
This command should fire up the grasp planning example, as shown in the following screenshot:
The IKFast routine requires a model of the robot in either OpenRave's custom XML format or a Collada (https://www.khronos.org/collada/) DAE format. For most robots, the easiest option may be to convert an existing URDF model into the Collada format.
If our model is in xacro format, we can convert it to pure URDF:
$ rosrun xacro xacro.py my_robot.urdf.xacro > my_robot.urdf
Next, we will convert URDF into collada format:
$ rosrun collada_urdf urdf_to_collada my_robot.urdf my_robot.dae
Since we have installed the full version of OpenRAVE, we can view our model:
$ openrave my_robot.dae
For example, we can open the irb6640.dae file for the ABB IRB 2400 robotic arm using OpenRave with the following command:
$ openrave irb6640.dae
We will see the model in OpenRave, as shown in the following screenshot:
