In the case of the mobile robot, we will begin our discussion with the concept of tf frames and their relationship and transformation. The most used tf frames in ROS are map, odom, and base_link, where the tf frame map is a world-fixed frame which defines the long-term global reference, and the odom frame provides an accurate short-term local reference. The base_link frame is rigidly attached to the center of the curvature of the mobile robot's base. Usually, the relationship among these frames can be characterized as map | odom | base_link. In most general cases, when the map frame is not defined, the world frame is used as a global reference:
Accordingly, in our basic control node mobile_state_publisher.cpp, we will define an odom frame and all the transformations will be referred to that odom frame. In our design, all the links are children of base_link, so all of the frames are automatically liked to the odom frame. We can refer to the following code where these relationships are defined:
geometry_msgs::TransformStamped odom_trans;
sensor_msgs::JointState joint_state;
odom_trans.header.frame_id = "odom";
odom_trans.child_frame_id = "base_link";
Moreover, we will create a topic named joint_state to control all the joints of the model, where the joint_state message field holds data to describe the state of every torque-controlled joint. Since our 3D arm robot model has seven joints, we will create a joint_state message with seven elements:
joint_state.header.stamp = ros::Time::now();
joint_state.header.frame_id = "base_link";
joint_state.name.resize(7);
joint_state.position.resize(7);
joint_state.name[0] ="base_to_arm_base";
joint_state.position[0] = base_arm;
joint_state.name[1] ="arm_1_to_arm_base";
joint_state.position[1] = arm1_armbase;
joint_state.name[2] ="arm_2_to_arm_1";
joint_state.position[2] = arm2_arm1;
joint_state.name[3] ="left_gripper_joint";
joint_state.position[3] = gripper;
joint_state.name[4] ="left_tip_joint";
joint_state.position[4] = tip;
joint_state.name[5] ="right_gripper_joint";
joint_state.position[5] = gripper;
joint_state.name[6] ="right_tip_joint";
joint_state.position[6] = tip;
In the case of the mobile robot, we would like to move the robot in a circle. The following code defines the coordinates in the message fields:
odom_trans.header.stamp = ros::Time::now();
odom_trans.transform.translation.x = cos(angle)*1;
odom_trans.transform.translation.y = sin(angle)*1;
odom_trans.transform.translation.z = 0.0;
odom_trans.transform.rotation = tf::createQuaternionMsgFromYaw(angle);
Finally, we will publish the new state of our robot in every control loop:
joint_pub.publish(joint_state);
broadcaster.sendTransform(odom_trans);
We will add the following to the arm_state_xacro.launch file:
<launch>
   <arg name="model" />
   <arg name="gui" default="False" />
   <param name="robot_description" command="$(find xacro)/xacro --inorder $(arg model)" />
   <param name="use_gui" value="$(arg gui)"/>
   <node name="arm_state_publisher_tutorials" pkg="robot_description" type="arm_state_publisher_tutorials" />
   <!--node name="joint_state_publisher" pkg="joint_state_publisher" type="joint_state_publisher"/-->
   <node name="robot_state_publisher" pkg="robot_state_publisher" type="state_publisher" />
   <node name="rviz" pkg="rviz" type="rviz" args="-d $(find robot_description)/arm.rviz" />
</launch>
Similarly, we will add the following to the mobile_state_xacro.launch file:
<launch>
   <arg name="model" />
   <arg name="gui" default="False" />
   <param name="robot_description" command="$(find xacro)/xacro --inorder $(arg model)" />
   <param name="use_gui" value="$(arg gui)"/>
   <node name="mobile_state_publisher_tutorials" pkg="robot_description" type="mobile_state_publisher_tutorials" />
   <!--node name="joint_state_publisher" pkg="joint_state_publisher" type="joint_state_publisher"/-->
   <node name="robot_state_publisher" pkg="robot_state_publisher" type="state_publisher" />
   <node name="rviz" pkg="rviz" type="rviz" args="-d $(find robot_description)/mobile.rviz" />
</launch>
Proceeding further, we have to install the following packages:
$ sudo apt-get install ros-kinetic-map-server
$ sudo apt-get install ros-kinetic-fake-localization
Compile the packages in the workspace using the following code:
$ cd ~/catkin_ws
$ catkin_make
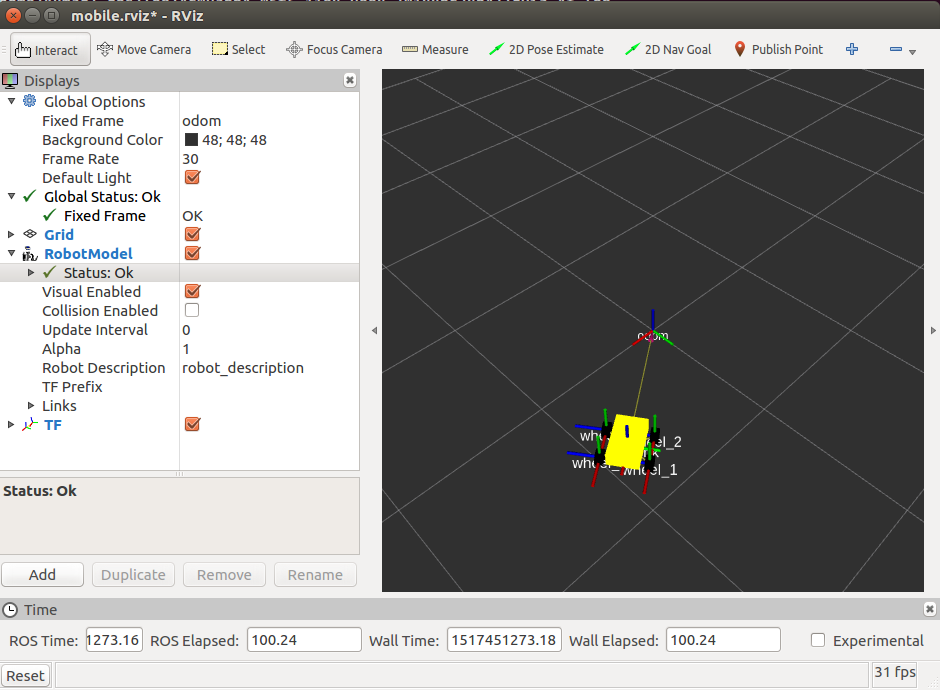
Hence, using the following command, we will start the 3D model of the mobile robot in rviz and can visualize its circular motion:
$ roslaunch robot_description mobile_state_xacro.launch model:="'rospack find robot1_description'/urdf/mobile_robot.xacro"
In the following screenshot, we can view the circular motion of the mobile robot:
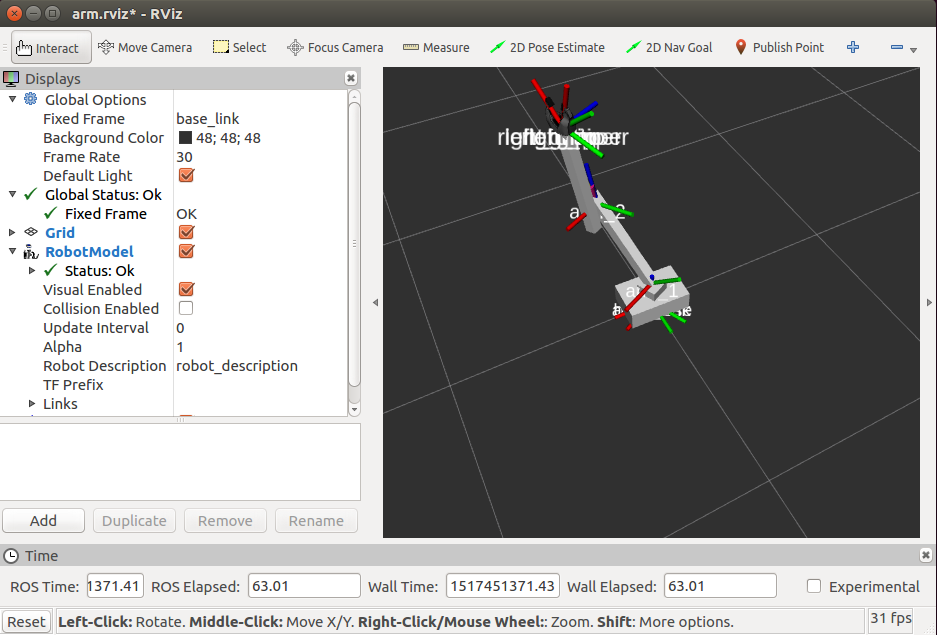
Similarly, using the following command, we will start the 3D model of the arm robot in rviz and can visualize all of its articulations:
$ roslaunch robot_description arm_state_xacro.launch model:="'rospack find robot1_description'/urdf/arm_robot.xacro"
In the following screenshot, we can view the articulation of the arm robot: