
Composing Your Blog Post
Composing a blog post is a lot like typing an e-mail: You give it a title, you write the message, and you click a button to send your words into the world. This section covers the steps you take to compose and publish a blog post on your site. By using the different options that WordPress provides — like discussion options, categories and tags, for example — you can configure each post however you like.
![]() You can collapse or reposition all the modules on the Add New Posts page to suit your needs. The only part of the Add New Posts page that can't be collapsed and repositioned is the actual Title and Post text boxes (where you write your blog post).
You can collapse or reposition all the modules on the Add New Posts page to suit your needs. The only part of the Add New Posts page that can't be collapsed and repositioned is the actual Title and Post text boxes (where you write your blog post).
Follow these steps to write a basic blog post:
- Click Add New on the Posts drop-down list.
The Add New Post page opens, as shown in Figure 1-1.
- Type the title of your post in the Enter Title Here text box at the top of the Add New Post page.
- Type the content of your post in the large text box below the Enter Title Here text box.
You can use the Visual Text Editor to format the text in your post. We explain the Visual Text Editor, and the buttons and options, later in this section.
- Click the Save Draft button in the Publish module, located at the top right of the Add New Post page.
The page refreshes with your post title and content saved, but not yet published to your blog.
Figure 1-1: Give your blog post a title and write your post body.
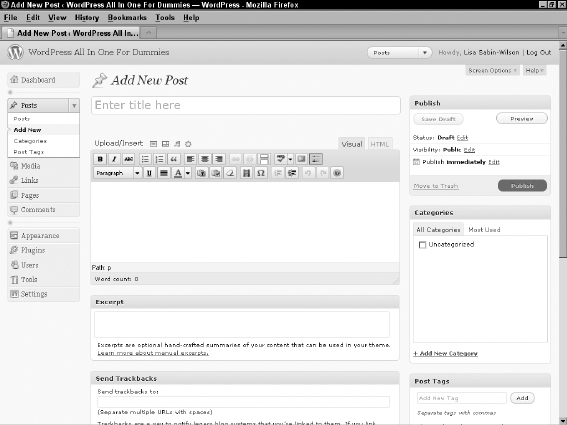
By default, the area in which you write your post is in Visual Editing mode, as indicated by the Visual tab that appears above the text. Visual Editing mode provides WYSIWYG (What You See Is What You Get) options for formatting. Rather than have to embed HTML code in your post, you can simply type your post, highlight the text you want to format, and click the buttons (shown in Figure 1-1) that appear above the text box in which you type your post.
If you've ever used a word processing program, such as Microsoft Word, you'll recognize many of these buttons:
- Bold: Embeds the <strong> </strong> HTML tag to emphasize the text in bold. Example: Bold Text.
- Italic: Embeds the <em> </em> HTML tag to emphasize the text in italic. Example: Italic Text.
- Strikethrough: Embeds the <strike> </strike> HTML tag that puts a line through your text. Example: Strikethrough Text.
- Unordered List: Embeds the <ul><li> </li></ul> HTML tags that create an unordered, or bulleted, list.
- Ordered List: Embeds the <ol><li> </li></ol> HTML tags that create an ordered, or numbered, list.
- Blockquote: Inserts the <blockquote> </blockquote> HTML tag that indents the paragraph or section of text you selected.
- Align Left: Inserts the <p align=“left”> </p> HTML tag that lines up the paragraph or section of text you selected against the left margin.
- Align Center: Inserts the <p align=“center”> </p> HTML tag that positions the paragraph or section of text you selected in the center of the page.
- Align Right: Inserts the <p align=“right”> </p> HTML tag that lines up the paragraph or section of text you selected against the right margin.
- Insert/Edit Link: Inserts the <a href=“ ”> </a> HTML tag around the text you selected to create a hyperlink.
- Unlink: Removes the hyperlink from the selected text, if it was previously linked.
- Insert More Tag: Inserts the <!--more--> tag, which lets you split the display on your blog page. It publishes the text written above this tag with a Read More link, which takes the user to a page with the full post. This feature is good for really long posts.
- Toggle Spellchecker: Perfect for typo enthusiasts! Checking your spelling before you post is always a good idea.
- Toggle Full Screen Mode: Lets you focus purely on writing, without the distraction of all the other options on the page. Click this button to make the Post text box expand to fill the full height and width of your browser screen. To bring the Post text box back to its normal state, click the Toggle Full Screen button again. Voilà — it's back to normal!
- Show/Hide Kitchen Sink: Lisa saw this button and thought, “Wow! WordPress does my dishes, too!” Unfortunately, the button's name is a metaphor that describes the advanced formatting options available with the Visual Text Editor. Click this button to make a new formatting list drop down, providing options for underlining, font color, custom characters, undo and redo, and so on — a veritable kitchen sink full of options, such as
- • Format: This drop-down list allows you to select the different text formatting available.
- • Underline: Inserts the <u> </u> HTML tags around the text to display it as underlined.
- • Text Color: Displays the text in the color chosen.
- • Paste as Plain Text: Useful if you copy text from another source, this option removes all formatting and special/hidden characters from the text and adds it to your post as unformatted text.
- • Paste from Word: Useful if you're copying text from a Microsoft Word document because Word inserts a lot of hidden HTML and characters that could make your post text look funny on your Web site. Use the Paste from Word feature to transfer posts from Word to WordPress to preserve formatting without the hidden mess.
- • Remove Formatting: Removes all formatting inside the post.
- • Insert/Edit Embedded Media: Easily embeds media (video or movie) files such as Flash, Quicktime, Shockwave, Windows Media or Real Media video files from outside, third-party sources. Here, you can configure options for the size of the embedded media, alignment within your post (top, right, bottom or left) and background color (optional), for example.
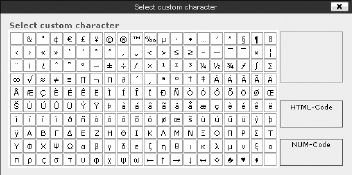
- • Insert Custom Character: If you click this option, a pop-up window appears, offering different characters (see Figure 1-2) such as $, % &, and ©. In the pop-up window, click the symbol that you want to include to add it to your post.
Figure 1-2: Custom characters.
- • Outdent: Moves indented the text to the left one preset level with each click.
- • Indent: Moves text in to the right one preset level with each click.
- • Undo: Click to undo your last formatting action.
- • Redo: Click to redo your last formatting action.
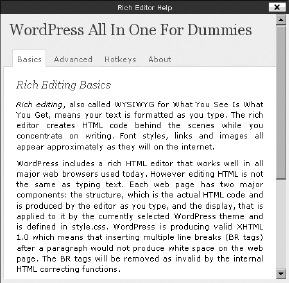
- • Help: Pops open a window that displays helpful information about using the text editor, including timesaving keyboard shortcuts (as shown in Figure 1-3).
Figure 1-3: The Help window displays information about using the text editor.
![]() You can turn off the Visual Text Editor by clicking Your Profile in the Users drop-down list. Deselect the Use the Visual Editor When Writing check box to turn off this editor if you want to insert the HTML code in your posts yourself.
You can turn off the Visual Text Editor by clicking Your Profile in the Users drop-down list. Deselect the Use the Visual Editor When Writing check box to turn off this editor if you want to insert the HTML code in your posts yourself.
![]() If you want to embed your own HTML code and skip the Visual Text Editor, click the HTML tab that appears to the right of the Visual tab. If you're planning to type HTML code in your post — for a table or video files, for example — you have to click the HTML tab before you can insert that code. If you don't, the Visual Text Editor formats your code, and it most likely looks nothing like you intended it to.
If you want to embed your own HTML code and skip the Visual Text Editor, click the HTML tab that appears to the right of the Visual tab. If you're planning to type HTML code in your post — for a table or video files, for example — you have to click the HTML tab before you can insert that code. If you don't, the Visual Text Editor formats your code, and it most likely looks nothing like you intended it to.
WordPress has a nifty, built-in autosave feature that saves your work while you're typing and editing a new post. If your browser crashes or you accidentally close your browser window before you manually save your post, you can access it again when you get back.
Directly above and to the left of the Visual Text Editor row of buttons, an Add Media area has a row of four icons. These icons let you insert images/photos, photo galleries, videos, and audio files into your posts. WordPress has an entire Media Library capability, which we describe in great detail in Chapters 2 and 3 of this minibook.