Adding Widgets
Widgets are individual features you can add to theme sidebars. Widgets can add a simple site search, display a calendar, list the most recent posts, and show RSS feed updates. These features just scratch the surface of what widgets offer and what widgets are capable of.
WordPress 2.8 introduced a new widget API that makes widget creation very easy. If you tried creating widgets in the past and gave up because of the difficulty of making them work properly, it's time to try widget creation again.
Coding a simple widget
The format for setting up filters and shortcodes are very similar. Add a function that performs a specific task and then use either add_filter or add_shortcode to register the function as a filter or shortcode.
Widgets are a bit different. Instead of creating one function and registering it, widgets are a collection of functions packaged in a container called a class. The class is registered as a widget using the register_widget function.
Like shortcodes, multiple plugins can be housed in a single plugin file. However, because the code for some of these widgets gets lengthy, each widget will be its own plugin.
The widget plugin we define in the following steps creates a widget that you can use on the Widgets page of your Dashboard (Appearance![]() Widgets) to show a widget in your sidebar that displays “You are logged in as Name” or “Welcome Guest” depending on whether you are logged in.
Widgets) to show a widget in your sidebar that displays “You are logged in as Name” or “Welcome Guest” depending on whether you are logged in.
This plugin, Example: My User Widget, creates a widget called My User Widget. As you did in the previous examples, create a plugin directory in the /wp-content/plugins directory by adding a new folder called /example-my-user-widget and add an empty init.php file that will serve as your main plugin PHP file and then follow these steps to create the sample plugin:
- Open this file in your text editor: init.php.
- Create the plugin header by adding this code to the top of the init.php file:
<?php /* Plugin Name: Example: My User Widget Description: This plugin provides a simple widget that shows the name of the logged in user */ - Press the Enter key and type the next line of code:
class My_User_Widget extends WP_Widget {This creates a new class called My_User_Widget. This new My_User_Widget class is based off (and extends) the structure of the existing WP_Widget class.
A class is a way of grouping a set of functions and a set of data into a logical group. In this case, everything that is in the My_User_Widget class is specific to just the My User Widget widget. Making modifications to this class will not affect any other widgets on your site.
The WP_Widget class is the central feature of WordPress's Widget API. This class provides the structure and most of the code that powers widgets. When the My_User_Widget class extends the WP_Widget class, the My_User_Widget class automatically gains all the features of the WP_Widget class. This means that only the code that needs to be customized for the specific widget needs to be defined because the WP_Widget class handles everything else.
- Press Enter and type the following lines of code in the init.php file:
function My_User_Widget() {
parent::WP_Widget(false,'My User Widget'),
}
The My_User_Widget function has the same name as the My_User_Widget class. A PHP class function that has the same name as the class is a constructor. This function is called automatically when the class code is run (for widgets, WordPress automatically runs the registered widget code behind the scenes). Constructors run necessary initialization code so that the class behaves properly.
The line of code the My_User_Widget function runs hands control to the WP_Widget class constructor. By calling parent::WP_Widget, the My_User_Widget class can tell WordPress about the new widget. In this instance, the My_User_Widget says that the default base ID should be used (this is the false argument and defaults to the lowercase version of the class name, my_user_widget, in this case) and that the widget's name is My User Widget.
- Press Enter and type the following line of code in the init.php file:
function widget($args) {The widget function displays the widget content. This function accepts two parameters: $args and $instance. For this example, only $args is needed. We discuss $instance when we create the next widget.
- Press Enter and type the following lines of code in the init.php file:
$user=wp_get_current_user();
if(!isset($user->user_nicename)) {
$message='Welcome Guest';
}
else {
$message="You are logged in as {$user->user_nicename}";
}
This code finds out information about the current user and sets a message to display that's dependent on whether the user is logged in. This is determined by checking the $user variable. If the $user->user_nicename variable is not set, then the user isn't logged in.
- Press Enter and type the following lines of code in the init.php file:
extract($args);
echo $before_widget;
echo "<p>$message</p>";
echo $after_widget;
}
}
The $args variable contains a number of important details about how the sidebar wants widgets to be formatted. It's passed into the “extract” function to pull out the settings into stand-alone variables. The four main variables used are $before_widget, $after_widget, $before_title, and $after_title. Because this widget does not have a title, the title variables are not used. The $before_widget variable should always be echoed out before any widget content, and the $after_widget variable should always be echoed out after the widget content.
- Press Enter and type the following lines of code in the init.php file:
function register_my_user_widget() {
register_widget('My_User_Widget'),
}
add_action('widgets_init;,'register_my_user_widget'),
To register a widget with WordPress (so WordPress recognizes it as a widget), use the register_widget function and pass it the name of the widget class.
Although calling the register_widget immediately after the class definition would be nice, it isn't that simple. The code of the widget that includes the different functions must run before the widget can be registered. When code needs to run at specific times, the code is placed in a function and the add_action function is used to have WordPress run the function at a specific time.
These specific points in time are actions. For widget registration, we want to use the widget_init action. This action happens after WordPress finishes setting up the code necessary to handle widget registrations, while being early enough for the widget to be registered in time.
With this final piece in place, the widget is ready for use. When you are done, the entire code block looks like this:
<?php
/*
Plugin Name: Example: My User Widget
Description: This plugin provides a simple widget that shows the name of
    the logged in user
*/
class My_User_Widget extends WP_Widget {
function My_User_Widget() {
parent::WP_Widget(false,'My User Widget'),
}
function widget($args) {
$user=wp_get_current_user();
if(!isset($user->user_nicename)) {
$message='Welcome Guest';
}
else {
$message=”You are logged in as {$user->user_nicename}”;
}
extract($args);
echo $before_widget;
echo “<p>$message</p>”;
echo $after_widget;
}
}
function register_my_user_widget() {
register_widget('My_User_Widget'),
}
add_action('widgets_init','register_my_user_widget'),
![]() Before WordPress 2.8, widget code had to manage everything by itself. To allow a widget to be used more than once, complex and bug-prone code needed to be produced and maintained. Fortunately, the WP_Widget class handles this seamlessly. Widget developers no longer need to worry about single-use or multi-use widgets because all widgets coded to use the WP_Widget class automatically become multi-use widgets.
Before WordPress 2.8, widget code had to manage everything by itself. To allow a widget to be used more than once, complex and bug-prone code needed to be produced and maintained. Fortunately, the WP_Widget class handles this seamlessly. Widget developers no longer need to worry about single-use or multi-use widgets because all widgets coded to use the WP_Widget class automatically become multi-use widgets.
With this final piece in place, the widget is ready for use. Open the Widgets page in your Dashboard (Appearance![]() Widgets); you see a new widget called My User Widget.
Widgets); you see a new widget called My User Widget.
Adding an options editor to a widget
Although some widgets work properly without any type of customization, most widgets need at least the ability for the user to supply a title for the widget. Thanks to the WP_Widget class, adding options to a widget is easy.
The My User Widget example made use of the widget function to display the widget's content. This addition to the widget code uses two additional functions to handle the widget options. The form function displays the HTML form inputs that allow the user to configure the widgets options. The update function allows the widget code to process the submitted data to ensure that only valid input is saved.
In this example, you create a basic clone of WordPress's Text widget. Although a bit simple, this will allow you to focus on the process of using widget options without getting caught up in the details of a complex widget concept.
Time to start coding, so set up the plugin environment by creating a new directory in your /wp-content/plugins called /example-my-text-widget and include a blank init.php file as your main plugin PHP file. The plugin you're creating in this section is Example: My Text Widget, which creates a widget called My Text Widget.
Follow these steps to create the init.php file for your Example: My Text Widget plugin:
- Open the init.php file in your text editor.
- Create the plugin header by adding this code to the top of the init.php file:
<?php /* Plugin Name: Example: My Text Widget Description: This plugin provides a basic Text Widget clone complete with widget options */ - Press Enter and type the following line of code in the init.php file:
class My_Text_Widget extends WP_Widget {As with the My User Widget in thepreceding section, this widget is created by extending WordPress' WP_Widget class. This new widget's class is My_Text_Widget.
- Press Enter and type the following lines of code in the init.php file:
function My_Text_Widget() {
$widget_ops=array('description'=>'Simple Text Widget clone'),
$control_ops=array('width'=>400);
parent::WP_Widget(false,'My Text Widget',$widget_ops,$control_ops);
}
The constructor for this plugin is a bit different this time. The parent::WP_Widget function is still called to set up the widget, but two more arguments are given: $widget_ops and $control_ops. These two arguments allow a variety of widget options to be set. The $widget_ops argument can set two options: description and classname. The description shows under the name of the widget in the widgets listing. The classname option sets what class the rendered widget uses.
- Press Enter and type the following line of code in the init.php file:
function form($instance) {The form class function displays an HTML form that allows the user to set the options used by the widget. The $instance variable is an array containing the current widget options. When the widget is new, this $instance variable is an empty array.
- Press Enter and type the following line of code in the init.php file:
$instance=wp_parse_args($instance,array('title'=>'','text'=>''));Remember how the shortcode plugins used the shortcode_atts function to merge default options with ones from the shortcode? The wp_parse_args in this example performs the same task by merging the existing $instance options with default option values.
- Press Enter and type the following line of code in the init.php file:
extract($instance);
The extract function is used to pull the title and text options in the $instance variable into the standalone variables $title and $text.
- Press Enter and type ?>.
By using the close PHP tag, ?>, we can more easily display a large amount of HTML without having to constantly echo out each line.
- Press Enter and type the following lines of code in the init.php file:
<p>
<label for="<?php echo $this->get_field_id('title'), ?>">
<?php _e('Title:'), ?>
<input
  class="widefat"
  type="text"
  id="<?php echo $this->get_field_id('title'), ?>"
  name="<?php echo $this->get_field_name('title'), ?>"
  value="<?php echo esc_attr($title); ?>"
/>
</label>
</p>
The block of HTML displays the title input.
Notice the $this->get_field_id and $this->get_field_name function calls. These functions are provided by the WP_Widget class and produce the needed id and name values specific to this widget instance. To use these functions, simply pass in the name of the option that is used, title in this case.
The _e(‘Title:’); section simply prints out Title:. The reason it is wrapped in a call to the _e function is that the _e function allows the text to be translated into other languages.
The value attribute of the input tag sets what the default value of the field is. Because we want this to be populated with the current title, the $title variable is echoed in this attribute. Before echoing, the $title variable is passed through the esc_attr function, which allows the text to be properly formatted for use as an attribute value. If the esc_attr isn't used, some values in the title, such as a double-quote, could break the HTML.
- Press Enter and type the following lines of code in the init.php file:
<textarea
  class="widefat"
  rows="16"
  id="<?php echo $this->get_field_id('text'), ?>"
  name="<?php echo $this->get_field_name('text'), ?>"
>
<?php echo esc_attr($text); ?>
</textarea>
This block of HTML displays the textarea input that allows the user to input the text that she wants to display. The only difference between this input and the previous one is that the textarea and text inputs have a different format and that this input does not have a description.
- Press Enter and type <?php.
The form HTML is complete, so the open PHP tag, “<?php”, is used to switch back to PHP code.
- Press Enter and type }.
This closes the form function.
- Press Enter and type the following line of code in the init.php file:
function update($new_instance,$old_instance) {The update class function processes the submitted form data. The $new_instance argument provides the data submitted by the form. The $old_instance argument provides the widget's old options.
- Press Enter and type the following line of code in the init.php file:
$instance=array();
First, a new empty array variable, $instance, is created. This variable will store the final options values.
- Press Enter and type the following lines of code in the init.php file:
$instance['title']=strip_tags($new_instance['title']);
$instance['text']=$new_instance['text'];
Store the title and text options from the $new_instance variable into the $instance variable. The title option is run through the strip_tags function so that no HTML tags are stored in the title option.
- Press Enter and type the following line of code in the init.php file:
return $instance;
The “update” function works like a filter function. The data is passed in, it can be manipulated as desired, and then the final value is returned.
After seeing how this function works, you might wonder why creating the $instance variable was needed. While using $new_instance directly would be more simple, it also could produce unexpected results. It is possible for unexpected data to come through as part of the $new_instance variable. By creating the $instance variable and only assigning known options to it, you can be assured that you know exactly what data is stored for the widget and that your code has had a chance to clean it up.
- Press Enter and type }.
Close the “update” function.
- Press Enter and type the following line of code in the init.php file:
function widget($args,$instance) {The widget class function is the same as before, but it now has the $instance argument. The $instance argument stores the options set for the widget.
- Press Enter and type the following lines of code in the init.php file:
extract($args);
extract($instance);
Use the extract function on both $args and $instance to populate easy-to-use variables for each.
- Press Enter and type the following line of code in the init.php file:
$title=apply_filters('widget_title',$title,$instance,$this->id_base);Remember that in a previous section when we assembled The Example: Contraction Compulsion Correction plugin, we added the add_filter function to add a function to be used as a filter. The apply_filters in this example function is how those filter functions are used. This line of code translates to Store the result of the widget_title filters in the $title variable. Each filter is passed the $title, $instance and $this->id_base variables. Every widget that has a title should have this line of code so that filters have a chance to filter all widget titles.
- Press Enter and type the following lines of code in the init.php file:
echo $before_widget;
if(!empty($title)) echo $before_title . $title . $after_title;
echo $text;
echo $after_widget;
Finally, after getting everything set, we are ready to display the widget. As with the previous widget, the $before_widget variable is echoed before the rest of the widget content and the $after_widget variable is echoed after all the other widget content. Because this widget supports a title, there is now the addition of the $before_title and $after_title variables that, like the $before_widget and $after_widget variables, come from the $args argument passed to the function. The if statement ensures that the title displays only if the title isn't empty (remember, ! means “not”).
- Press Enter and type }.
This closes the widget function class.
- Press Enter and type }.
This closes the My_Text_Widget class.
- Press Enter and type the following lines of code in the init.php file:
function register_my_text_widget() {
register_widget('My_Text_Widget'),
}
add_action('widgets_init','register_my_text_widget'),
Register the widget. Note how the My_Text_Widget argument of the register_widget function matches the name of this widget's class.
When you are finished with thepreceding steps, the entire block of code looks like this when all put together in your init.php file:
<?php
/*
Plugin Name: Example: My Text Widget
Description: This plugin provides a basic Text Widget clone complete with
    widget options
*/

class My_Text_Widget extends WP_Widget {

function My_Text_Widget() {
$widget_ops=array('description'=>'Simple Text Widget clone'),
$control_ops=array('width'=>400);
parent::WP_Widget(false,'My Text Widget',$widget_ops,$control_ops);
}

function form($instance) {

$instance=wp_parse_args($instance,array('title'=>'','text'=>''));

extract($instance);

?>

<p>
<label for="<?php echo $this->get_field_id('title'), ?>">
<?php _e('Title:'), ?>
<input
  class="widefat"
  type="text"
  id="<?php echo $this->get_field_id('title'), ?>"
name="<?php echo $this->get_field_name('title'), ?>"
  value="<?php echo esc_attr($title); ?>"
/>
</label>
</p>

<textarea
  class="widefat"
  rows="16"
  id="<?php echo $this->get_field_id('text'), ?>"
  name="<?php echo $this->get_field_name('text'), ?>"
>
<?php echo esc_attr($text); ?>
</textarea>

<?php

}

function update($new_instance,$old_instance) {

$instance=array();

$instance['title']=strip_tags($new_instance['title']);
$instance['text']=$new_instance['text'];

return $instance;

}

function widget($args,$instance) {

extract($args);
extract($instance);

$title=apply_filters('widget_title',$title,$instance,$this->id_base);

echo $before_widget;
if(!empty($title)) echo $before_title . $title . $after_title;
echo $text;
echo $after_widget;

}
}

function register_my_text_widget() {
register_widget('My_Text_Widget'),
}
add_action('widgets_init','register_my_text_widget'),
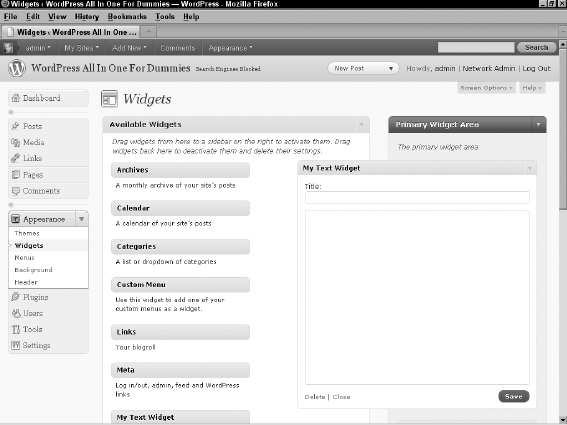
With this final piece in place, the widget is ready for use. Open the Widgets page in your Dashboard (Appearance![]() Widgets); you see a new widget ready for you to use called My Text Widget that, when expanded, has a Title field and text box for the user to configure and add content to, as shown in Figure 5-9.
Widgets); you see a new widget ready for you to use called My Text Widget that, when expanded, has a Title field and text box for the user to configure and add content to, as shown in Figure 5-9.
Figure 5-9: The My Text Widget.