
Setting Up a Test Site
Because WordPress changes so often, it is useful to create a test site on which we can install and run the WordPress software and plugins to test them before applying them to our regular, live Web site.
If you depend on your WordPress Web site for your income or business, having things run smoothly at all times is very important. Because installing or upgrading new plugins can sometimes have disastrous effects, you want to maintain a mirror of your WordPress installation on a test site. There are several ways to create a test environment, and everyone will have his own preferences. Here are the basics:
- Find out whether your hosting provider gives you the ability to create subdomains.
Generally, most hosting providers give you this option. We use the cPanel hosting account manager to create this subdomain, but your hosting account might offer you a different management tool, such as NetAdmin or Plesk.
A subdomain is the second level of your current domain that can handle unique content separately from content in your main domain. Subdomains operate underneath your main domain, and can function as a wholly different section of your site, independent from your existing domain name.
For an example of a subdomain on Lisa's domain, ewebscapes.com, see Steps 3 and 4 where Lisa created the subdomain http://testing.ewebscapes.com. The prefix testing in that Web address (or URL) is a subdomain that branches off ewebscapes.com, which when set up, handles completely different content than content currently installed on her main domain.
- Log in to your cPanel (or hosting account manager tool provided to you).
- Locate and then click the Subdomains icon in the cPanel interface.
The Subdomains page within cPanel appears, as shown in Figure 3-14.
- Type the name of your subdomain in the Subdomain text box.
For the purposes of making this straightforward and easy, type testing in the text box.
- On the drop-drop menu, choose the name of the domain on which you want to add the subdomain.
In Figure 3-14, the drop-down menu shows the domain ewebscapes.com. Lisa created the subdomain on this domain, so her new subdomain is http://testing.ewebscapes.com.
A unique folder name for your new subdomain appears in the Document/Root text box. Don't alter this text because this tells your Web server where to install the necessary WordPress files.
- Click the Create button.
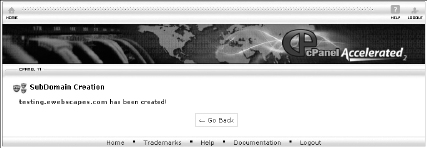
It takes a few seconds, but the page refreshes and displays a message that the new subdomain has been created, as shown in Figure 3-15.
Now that you have a subdomain set up on your hosting account, you can install WordPress into the folder that was created when you added the subdomain. For example, if you created a subdomain called testing, then the folder on your Web server you'll install into will be the /testing/ folder. For the steps to install WordPress, check out Book II, Chapter 4.
Figure 3-14: The Subdomains page in cPanel where you can create a new subdomain.

Figure 3-15: Successful subdomain creation message in cPanel.
After you have WordPress installed on your test domain, you can import the content from your live site using the WordPress import feature that we present in Book II, Chapter 7. After the content is imported, you have a carbon copy of your live site on your test domain where you can install different plugins and test different configurations first, before making those changes to your live site.