
Inserting Images into Your Blog Posts
You can add images to a post pretty easily by using the WordPress image uploader. Jump right in and give it a go by clicking the Upload an Image icon on the Add New Post page. The Add an Image window that appears lets you choose images from your hard drive or from a location on the Web (see Figure 3-1).
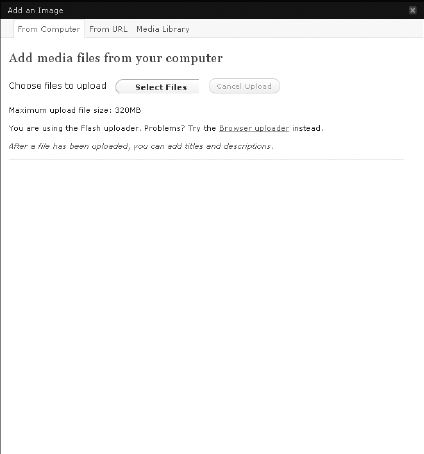
![]() The interface that WordPress uses for file uploads is based on Adobe Flash. Flash is a specific set of multimedia technologies programmed to handle media files on the Web. Some browsers and operating systems aren't configured to handle Flash-based applications. If you experience difficulties with the Add an Image window, WordPress gives you an easy alternative: Click the Browser Uploader link in the Add an Image window to use a non–Flash-based uploader to transfer your files.
The interface that WordPress uses for file uploads is based on Adobe Flash. Flash is a specific set of multimedia technologies programmed to handle media files on the Web. Some browsers and operating systems aren't configured to handle Flash-based applications. If you experience difficulties with the Add an Image window, WordPress gives you an easy alternative: Click the Browser Uploader link in the Add an Image window to use a non–Flash-based uploader to transfer your files.
Figure 3-1: The WordPress Add an Image window.
Adding an image from the Web
To add an image from the Web after you click the Add an Image icon, follow these steps:
- Click the From URL tab in the Add an Image window.
The Add Media File from URL window opens.
- Type the URL (Internet address) of the image in the Image URL text box.
Type the full URL, including the http:// and www portion of the address. You can easily find the URL of any image on the Web by right-clicking (PC) or Command-clicking (Mac), and then selecting Properties from the pop-up menu that appears.
- Type a title for the image in the Image Title text box.
- Type a description of the image in the Alternate Text text box.
The alternative text appears in a browser for visually impaired people who use text readers or if, for some reason, the image doesn't load properly. Although alternate text gives the visitors to your site a description of what the image is, it can also improve your SEO (search engine optimization) efforts. Search engines read the alternative text (also called ALT tags) to further categorize and define your site in listings and directories.
- (Optional) Type the caption of the image in the Image Caption text box.
The words you type here appear below the image on your blog, as a caption.
- Specify an alignment option by selecting the None, Left, Center, or Right radio button.
- Type the URL to which you want the image linked.
The option you select determines where your readers go when they click the image you uploaded:
- None: You don't want the image to be clickable.
- Link to Image: Readers can click through to the actual image itself, where the image file loads in their browser window.
- Click the Insert into Post button.
WordPress inserts the appropriate HTML markup in the body of your post so that the image gets displayed when visitors to your site view your post.
Adding an image from your computer
To add an image from your own hard drive after you click the Add an Image icon, follow these steps:
- Click the From Computer tab, and then click the Select Files button.
A dialog box, from which you can select an image (or multiple images) from your hard drive, opens.
- Select your image(s), and then click Open.
The image is uploaded from your computer to your Web server. WordPress displays a progress bar on the upload and displays an Image Options window when the upload is finished.
- Edit the details for the image(s) by clicking the Show link that appears to the right of the image thumbnail (the Show link appears for each image if you uploaded multiple images at once — if you uploaded only one image, the Image options automatically appear).
When you click Show, the Add an Image window appears (see Figure 3-2), which contains several image options:
- Title:Type a title for the image.
- Alternate Text: Type the alternate text (see preceding section) for the image.
- Caption: Type a caption for the image (such as This is a flower from my garden).
- Description: Type a description of the image.
- Link URL: If you want the image linked to a URL, type that URL in this text box. Alternately, select the appropriate option button to determine where your readers go when they click the image you uploaded: Selecting None means the image isn't clickable, File URL directs readers through to the image itself, and Post URL directs readers through to the post in which the image appears.
- Alignment: Select None, Left, Center, or Right. (See Table 3-1, later in this chapter, for styling information regarding image alignment.)
- Size: Select Thumbnail, Medium, Large, or Full Size.
 WordPress automatically creates small- and medium-sized versions of the images you upload through the built-in image uploader. A thumbnail is a smaller version of the original file. You can edit the size of the thumbnail by clicking the Settings link and then clicking the Media menu link. In the Image Sizes section of the Media Settings page, designate your desired height and width of the small and medium thumbnail images generated by WordPress.
Figure 3-2: You can set several options for your images after you upload them.

If you're uploading more than one image, skip to the “Inserting a Photo Gallery” section, later in this chapter.
- Click the Edit Image button (shown in Figure 3-2) to edit the appearance of the image.
The image editor (see Figure 3-3) options are represented by icons shown across the top of the image editor window and include
- Crop: Cut the image down to a smaller size.
- Rotate Counter-Clockwise: Rotate the image to the left.
- Rotate Clockwise: Rotate the image to the right.
- Flip Vertically: Flip the image upside down and back again
- Flip Horizontally: Flip the image from right to left and back again.
- Undo: Undo any changes you made.
- Redo: Redo images edits that you've undone.
- Scale Image: The option drop-down list appears, giving you the ability to set a specific width and height for the image.
- Click the Insert into Post button.
Figure 3-3: The WordPress image editor options.

The Add an Image window closes, and the Add New Post page (or the Add New Page page, if you're writing a page) reappears. WordPress has inserted the HTML to display the image in your post, as shown in Figure 3-4; you can continue editing your post, save it, or publish it.
Figure 3-4: WordPress inserts the correct HTML code for your uploaded image into your post.

![]() To see the actual image, and not the code, click the Visual tab just above the Post text box.
To see the actual image, and not the code, click the Visual tab just above the Post text box.
Aligning your images
When you upload your image, you can set its alignment as None, Left, Center, or Right. The WordPress theme you're using, however, may not have these alignment styles accounted for in its stylesheet. If you set the alignment to Left, for example, but the image on your blog doesn't appear to be aligned at all, you may need to add a few styles to your theme's stylesheet.
Themes and templates are discussed in greater detail in Book VI; however, for purposes of making sure that you have the correct image alignment for your newly uploaded images, follow these steps for a quick-and-dirty method:
- Click Editor in the Appearance drop-down list.
The Edit Themes page opens. All the template files for your active theme are listed on the right side of the page.
- Click the Stylesheet template.
The Stylesheet (style.css) template opens in the text box on the left side of the page.
- Add your desired styles to the stylesheet.
Table 3-1 shows the styles you can add to your stylesheet to make sure that image-alignment styling is present and accounted for in your theme.
Table 3-1 Styling Techniques for Image Alignment
| Image Alignment | Add This to Your Stylesheet (style.css) |
| None | img.alignnone {float:none; margin: 5px 0 5px 0;} |
| Left | img.alignleft {float:left; margin: 5px 10px 5px 0px;} |
| Center | img.aligncenter {display:block; float:none; margin: 5px auto;} |
| Right | img.alignright {float:right; margin: 5px 0 5px 10px;} |
These styles are just examples of what you can do. Get creative with your own styling. You can find more information about using CSS (Cascading Style Sheets) to add style to your theme(s) in Book VI, Chapter 4.