Creating Your First Plugin
When developing something new, taking very small steps is usually best. This way, if something breaks, the problem is clear. Doing a large number of new things at one time makes finding where something went wrong difficult.
Sticking with this concept, the first plugin we help you create in this chapter is a plugin that can be activated and deactivated but doesn't do anything. In other words, a fully functional plugin shell that's ready for code to be added.
Because this plugin is an example and won't really do anything, we named it Example: Do Nothing.
Setting up the plugin files
For this plugin, all that you need is a main plugin file. Following the best practices from earlier in this chapter, this file is placed in its own directory by following these quick steps:
- Connect to your Web server via FTP.
- Browse to the /wp-content/plugins directory in your WordPress installation directory.
If you're unsure where your WordPress installation directory is located, flip to Book II, Chapter 4 where we cover installing WordPress on your Web server.
- Create a new directory within /wp-content/plugins called /example-do-nothing.
Most FTP programs allow you to right-click with your mouse and choose Add New Folder or Add New Directory.
- Create an empty .php file with the filename init.php.
Use your favorite text editor, such as Notepad for PC or TextMate for Mac, to open a new file and then save it with the filename init.php.
- Upload your blank init.php file to /wp-content/plugins/example-do-nothing.
Your plugin directory and plugin file are set up. In the next section, you add code to the init.php plugin file.
Adding the plugin header
Open the init.php file you created in the previous section (most FTP programs have built-in text editors that allow you to right-click the file with your mouse and choose Edit) and add the following lines of code to create the plugin header:
<?php
/*
Plugin Name: Example: Do Nothing
Description: This plugin does nothing. It is an example of how to create
    a valid WordPress plugin.
*/
![]() Adding the closing ?> tag at the end of a PHP file is optional at this point. Leaving it out is helpful because it prevents accidentally adding code after it, which may cause the PHP code to break.
Adding the closing ?> tag at the end of a PHP file is optional at this point. Leaving it out is helpful because it prevents accidentally adding code after it, which may cause the PHP code to break.
Adding a plugin description isn't necessary, but it makes the purpose of the plugin clear to anyone who reads your code. Additionally, the plugin description displays on the Plugins page in your Dashboard to give users a good idea of what the purpose of your plugin is. When developing, you wind up with many plugins that were used for simple tests or are unfinished. Having solid names and descriptions adds order to the chaos so that important code isn't forgotten or accidentally deleted.
Be sure to save the init.php file and upload it to your /wp-content/plugins/example-do-nothing directory on your Web server.
Testing the plugin
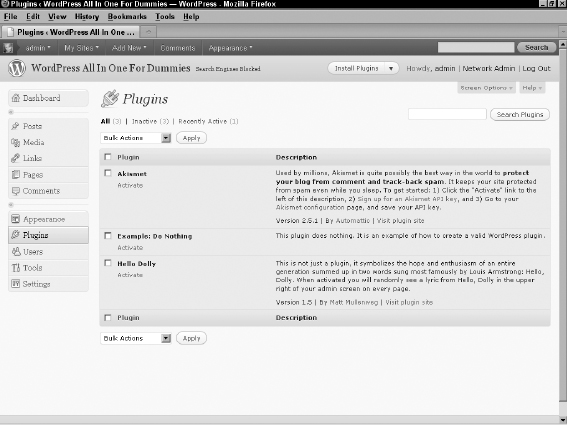
After modifying the init.php file and saving it in the /wp-content/plugins/example-do-nothing directory, visit your WordPress Dashboard and click Plugins to view the Plugins page in your Dashboard. Your new plugin is listed with the title Example: Do Nothing, as shown in Figure 5-1.
Click the Activate link directly beneath the title. The Plugins page displays a Plugin activated message, which indicates the Example: Do Nothing plugin was activated in your WordPress install. Although your new plugin doesn't “do” anything, you have a simple WordPress plugin with the correct file structure, naming conventions, and headers.
Figure 5-1: The Plugins page showing the sample plugin in the list.