
Before we dig deep into the theory, let's take some time to make a class and see it in action.
First, we will need to create a sphere in our Hierarchy view:
- Click on the Create button.
- Hover over 3D object and click on sphere.
- Name the sphere Ball.
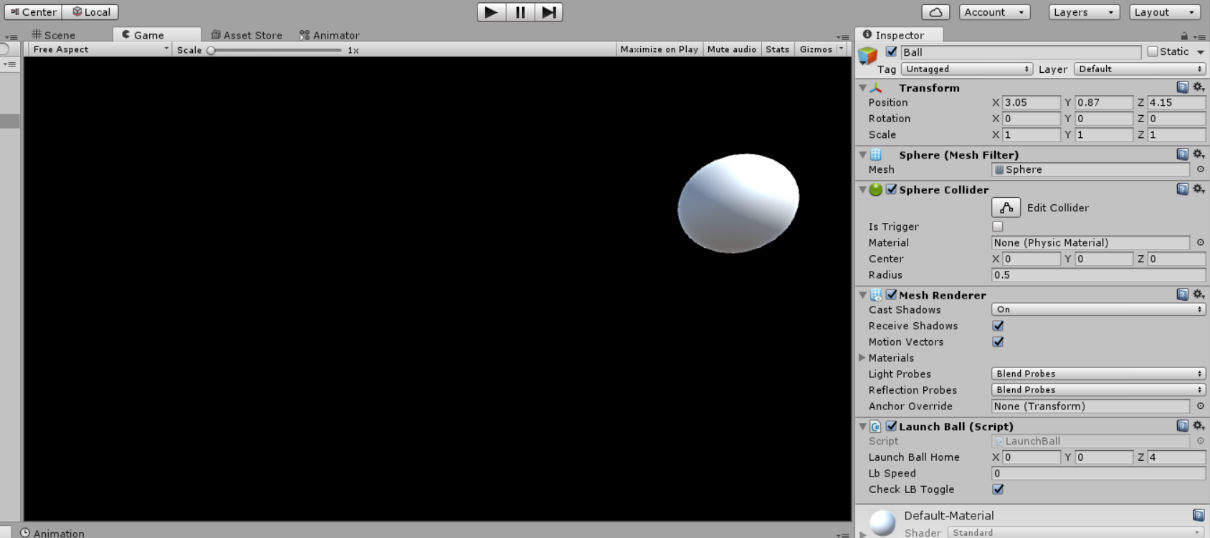
- In the Inspector, make sure that all position elements are 0. Alternatively, you can simply click on the gear icon and select reset.
- With the sphere reset, change its position.x to 3.05, position.y to 0.87, and position.z to 4.15.
Now, we will add a script file to the ball:
- Click on the Add Component button in the Inspector.
- Scroll down to New Script and click on it.
- Name the script LaunchBall; click on Create and then on Add.
- Double-click on the Launchball script in the Inspector.
Visual Studio should be loading now. Once it is loaded, you should see a blank class called LaunchBall with two using statements and two methods, Start and Update. Now, we will need to copy or type the following code into that class.
Let's take a look at Part 1 of the code for the LaunchBall.cs file:
using UnityEngine;
using System.Collections;


namespace HoloLensBeginnersGuide
{

     public class LaunchBall : MonoBehaviour {

       // Member Variables

    public Vector3 launchBallHome =
                    new Vector3(0.0f, 0.0f, 4.0f);
    public float lbSpeed;
    public bool checkLBToggle = true;
    private Color lbColor;
    Renderer rend;
    bool lbJump;

    void Start()
    {
        gameObject.transform.position = launchBallHome;
        lbSpeed = 0.1f;
        lbColor = new Color(0.1f, 0.2f, 0.5f);
        rend = gameObject.GetComponent<Renderer>();
        lbJump = true;
    }
Let's take a look at Part 2 of the code for the LaunchBall.cs file:
// Update is called once per frame
       void Update ()
{
        if (lbJump)
{
            TeleportBall();
            ChangeColor();
            rend.material.color = lbColor;
            LaunchBallJump();
        }

        if (checkLBToggle)
        {
            CheckLB();
        }
       }

    //Class Methods
    void TeleportBall()
    {
        if (transform.position.y >= 2)
        {
            transform.position =
     new Vector3(transform.position.x, -1,
                 transform.position.z);
        }

    }

    void ChangeColor()
    {
        float redColor = 0.1f;

        lbColor.r = redColor;
        lbColor.g = Random.Range(0, 1f);
        lbColor.b = Random.Range(0, 1f);
    }
    void LaunchBallJump()
    {
        transform.Translate(Vector3.up *
                               lbSpeed * Time.deltaTime);
    }
Let's take a look at Part 3 of the code for the LaunchBall.cs file:
 void CheckLB()
    {
        int i = Random.Range(0, 1000);
        if(i < 997)
        {
            lbJump = true;

        }
        else
        {

            lbJump = false;
            transform.position = launchBallHome;
        }

    }


   }
}
This is what Unity should look like before we test our new class: the offset white ball against a black background. Now, click on Play in the Unity editor:
Upon doing so, the ball should move to the lower center and start changing colors. It will move up slowly until a certain condition is met, at which point the ball moves down again:
