The following steps outline how to grant users or AD security groups access to a Horizon desktop pool, a necessary task, since no access is granted by default. This can be done while the pool is still being provisioned:
- Log on to the Horizon Administrator console using an AD account that has administrative permissions within Horizon.
- Open the Catalog | Desktop Pools window within the console.
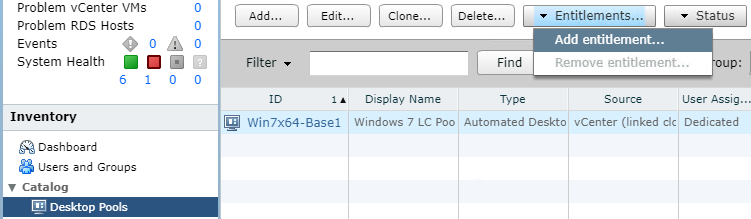
- Highlight the pool you wish to entitle, as shown in the following screenshot, and navigate to the Entitlements... | Add entitlement... to open the Add Entitlements window:
- In the Add Entitlements window, shown in the following screenshot, click on the Add... button to open the Find User or Group window:

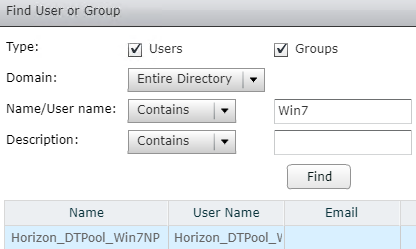
- In the Find User or Group window, shown in the following screenshot, use the Name/User name: or Description: fields to search for the user or group to which you wish to grant access. In the following example, we used the Find button to search for a security group that was created specifically for a Horizon named Horizon_DTPool_Win7NP. Highlight the desired user or group, and click on OK to return to the Add Entitlements window:
- Repeat steps 4 and 5 as needed to entitle additional users or groups.
- If all the required users and groups have been added, click on the OK button in the Add Entitlements window to complete the action.
The selected users and groups now have access to the available desktops within the desktop pool. Now that we have entitled a user or group to do the desktop pool, the Remove Entitlement... option shown in step 3 will no longer be greyed-out, and we can use it to remove entitlements if needed.
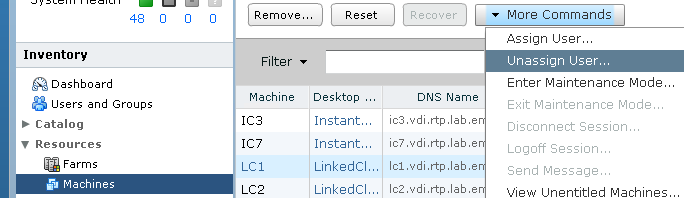
Removing an entitlement to a dedicated assignment-linked clone or full clone desktop pool does not remove any assignments to the desktops themselves, which occur when a user logs in for the first time or when set manually by a Horizon administrator. To fully remove the entitlement, you must also highlight the desktop in the Horizon Administrator console Resources - Machines window, open the More Commands drop-down menu, as shown in the following screenshot, click Unassign User... to open the Unassign User window, and then click OK. The desktop will not be available for new logins until this is performed:
Alternatively, you may use the Remove... button to delete the desktop and force the creation of a new, unassigned desktop. Both methods require the entitlement to be removed as well; if this is not done, the user will be able to log in again and be assigned a new desktop.