The following steps outline how to use the Horizon Administrator console to create a dedicated assignment desktop pool using Horizon Composer-linked clones. As discussed previously, it is assumed that you already have a virtual desktop master image that you have created a snapshot of. During each stage of the pool creation process, a description of many of the settings is displayed on the right-hand side of the Add Desktop Pool window. In addition, a question mark appears next to some of the settings; click on it to read important information about the specified setting:
- Log on to the Horizon Administrator console using an AD account that has administrative permissions within Horizon.
- Open the Catalog - Desktop Pools window within the console.
- Click on the Add... button in the Desktop Pools window to open the Add Desktop Pool window.
- In the Desktop Pool Definition | Type window, select the Automated Desktop Pool radio button as shown in the following screenshot, and then click on Next >:

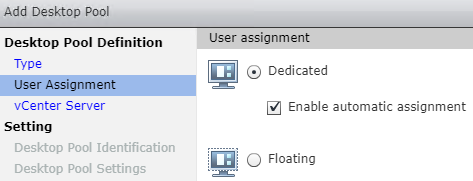
- In the Desktop Pool Definition | User Assignment window, select the Dedicated radio button and check the Enable automatic assignment checkbox, as shown in the following screenshot, and then click on Next >:
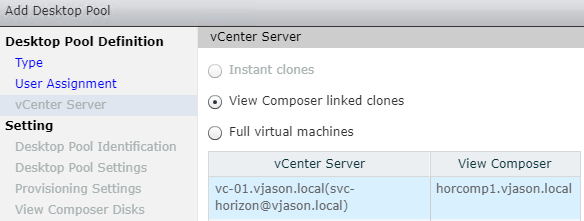
- In the Desktop Pool Definition | vCenter Server window, select the View Composer linked clones radio button, highlight the vCenter server, as shown in the following screenshot, and then click on Next:
- In the Setting | Desktop Pool Identification window, populate the pool ID:, as shown in the following screenshot, and then click on Next. Optionally, configure the Display Name: field. When finished, click on Next:

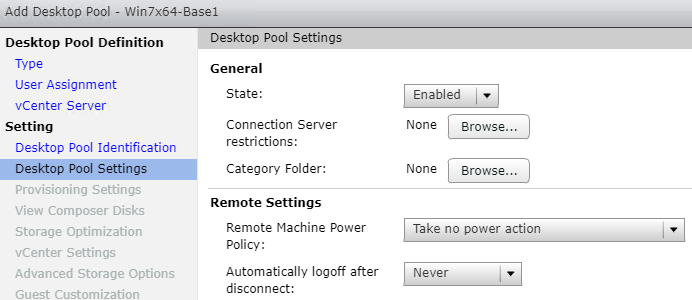
- In the Setting | Desktop Pool Settings window, configure the various settings for the desktop pool. Many of these options are self-explanatory; those that are not are described in the Desktop pool common terms section of this chapter. These settings can also be adjusted later, if desired. When finished, click on Next >:
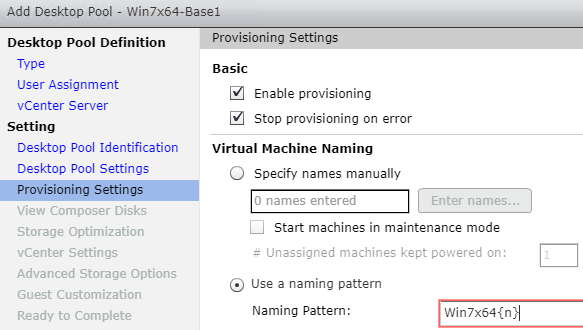
- In the Setting | Provisioning Settings window, configure the various provisioning options for the desktop pool that include the desktop-naming format, the number of desktops, and the number of desktops that should remain available during Horizon Composer maintenance operations. When finished, click on Next >:
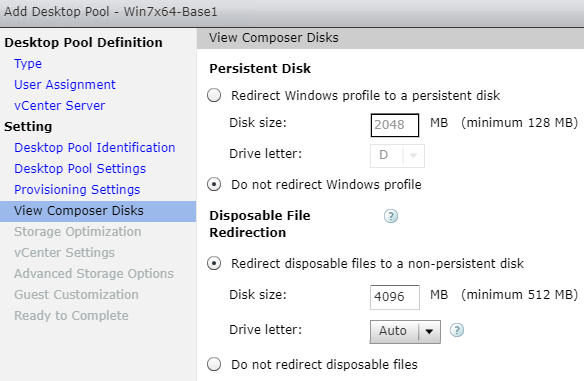
- In the Setting | View Composer Disks window, configure the settings for your optional linked clone disks. By default, both a Persistent Disk for user data and a non-persistent disk for Disposable File Redirection are created. When finished, click on Next >:
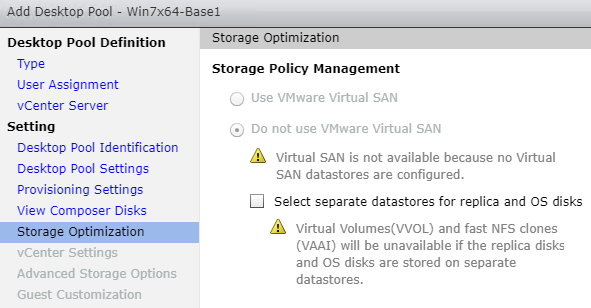
- In the Setting | Storage Optimization window, we configure whether our desktop storage is provided by VMware Virtual SAN, and, if not, whether to separate our Horizon desktop replica disks from the individual desktop OS disks. In our example, VMware Virtual SAN is not available, so we will simply click Next >:
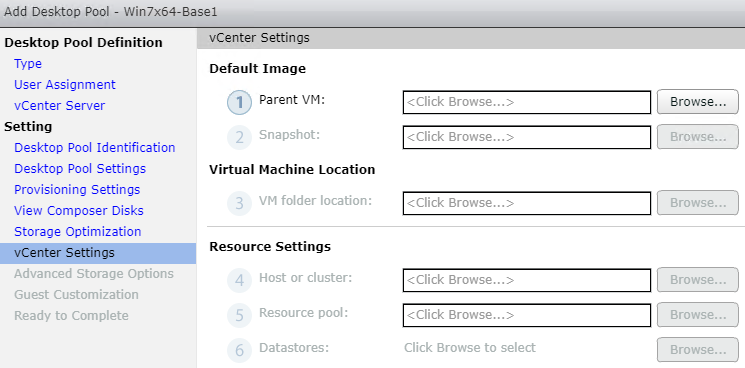
- In the Setting | vCenter Settings window, we will need to configure six different options that include selecting the parent virtual machine, which snapshot of that virtual machine to use, what vCenter folder to place the desktops in, what vSphere cluster and resource pool to deploy the desktops to, and what data stores to use. Click on the Browse... button next to the Parent VM: field to begin the process and open the Select Parent VM window:
- In the Select Parent VM window, highlight the virtual desktop master image that you wish to deploy desktops from, as shown in the following screenshot. Click on OK when the image is selected to return to the previous window:

- In the Setting | vCenter Settings window, click on the Browse... button next to the Snapshot: field to open the Select default image window. Select the desired snapshot, as shown in the following screenshot, and click on OK to return to the previous window:

- In the Setting | vCenter Settings window, click on the Browse... button next to the VM folder location: field to open the VM Folder Location window, as shown in the following screenshot. Select the folder within vCenter where you want the desktop virtual machines to be placed, and click on OK to return to the previous window:

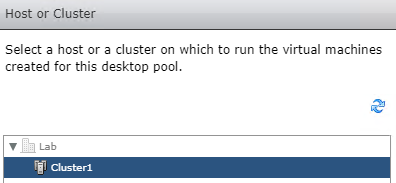
- In the Setting | vCenter Settings window, click on the Browse... button next to the Host or cluster: field to open the Host or Cluster window, as shown in the following screenshot. Select the cluster or individual ESXi server within vCenter where you want the desktop virtual machines to be created, and click on OK to return to the previous window:
- In the Setting | vCenter Settings window, click on the Browse... button next to the Resource pool: field to open the Resource Pool window, as shown in the following screenshot. If you intend to place the desktops within a resource pool, you would select that here; if not, select the same cluster or ESXi server you chose in the previous step. Once finished, click on OK to return to the previous window:

- In the Setting | vCenter Settings window, click on the Browse... button next to the Datastores: field to open the Select Linked Clone Datastores window, as shown in the following screenshot. Select the datastore or datastores where you want the desktops to be created, their Storage Overcommit level, and then click on OK to return to the previous window:

- The Setting | vCenter Settings window should now have all options selected, enabling the Next > button. When finished, click on Next >.
- In the Setting | Advanced Storage Options window, if desired, select and configure the Use View Storage Accelerator and Other Options check boxes to enable those features. In our example, we have enabled both the Use View Storage Accelerator and Reclaim VM disk space options, and configured Blackout Times to ensure that these operations do not occur between 08:00 and 17:00 on weekdays. When finished, click on Next >:

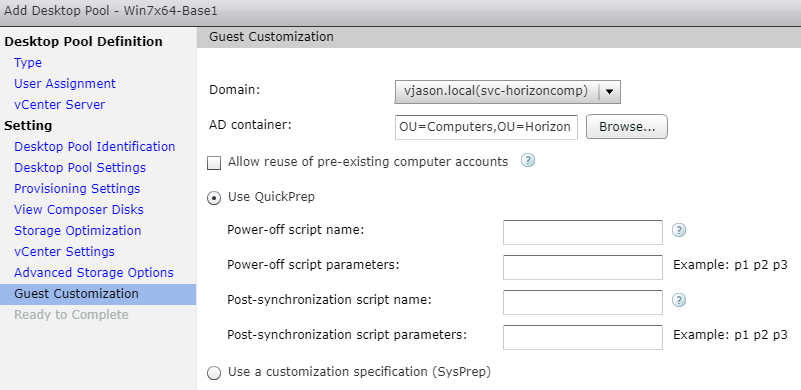
- In the Setting | Guest Customization window, select the Domain: where the desktops will be created, the AD container: (also known as Organizational Unit, or OU) where the computer accounts will be placed, whether to Use QuickPrep or Use a customization specification (Sysprep), and any other options as required. When finished, click on Next >:
- In the Setting | Ready to Complete window, verify that the settings we selected were correct, using the < Back button, if needed, to go back and make changes. If all the settings are correct, click on Finish to initiate the creation of the desktop pool.
The Horizon desktop pool and virtual desktops will now be created. To monitor the creation of the desktops, review the Monitoring the desktop creation process section of this chapter. Also located in this chapter is the Managing Horizon Desktop Pool Entitlements section, which outlines how to grant clients access to the desktop pools that we have created.
