You can add data to your application from many sources, such us Excel sheets, databases, and even Qlik DataMarket, which allows you to connect to external sources.
When you click on Add data within Data Manager, you will have a few options to choose from. In the examples, we use Qlik Sense Cloud; your screen may be different, depending on whether you use the Desktop, Enterprise, or Cloud version.
Allow us to briefly explain the Add data screen:

| 1 |
The New button [1] takes you back to the Add data main screen (as shown in the screenshot). |
| 2 |
File locations [2] will show you connections created by you or an administrator if you are in an Enterprise environment. Do not confuse a connection with a database connection. This is a file connection, meaning there's a link between your Qlik Sense application and a folder containing files. You can see the connections by clicking on the Attached files option. You can also add files directly from this location. Drag and drop! If you have created connections to data sources, this will show here too. Use this section mainly after you create your connections. The Data files option will show you all files loaded to your Cloud account. You can upload files to your account by clicking on My Data Files in your hub accessible through this URL: https://qlikcloud.com/hub/personal.
|
| 3 | Click on Qlik DataMarket [3] to choose from a variety of free and paid data sources. |
| 4 | Drag and drop files you want to upload here [4]! Choose from many formats such us Excel and QVDs. |
| 5 | Use this [5] to connect to sources such us databases, social media, and so on. Use this section to create brand new data connections that will then show in section 2. |
| 6 | When done choosing your source, click on Add Data [6] to add it to your application before loading it. |
Now, to get started, drag and drop the sample data file into the Attach files to this app section. TheCountryRevenue.xlsx source file consists of four sheets: Revenue, Time, Location, and Product. Once you drag and drop the file in the application, Qlik Sense will display a table wizard, similar to the one in QlikView.
Here, you can choose the sheets you want to load and the columns, update column names, and so on. It is simple and straightforward as shown in the following screenshot:

Make sure you select everything you want to load and then click on Add data to add the data to your application. The data will not be in the application until you reload it, but the Add data button allows you to preview what your tables and fields look like so you can make modifications in case you need to.
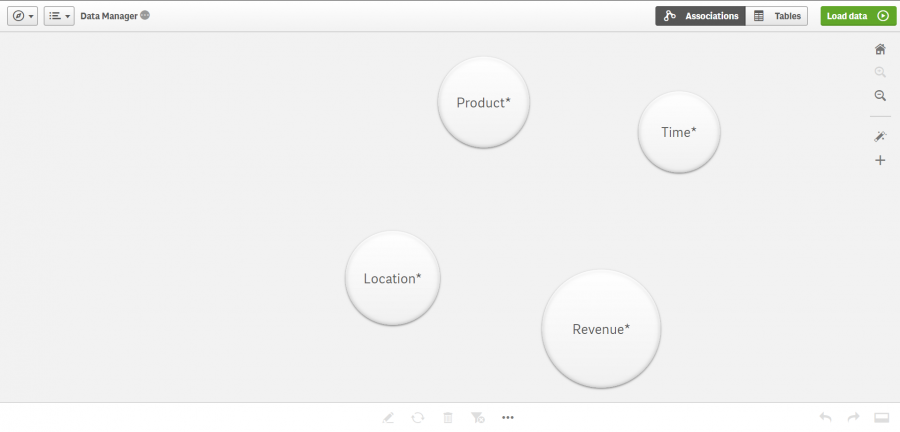
After adding the data, Data Manager will show the bubbles: one for Revenue, Time, Location, and Product. Each bubble has a different size depending on its data. The following image shows the different bubbles. The star (*) in each bubble name means the data is still to be loaded by clicking on the green Load data button:

Remember that Qlik Sense joins tables through a common field name. My data source does not have any field name in common, thus none of the bubbles will be connected.
