
This recipe is very simple and it will be designed using Open Office. We have worked in previous chapters with Spreadsheet and Drawing in Open Office, so it is time to work with Presentation (you could also use Microsoft Office).
It is time to look for an SVG graphic to insert in our presentation. As our baseline topic in this chapter is 2D and 3D Geometry, our SVG is to be with shapes. We can insert the stars designed in a previous recipe. In that case, we can combine the activities in our Moodle course. We can insert the graphic in the weekly outline section to introduce the topic, and we can now use the SVG graphic to design an activity. We can also render the drawing as we did in previous recipes, in that case, we do not want to use all of it.
Click on the Open Office icon to run the software. In this case, choose Presentation. Then, these are the steps that you have to follow in order to design the file:
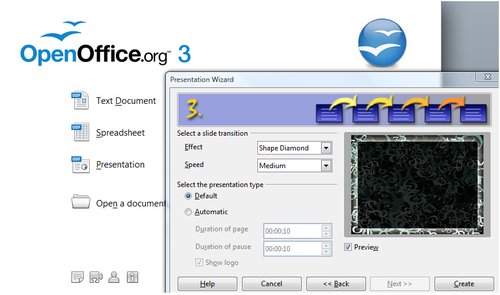
- When you click on Presentation, a pop-up window with the Presentation Wizard appears. Click on Next.
- Select a slide design, for example, Numbers on Dark Background to contrast with shapes, but keeping the Math idea.
- Click on Next.
- Select a slide transition, for example, Shape Diamond to keep the shapes idea.
- Click on Create, as shown in the following screenshot:
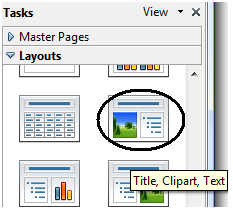
- It is time to create the presentation. On the right-hand margin, there appears a Layouts tab that you may choose in order to design the presentation. Choose the layout with a Title, Clipart, Text. When hovering the mouse on them, it says what you can insert, though it is quite clear, as shown in the following screenshot:
- Double-click on the chosen layout. Then, follow the instructions on the slide to complete it.
- Click to add title, write the title.
- Double-click to add graphics, browse for the SVG to insert, and click on Open.
- Click to add an outline. Write the outline. You may write it using bullets.
- Save the file. Click on File | Save as ... | write a name for the file | click on Save.
After designing the presentation and saving it, we can upload it to our Moodle course. It is the introduction to an activity, therefore, we can add a resource to our course. So, choose the weekly outline section where you want to add the resource and follow these steps:
- Click on Add a resource | File.
- Complete the Name and Description blocks.
- Click on Add | Upload a file | Browse and look for the file to be uploaded.
- Click on Open | Upload this file.
- Within Options, click on the downwards arrow in Display and choose Embed.
- Click on Save and return to course.
- When students click on the activity, it looks as shown in the following screenshot:
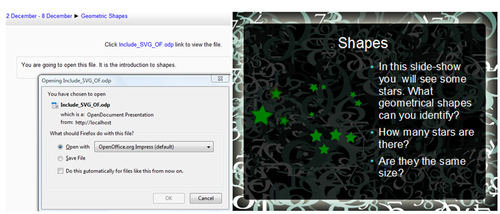
The screenshot on the left shows what students see before opening the file. The screenshot on the right shows the presentation that we have created using Open Office, in which we included SVG.