
Creating Your Own Personal Monitoring Mix
After trying out the various monitoring services, you can create a mix of services to import into your WordPress Dashboard. You import the results of these monitoring services by leveraging RSS (Really Simple Syndication). You can combine different single RSS feeds into one RSS feed and create an organized setup for all the information you have to manage. For example if you have various RSS feeds from different sources around the keywords “cookies” you can combine them all into one RSS feed. Or if you want to combine various feeds based off sources, like all your Twitter RSS feeds, you can do that as well.
Look for the orange RSS icon that's usually found in the URL bar of your browser. Additionally, some sites offer an RSS export on the right sidebar or in the search bar for the site. Grab the address of all these feeds by clicking on the feed name and copying the feed URL from the browser.
For each search that you do on a monitoring service, you need to log the feed address. To make recording these addresses easy, open a spreadsheet or a document into which you can paste the various feeds. You can collect them in one place before you begin to splice them together (which we talk about in the following sections). Think of it as a holding area.
Grouping your monitoring results
After you copy the locations for all your RSS feeds in one document, you need to group those RSS feeds together. After you group these feeds, you splice them together to make one master feed per grouping (see the following section). Grouping your RSS feeds keeps your monitoring system nice and tidy, and allows you to more easily set up the WordPress Dashboard. Reorder the spreadsheet or Word document that you created into categories. You can import feeds into your WordPress Dashboard, so you can monitor what you want. If you're tracking a variety of keywords, you may want to put your feeds into groups. For example, Wendy's Restaurants could make these keyword groupings:
- Grouping 1: Your brand, products, and other information around your company
- • Wendy's (the company name)
- • Frosties (a prominent product name)
- • Dave Thomas (a prominent person in the company)
- Grouping 2: Competitors
- • McDonald's
- • Burger King
- • In-N-Out
- Grouping 3: Keyword-based searches (Burgers)
- • Hamburgers
- • Cheeseburgers
- Grouping 4: Keyword-based searches (Fast Food)
- • Fast food
- • Drive thru
- Grouping 5: Keyword-based searches (Chicken)
- • Chicken sandwiches
- • Chicken salad
- • Chicken nuggets
In each of these groups, you place your Google Alerts feed, Twingly feed, and whatever other feeds you feel will provide information about that subject area. You can blend each group of feeds together into one master feed for that group and bring them into WordPress. Remember, WordPress limits you to five groups total. Any more than five groups slows down the Dashboard and is more than WordPress really can handle.
Grouping all these various feeds together gives you the most complete monitoring solution by covering multiple monitoring tools and blending them together. You get more coverage of your brand or blog than you would by just using Google Alerts, but on the downside, you may see some duplicates because of overlaps between the different services.
If you feel overwhelmed by duplicate search results, you can blend one feed that covers only your brand, or simplify setting up your monitoring even more and avoid blending the feeds by keeping one feed for each item. For example:
- General overview: Google Alerts or Social Mention
- Message boards: Board Reader
- Microblogging: Twitter Search
Cleaning and combining your feeds
If you decide to blend your feeds together, you need to fine-tune them, and then splice them together. First, clean up the feeds to make them a little more targeted by using FeedRinse (www.feedrinse.com). To combine the cleaned feeds file, use xFruits (www.xfruits.com) to turn the file into a feed that you can bring into WordPress.
To clean your feeds by using FeedRinse and then combine it by using xFruits, follow these steps:
- Go to www.feedrinse.com.
If you don't have an account, you need to set one up by clicking the Sign Up link on the FeedRinse home page. It takes just a few seconds and allows you to come back to edit these feed splices later. (See Figure 2-2.) After you sign up, remember to sign into FeedRinse in order to save your results.
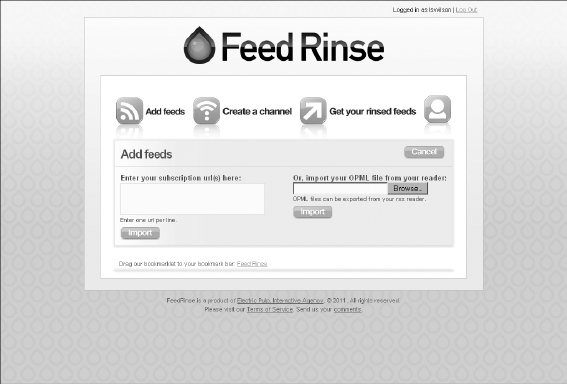
- Click Add Feeds.
A screen appears where you can bring in your feeds individually or by an OPML file. For our example, you bring in feeds individually, copy and paste the feed locations from the document you created of groups of feeds (see the preceding section). If you imported feeds into a feed reader such as Google Reader, you can import the entire OPML file to FeedRinse. (See Figure 2-3.)
Figure 2-2: The FeedRinse sign-up form.
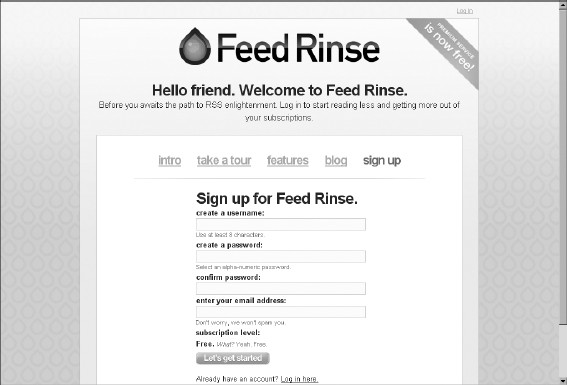
Figure 2-3: Adding feeds to FeedRinse.
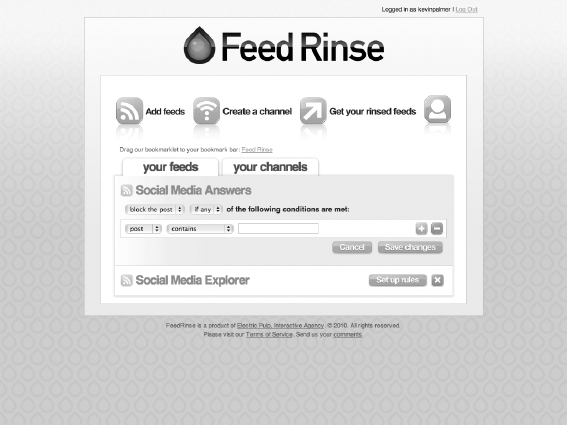
- Edit the contents of your feed.
If you didn't use Boolean search methods to narrow down the contents of your feed (which we suggest you do in the section “Exploring Different Listening Tools,” earlier in this chapter) or you're still picking up terms in your results that don't relate to what you want to target, you can use the editing capabilities in FeedRinse to narrow down the contents of the feeds. Using FeedRinse editing really gives you a laser-focused feed. For each feed you import to FeedRinse, you can include or exclude posts based on the presence of selected keywords. If you want to monitor Caesars Palace in Las Vegas, for example, you can exclude all posts that mention Atlantic City or other locations. (See Figure 2-4)
- Click the Create a Channel icon. This will take you to a screen where you can name your feed.
- Enter a name for your channel in the Give Your Channel a Name text box to keep track of it in the FeedRinse system.
After you enter a name for your channel, a drop-down list box appears with a plus-sign icon on the right.
- From the drop-down list, select the feed that you want to include in this channel, and then add it to the channel by clicking the plus-sign icon.
- Repeat Step 6 to add all the feeds that you want. There is no limit to the number of feeds you can create.
- After you add all the feeds to your channel, click the Save Changes button (see Figure 2-5).
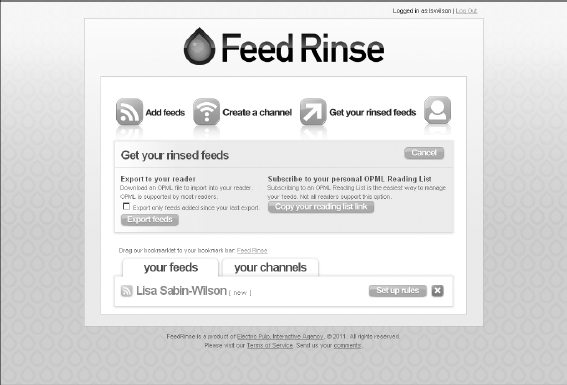
- Export your newly rinsed feed by clicking the Get Your Rinsed Feeds link, and then click the Copy Your Reading List Link button (see Figure 2-6).
Clicking this button combines the URLs of the new feeds before you import them into WordPress.
- Go to www.xfruits.com.
- Click the Sign In link in the upper-right corner of the screen.
The Sign In page appears. If you don't have an account with xFruits, you need to sign up for one, which you can do on this page.
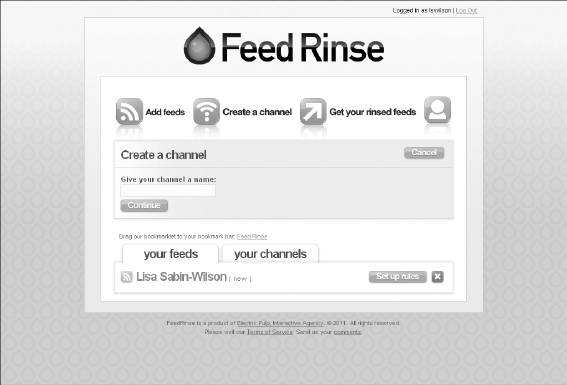
Figure 2-6: Export your feeds.
- Fill in the appropriate text boxes and click the Sign Up or Sign In button.
A menu page appears, showing all the different xFruits RSS and OPML services.
- Choose the Aggregator RSS option.
- Paste the URL that you copied in Step 9 into a Feed or OPML text box.
- Enter a title for your feed in the Title text box.
- (Optional) If you want make your feed public, add tags to it by typing them into the Tags text box.
When you make your feed public, other users can find it and use it.
- After you complete all the settings, click Aggregate My Feeds (see Figure 2-7).
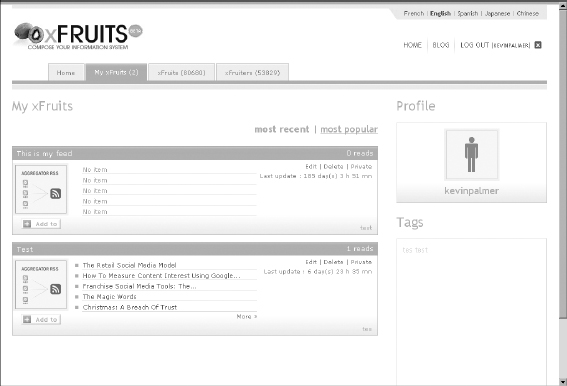
Your feeds are now rinsed, exported to an OPML file, and combined into one RSS feed. The My xFruits screen appears, where it displays various feed combinations you've created. (See Figure 2-8.)
Figure 2-7: Turning your FeedRinse file into RSS.
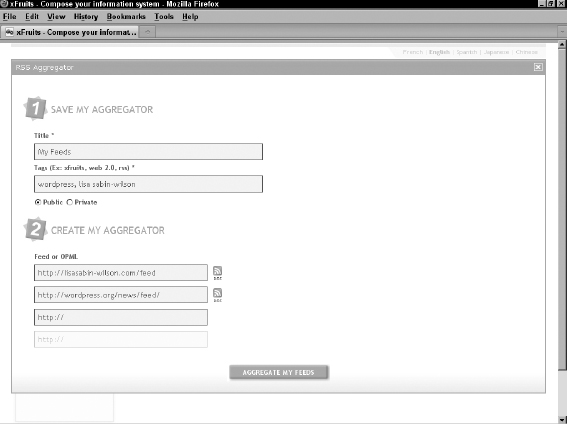
Figure 2-8: Configuring your file export.
- Click the Aggregator RSS image, which is to the left of the list of latest blog posts for this section.
This takes you to your new feed.
- Copy the URL in the Web browser and save it to a list to import to WordPress in the next step.
That's the URL of your new feed! (See Figure 2-9.)
Figure 2-9: Grabbing the RSS file from xFruits.com.

- Repeat Steps 2 through 20 if you're setting up multiple feed groupings.
For example, you might create one grouping about your competitors or different groupings based on different keywords.
Now that you have your feeds set up, you can bring them into the WordPress Dashboard.