
Customizing the Header Image
Another great feature in Twenty Ten is the header uploader, which allows you to upload new and unique custom header graphics for your WordPress site. Twenty Ten comes preloaded with eight default header images. To install one, follow these steps:
- On the WordPress Dashboard, choose Appearance
 Header.
On the Custom Header page, the settings for the header image feature appear.
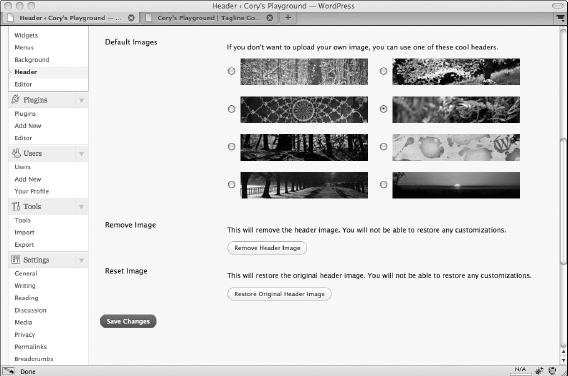
- Scroll to the Default Images section, which shows the available header images.
- Select the radio button next to the header image you like.
- Click the Save Changes button.
Figure 1-5 shows the default header images.
Figure 1-5: The Twenty Ten theme's default header images.
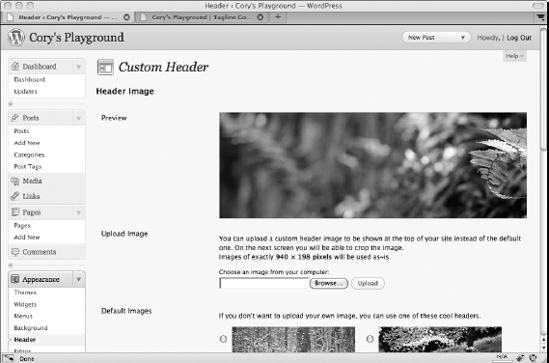
Although the default header images are acceptable, you most likely will want something unique for your blog. The uploader allows you to choose a custom header image easily. Just follow these steps:
- On the WordPress Dashboard, choose AppearanceHeader.
The Custom Header page loads in your browser window.
- Scroll to the Upload Image section shown in Figure 1-6.
Figure 1-6: Twenty Ten's header uploader.
- Click the Choose File button.
A window pops up asking you to select an image from your computer's hard drive.
- Select the image you want to use.
- Click the Open button.
- Click the Upload button.
Your image uploads to your Web server and the Crop Header Image page appears.
- Use the image crop tool to resize your header image.
To resize and crop your image, drag one of the eight boxes located at the corners and the middle of each side of the image. You can also click within the image and move the entire image up or down to get the optimal placement and cropping effect that you want.
 The Twenty Ten theme's default header size is 940 x 198 pixels. Generally, uploading a new header image already cropped in an image-editing program to that exact size is best. However, if your image is larger, you can use the built-in cropping feature to fit the image in the default space after you upload the header, as shown in Figure 1-7.
Figure 1-7: Cropping the header image in the Twenty Ten theme.
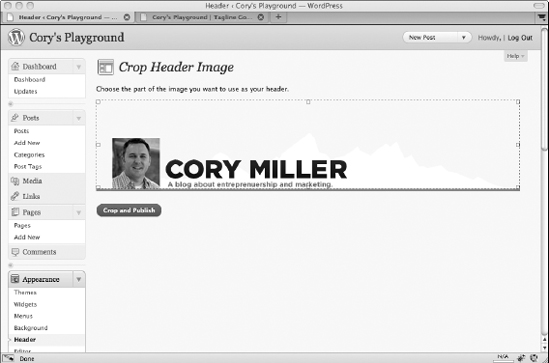
- Click the Crop and Publish button.
This loads the Custom Header page in the Dashboard and displays your new header image.
- Click the Save Changes button.
This saves the changes you made to the header image and publishes it to your site.