Including Custom Navigation Menus
Navigational menus are vital parts of your site's design. They tell your site visitors where to go and how to access important information or areas on your site. The Menus feature released in WordPress 3.0 was an extremely significant addition to the already powerful software that allowed greater control over the navigational areas.
Similar to the way the drag-and-drop WordPress Widgets feature enables users to tweak areas of their sites without having to know a lot of code, the new Menus feature offers an easy way to add and reorder a variety of navigational links to your site, as well as create secondary menu bars (if your theme offers multiple menu areas).
Additionally, the Menus feature improved WordPress further by allowing users to easily create more traditional Web sites, which sometimes need multiple and more diverse navigational areas than a typical blog layout uses or needs.
Twenty Ten comes with the appropriate code in the navigation menus that make use of this robust feature. (By default, Twenty Ten offers only one menu navigation area to include a custom menu.)
To create a new navigation menu in Twenty Ten, follow these steps:
- In the WordPress Dashboard, click Appearance
 Menus.
The Menus page loads in your Dashboard.
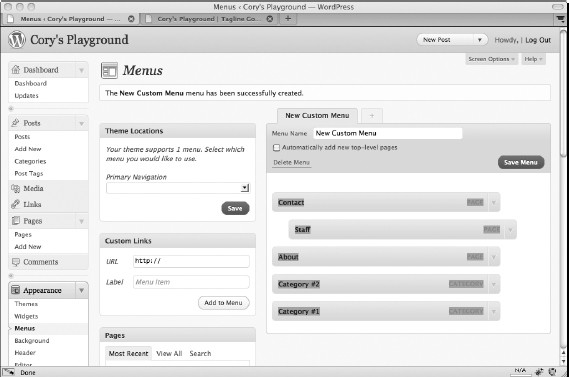
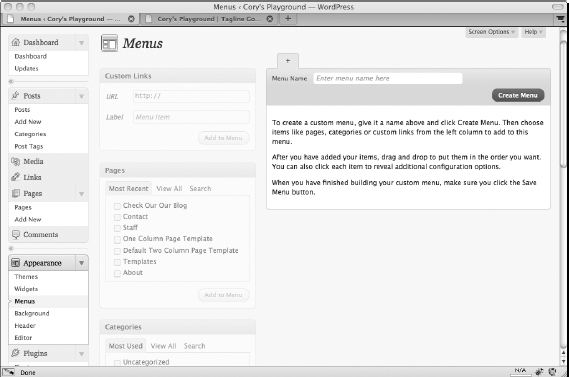
- Enter a menu name in the Menu Name field and then click Create Menu, as shown in Figure 1-11.
After you create your new custom menu, the gray modules to the left become active for you to add new links to your custom menu.
- In the Theme Locations module, choose your new menu from the Primary Navigation drop-down menu and click Save.
This activates your new menu in the theme for display on your site. As noted in the Theme Locations module, the Twenty Ten theme supports only one custom menu, defined as Primary Navigation.
Figure 1-11: The WordPress Menus page.
- Add menu items, such as custom links, pages, and categories, to your new menu.
Items you can add to your menu include the following:
- Pages: To include existing pages in your menu, scroll to the Pages module (shown in Figure 1-12) and click the pages you want to include. After you do that, click Add to Menu and then click Save Menu.
- Categories: To include existing categories in your menu, scroll to the Categories module (shown in Figure 1-12) and click the categories you want to include. After you do that, click Add to Menu and then click Save Menu.
- Custom Links: You can add links to sites that exist outside your Web site, such as your Twitter or Facebook profile pages. Scroll to the Custom Links module (shown in Figure 1-13). In the URL field, type the Web address you want to direct people to. In the Label field, add the word or phrase the menu displays for people to click. Then click Save to Menu.
- Click Save Menu to add your custom menu to your theme.
Be sure to click Save Menu after you make any significant change to your custom menu, such as reordering or adding new menu items so they are reflected on your site.
Figure 1-12: Selecting categories to add to the custom menu.
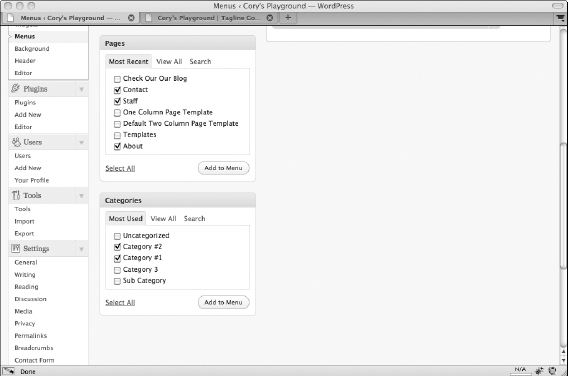
Figure 1-13: Adding links to a custom menu.
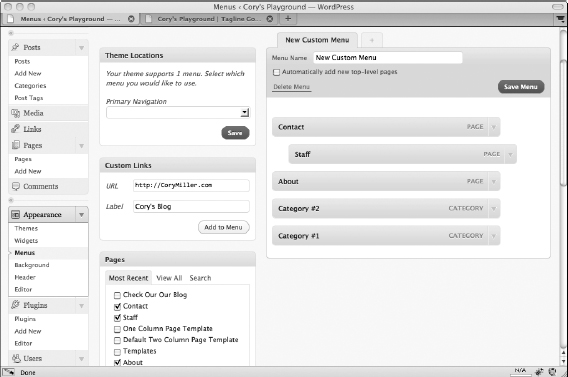
After you save your navigation menu, you can use the drag-and-drop interface to rearrange your menu, as shown in Figure 1-14. Additionally, you can create subpages under top-level menu items by moving menu items slightly to the right beneath the top-level menu items. Not cluttering up the navigation bar and organizing content logically can be handy for sites with lots of page content.
You can also create multiple custom menus and add them to your theme through widget areas by using the Custom Menu widget, navigation areas if your theme supports multiple menu areas, or additional menu areas by inserting the WordPress template tag directly into your theme's template files.
Figure 1-14: The drag-and-drop interface of the WordPress Menus feature.