
To build a new Android app, there are some steps you will always have to follow:
- The first thing you need to do is select the platform. For that, click on File|Build Settings.
- Click on Add Open Scenes to add our current scene to the (empty) list of scenes that will be built in the app.
- Under Platform, select Android and click on Switch Platform. Wait until Unity recompiles the resources for the selected platform:

The Build Settings window with the current scene added and the Android platform selected
- Then, click on Player Settings... to configure the app settings. In the pop-up window, we are going to change a few things for the time being:
- Company Name: Banana
- Product Name: AR Catalogue
These names are the same ones we used in the generation of the EasyAR key code.
The following image shows the Project Settings window with the newly added Company Name and Product Name fields:

Filling in the company and product names in Project Settings
- Then, on Other Settings|Identification, set the following:
- Package name: com.banana.arcatalogue (make sure it matches the name from the EasyAR key generation, otherwise the app will launch an error on its initialization saying the package name doesn't match the key)
- Version: 1.0
- Minimum API Level: Android 5.0 'Lollipop' (API level 21)
- Target API Level: Automatic (highest installed):
According to EasyAR's documentation, the SDK is compatible with Android 4.2 and above, but for performance reasons, and in order to have a fluid AR experience on users' devices, we recommend setting the minimum API level to 5.0.

Identification section inside the Other Settings tab
- In case you have Android SDK installed outside Unity, before opening the Player Settings, Unity will most likely tell you it found an Android SDK and whether you want to use it. If that's the case, click Yes:
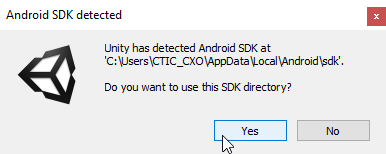
Using the installed SDK if we already have it installed
- Close the Player Settings window, connect your mobile device to the computer with a USB cable, and make sure your device has USB debugging activated in order to deploy the app directly into it from Unity. To activate this option, the general steps are as follows:
- Enable Developer Mode by going to Settings|About Device.
- Then, tap seven times on the build number until a notification appears stating that the Developer Options are available.
- Go to the Developer Options and activate USB Debugging to allow the computer to install and start the app on it.
Important! As we mentioned earlier, these steps are general. If you have any doubts, please try to find the specific case for your device as the names of the options may vary from one manufacturer to another.
- Now, click on Build And Run in the Build Settings window, call your APK arcatalogue.apk, and hit Save. Unity will immediately start the compilation by looking for the Android SDK (if it doesn't detect it, it will ask you to select the folder where it's installed) and searching for a suitable device (if the device isn't plugged in correctly or USB Debugging isn't activated, it will tell you it can't find the device). Then, it will start the building process until it copies the APK into the device and launches it.
- Once the app has launched, point the camera to the target in order to see the cube:
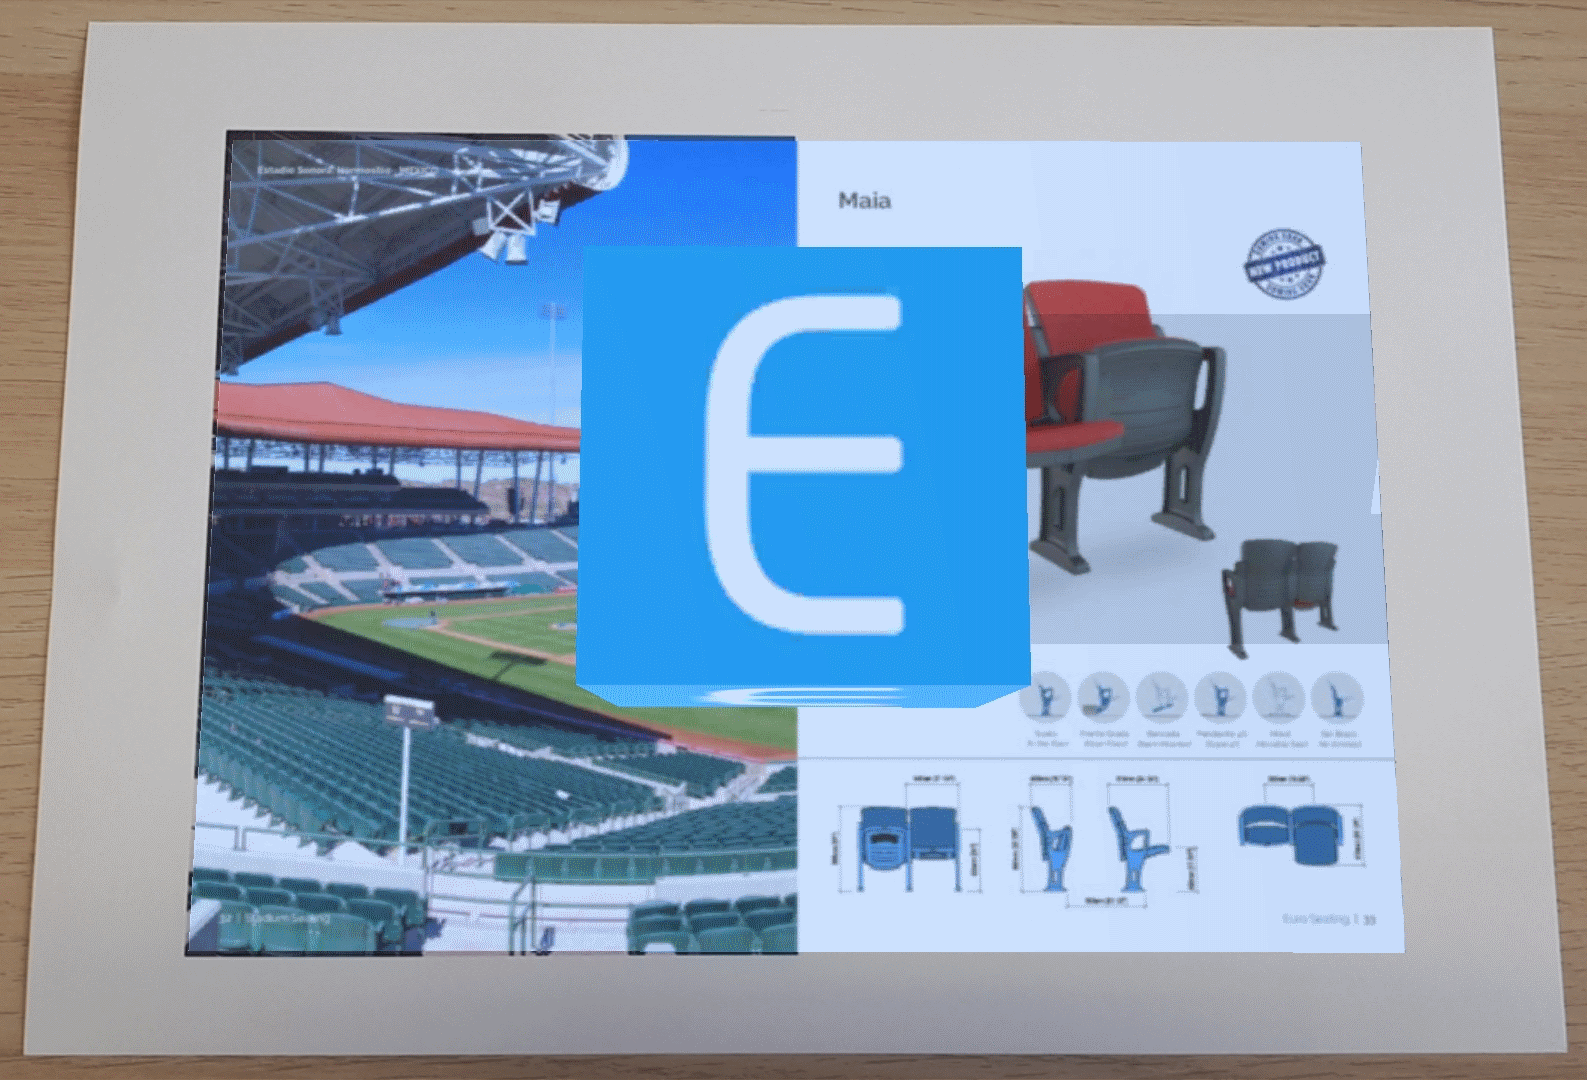
Screenshot of the cube over the target on a mobile device
If for any reason, you don't want/can't build the APK into the mobile device, you can use Build instead of Build And Run to create the APK without installing it.
When the compilation process finishes, you will have to manually copy the resulting APK into your device and install it.
When the compilation process finishes, you will have to manually copy the resulting APK into your device and install it.
Note: This process is for Android devices only. To compile the app on an iOS device, you have to build and run the Unity project from an Apple computer and, when the building process finishes, it will automatically launch Xcode where the building will end up (you will have to assign your Apple ID in order to play the app on an iOS device, just like you need to with any other iOS app developed in Xcode).
In this section, you have learned how to use EasyAR to detect an image and display a virtual cube on it. Now, we will substitute the test cube for an external 3D model we will import into our project.