
We are going to install Unity using the Unity Hub, a tool that allows us to install and manage different versions of Unity on our computer. You can download the Unity Hub from https://unity3d.com/get-unity/download.
Follow these steps to install Unity:
- Download and install the Unity Hub.
- Run the Unity Hub. The first time you do this, it will notify you that the license is missing, as shown in the following screenshot. Click on MANAGE LICENSE:

No valid license message
- In the License window, another message will appear, asking you to log in in order to add a license. Click on LOGIN:

LOGIN message in the License window
- A pop-up window will appear, asking for your Email and Password. If you don't have an account, you can create one by clicking on create one. You can also Sign in with google or Sign in with facebook:

Signing into Unity
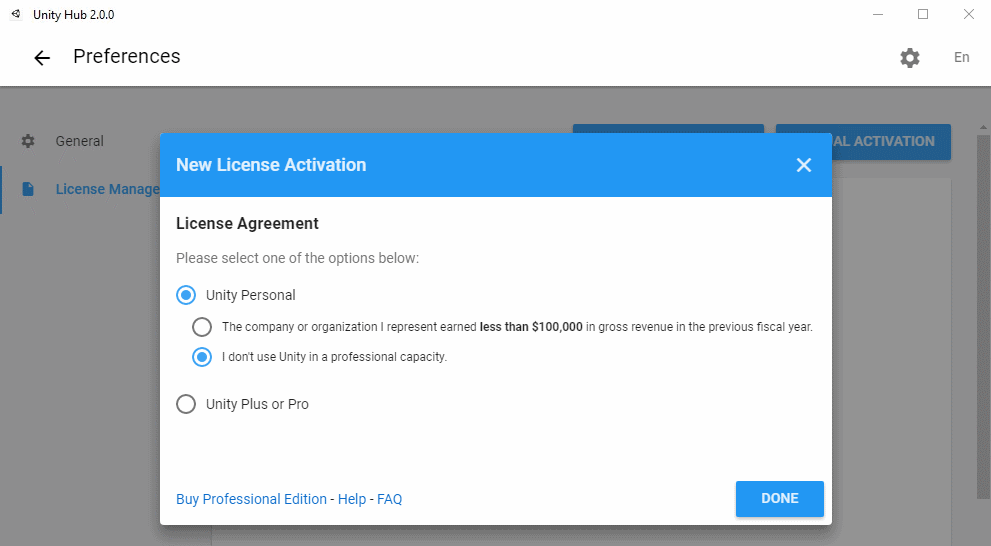
- Now, select one of the license options and click DONE. (You can use Unity for free with the Personal license if you meet the requirements. If you don't, you have to purchase Unity Plus or Pro on their web page (https://store.unity.com):
Selecting a license for the product
- Now, go back, click on the Installs tab, and then on ADD to add a new Unity installation:

Adding a new Unity version
- In the pop-up window that appears, select the Unity Version you want to install and the modules to add. In our case, we're using the 2019.1.2f1 version and we will install Microsoft Visual Studio Community 2017 to code and Android Build Support and Android SDK & NDK Tools to develop in Android, as shown in the following screenshot:

Choosing the Unity version and modules
Unity Hub always shows the latest compilation of each version. If you want to install a specific version, such as the one we are using here, you can find it and install it through the Hub from the Unity Archive: https://unity3d.com/es/get-unity/download/archive.
Starting with Unity 2019.2, a new option appears under Android Build Support so that you can directly install OpenJDK.
- If you plan to develop with Vuforia, which is what we will do in Chapter 6, AR for Retail with Vuforia, and Chapter 7, AR for Automation with Vuforia and Epson Glasses, check the Vuforia Augmented Reality Support option shown in the following screenshot. Then, click NEXT and finish the installation:

Selecting Vuforia Augmented Reality Support
Most recent versions of Unity might not always support Vuforia. If you don't see Vuforia on the list, don't panic! It is because the latest version of Unity doesn't support it yet and an older version should be installed that supports Vuforia
- When you've finished the installation, you will be sent back to the Installs window, where you will see the new version and the installed modules, as shown in the following screenshot:
Installs window with the new Unity version
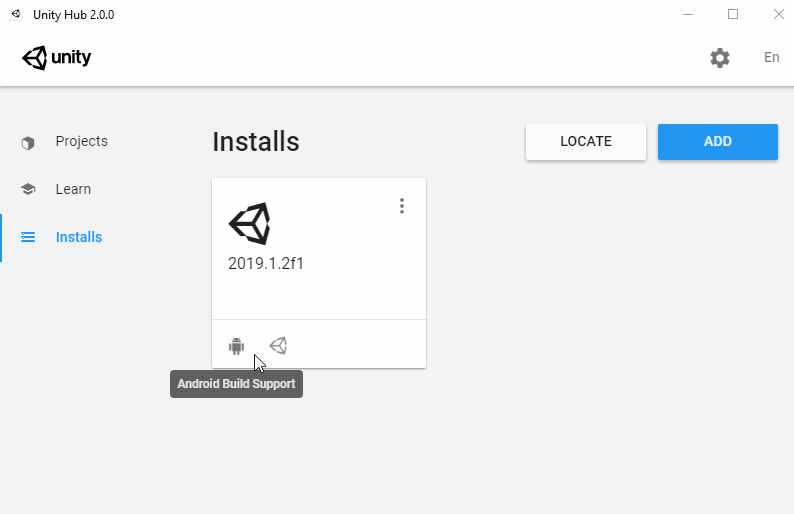
- If during the installation process you forgot to add a module or you want to add it at a later date, you only have to click on the three dots button in the top right corner and select Add Modules, as follows:

Adding a new module after finishing the installation
- Now, click on the Projects tab. Here, we will create a new project by pressing on the NEW button, as follows:

Creating a new project
- We will create a 3D project (already selected). In the Settings panel, give the project a Name and set a Location, as shown in the following screenshot. Then, click on CREATE:
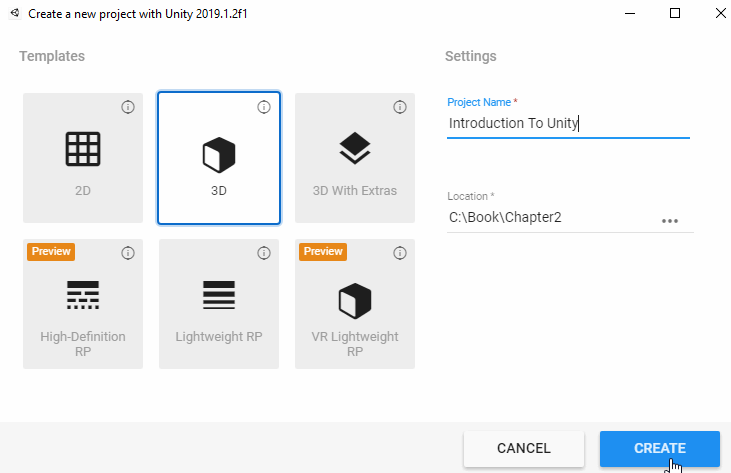
Setting up the new Unity project
- Unity will now open the new project and you can start working with it. If you close the Unity window, you can reopen the project by selecting it from Unity Hub's Projects window, as shown in the following screenshot:

The new project appears in the Projects window
And that's it. Now, you have installed Unity on your computer and your first project is open so that you can start working with it. In the next section, we will provide a tour of the Unity interface in order to see the possibilities Unity offers and how to use each tool.