
Once we have the basic app ready, there are some things we can do to improve the overall working of the app:
- Make the screen orientation fixed. If we leave it in auto-rotation mode, rotating the screen will cause the phone to lose the anchor and the model will disappear from the screen.
- So far, we have seen that, for each screen tap, a new model appears. Since we are using the app for prototyping, the idea is that only one model is shown.
- We will also change the rotation and size of the model so that it's displayed better in the scene.
Let's change the code to add these features. For that, follow these steps:
- Force the screen orientation so that it's in portrait mode by adding AndroidManifest.xml inside <application> and <activity>:
<activity android:name=".MainActivity" android:screenOrientation="portrait">
This way, the screen will always be in portrait mode and won't autorotate and lose the anchor, even if the user rotates the phone by mistake.
- If you are using a tablet or prefer to see the scene in landscape mode, change this to the following:
<activity android:name=".MainActivity" android:screenOrientation="landscape">
- To display only one model for each tap on the screen, open MainActivity.java and create the following variables after the ArFragment and ModelRenderable variables:
private Anchor anchor;
private AnchorNode anchorNode;
private TransformableNode model;
- Then, inside setOnTapArPlaneListener(), add the following lines after the modelRenderable = null check and before creating a new anchor, so that the previous one is released:
protected void onCreate(Bundle savedInstanceState) {
    ...
    arFragment.setOnTapArPlaneListener(
            (HitResult hitResult, Plane plane, MotionEvent motionEvent) -> {
                if (modelRenderable == null)
                    return;

                //Remove previous anchor
                if (anchor != null)
                {
                    arFragment.getArSceneView().getScene().removeChild(anchorNode);
                    anchor.detach();
                    anchorNode.setParent(null);
                    anchorNode = null;
                }
This way, when the users tap on different places of the screen, the model will move from one place to the next one, instead of appearing duplicated in each one.
- Now, remove the definition part of the Anchor, AnchorNode, and TransformableNode from the lines that follow, so that they make reference to the global variables:
anchor = hitResult.createAnchor();
anchorNode = new AnchorNode(anchor);
...
model = new TransformableNode(arFragment.getTransformationSystem());
- Finally, to rotate and scale the model, start by adding the following imports to the MainActivity.java file:
import com.google.ar.sceneform.math.Quaternion;
import com.google.ar.sceneform.math.Vector3;
- Inside the arFragment.setOnTapArPlaneListener() method, add the following code before setParent():
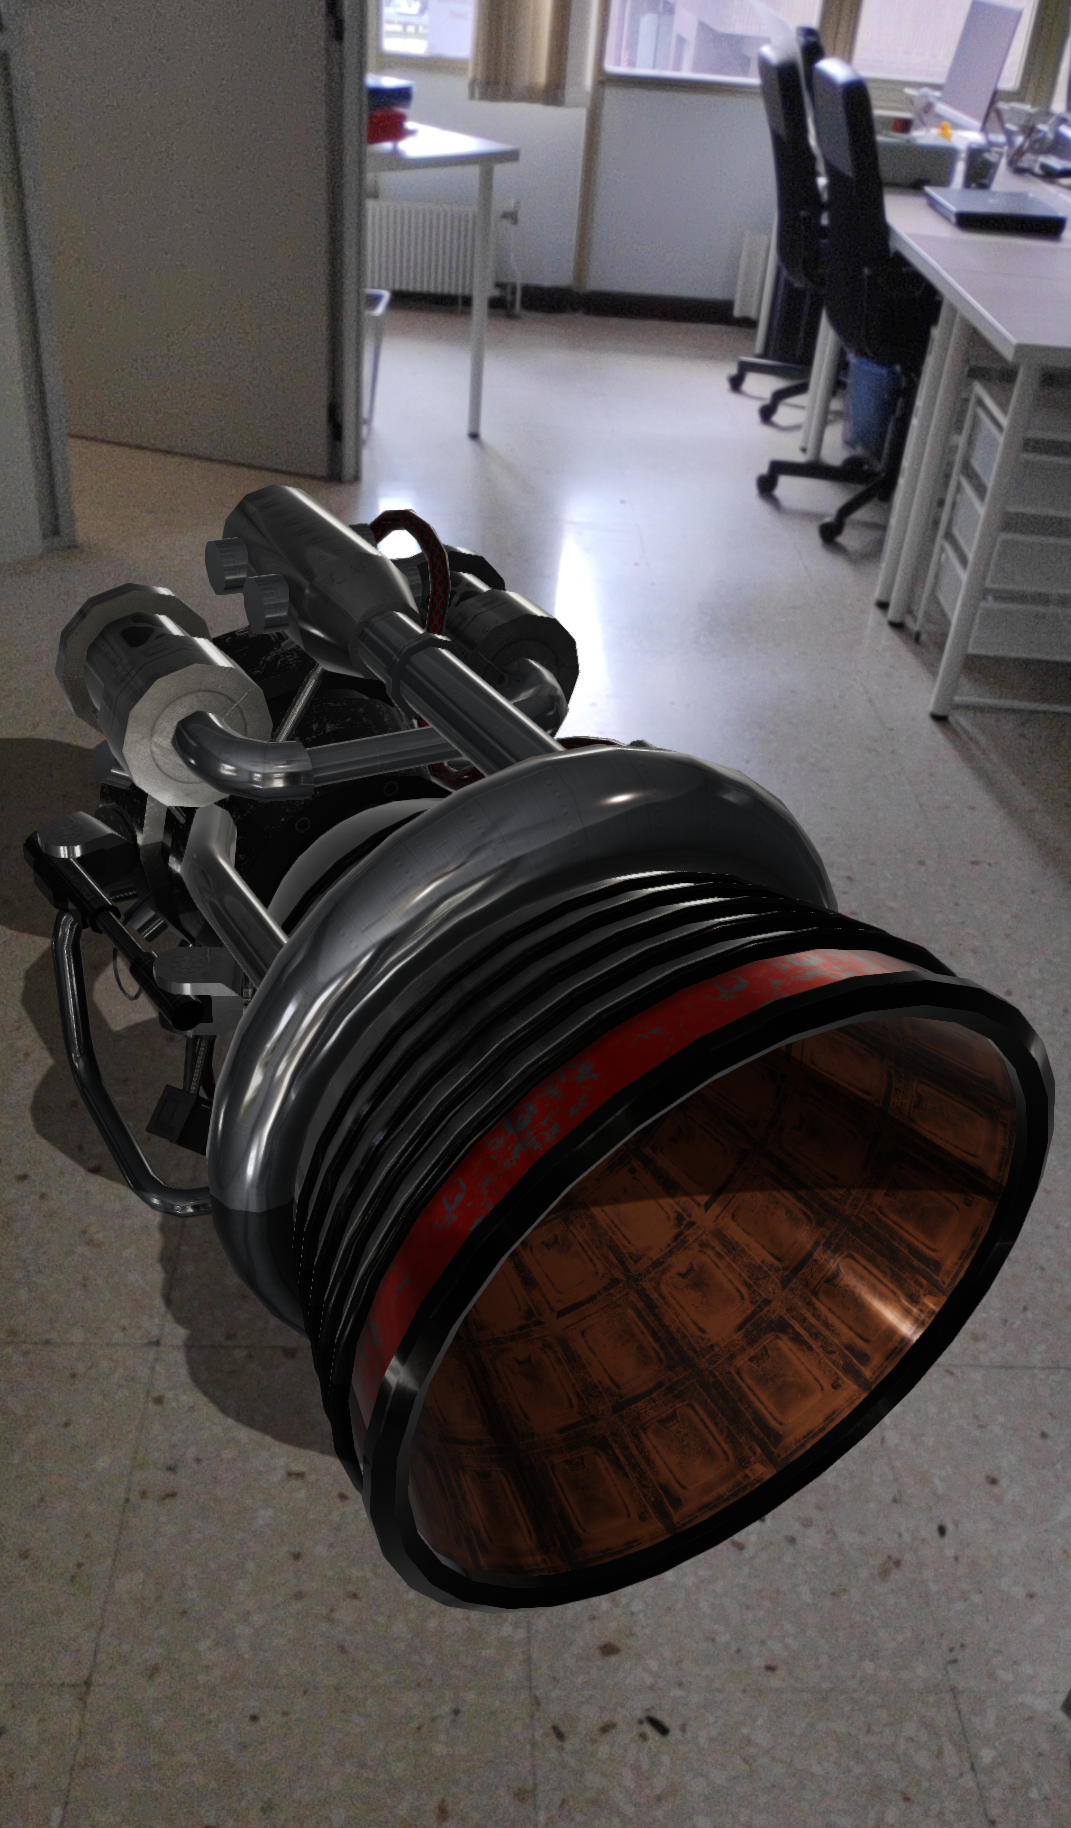
model.setLocalScale(new Vector3(0.55f, 0.55f, 0.55f));
model.setLocalRotation(Quaternion.eulerAngles(new Vector3(-90,45,0)));
With this, the model will appear lying down on one side so that we can see the inside of it. This can be seen in the following image:
Now that we have improved on the basics, let's add two more prototypes and a simple UI so that we can switch between them. Follow these steps to do so:
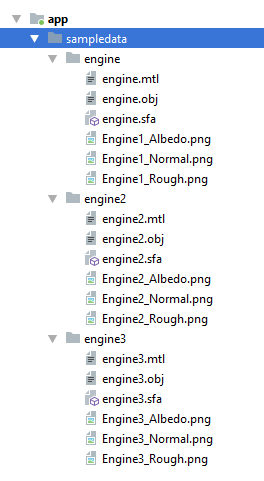
- From the resources folder of this project, copy the engine2 and engine3 folders into the sampledata folder.
- Right-click on each of the .obj files and select Import Sceneform Asset to create the .sfa and .sfb files. Your sampledata folder should now look like this:
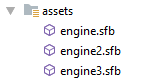
Your assets folder should have the three binary files for the models:
- From the resources folder of this project, copy the three images corresponding to each of the engines into the res|drawable folder:

- Open the activity_main.xml file located in res|layout in Text mode and add the following code:
<LinearLayout
    android:orientation="horizontal"
    android:paddingLeft="4dp"
    android:paddingTop="15dp"
    android:paddingRight="4dp"
    android:paddingBottom="1dp"
    android:layout_width="match_parent"
    android:layout_height="wrap_content"
    app:layout_constraintBottom_toBottomOf="@+id/ux_fragment">
Here, we're using layout_constraintBottom_toBottomOf to anchor it to the bottom of the screen.
- If you are in landscape mode, you will probably want to locate the buttons on the right-hand side of the screen so that you have more space to play around. Make the following changes to the preceding code to do so:
<LinearLayout
    android:orientation="vertical"
    ...
    android:layout_width="wrap_content"
    android:layout_height="match_parent"
    app:layout_constraintRight_toRightOf="@+id/ux_fragment">
- Now, add the three buttons:
<ImageButton
    android:id="@+id/engine1_button"
    android:layout_width="wrap_content"
 android:layout_height="wrap_content"
 android:layout_margin="10dp"
    android:src="@drawable/engine1"
    android:background="#7cc53a"
    android:layout_weight="1.0"/>

<ImageButton
    android:id="@+id/engine2_button"
    android:layout_width="wrap_content"
    android:layout_height="wrap_content"
    android:layout_margin="10dp"
    android:src="@drawable/engine2"
    android:background="#40000000"
    android:layout_weight="1.0" />

<ImageButton
    android:id="@+id/engine3_button"
    android:layout_width="wrap_content"
    android:layout_height="wrap_content"
    android:layout_margin="10dp"
    android:src="@drawable/engine3"
    android:background="#40000000"
    android:layout_weight="1.0" />
The first button has a green background (selected), while the other two have a semi-transparent background. Each of them has its corresponding image from res|drawable.
- Finally, add the closing tag for LinearLayout:
</LinearLayout>
- The preview should look similar to the following:

- By default, the Preview is in Portrait mode. To change it to Landscape click on the rotating phone icon and select Landscape:

- Open the MainActivity.java file again and add the following libraries:
import android.widget.ImageButton;
import android.view.View;
- Add three new modelRenderables below the preceding code:
private ModelRenderable modelRenderable2;
private ModelRenderable modelRenderable3;
private ModelRenderable currentRenderable;
We will use currentRenderable to find out which renderable is active every moment.
- Now, add three new image buttons at the end of the variables:
private ImageButton button1;
private ImageButton button2;
private ImageButton button3;
- Copy ModelRenderable.builder() and paste it twice to build the two new models.
- Change their Uri.parse calls to engine2.sfb and engine3.sfb, respectively.
- In the .thenAccept call, change the name of the renderables to the corresponding ones. The resulting code should look like this:
ModelRenderable.builder()
        .setSource(this, Uri.parse("engine2.sfb"))
        .build()
        .thenAccept(renderable -> modelRenderable2 = renderable)
        .exceptionally(
                throwable -> {
                    Toast toast = Toast.makeText(this, "Unable to load andy renderable", Toast.LENGTH_LONG);
                    toast.setGravity(Gravity.CENTER, 0, 0);
                    toast.show();
                    return null;
                });

ModelRenderable.builder()
        .setSource(this, Uri.parse("engine3.sfb"))
        .build()
        .thenAccept(renderable -> modelRenderable3 = renderable)
        .exceptionally(
                throwable -> {
                    Toast toast = Toast.makeText(this, "Unable to load andy renderable", Toast.LENGTH_LONG);
                    toast.setGravity(Gravity.CENTER, 0, 0);
                    toast.show();
                    return null;
                });
- In the first ModelRenderable.builder(), modify the .thenAccept call:
.thenAccept(renderable -> currentRenderable = modelRenderable = renderable)
Here, we're assigning currentRenderable to the first renderable. This way, the initial model that appears on the screen will be the first engine (remember that we have the first button highlighted as the selected one).
- Finally, in the setOnTapArListener() method, change modelRenderable to currentRenderable:
if (currentRenderable == null)
    return;
...
model.setRenderable(currentRenderable);
- To add the button's activities, we are going to make our MainActivity implement OnClickListener:
public class MainActivity extends AppCompatActivity implements View.OnClickListener
- This way, we can simplify our buttons initialization like so, at the bottom of the onCreate() method:
button1 = findViewById(R.id.engine1_button);
button2 = findViewById(R.id.engine2_button);
button3 = findViewById(R.id.engine3_button);

button1.setOnClickListener(this);
button2.setOnClickListener(this);
button3.setOnClickListener(this);
The first three lines initialize our buttons and the next three make a call (the same call in all three cases) when the user clicks on them.
- To receive these clicks, create the onClick() method:
@Override
public void onClick(View view)
{
    switch (view.getId()) {
        case R.id.engine1_button:
            currentRenderable = modelRenderable;
            button1.setBackgroundColor(0xFFA4FF50);
            button2.setBackgroundColor(0x40000000);
            button3.setBackgroundColor(0x40000000);
            break;
        case R.id.engine2_button:
            currentRenderable = modelRenderable2;
            button1.setBackgroundColor(0x40000000);
            button2.setBackgroundColor(0xFFA4FF50);
            button3.setBackgroundColor(0x40000000);
            break;
        case R.id.engine3_button:
            currentRenderable = modelRenderable3;
            button1.setBackgroundColor(0x40000000);
            button2.setBackgroundColor(0x40000000);
            button3.setBackgroundColor(0xFFA4FF50);
            break;
    }
    model.setRenderable(currentRenderable);
}
This method will assign a different modelRenderable to the currentRenderable and highlight its corresponding button, depending on which button has been pressed, after the onCreate(). The last line swaps the current visible model to the newly selected one.
- Run the app and try the three different engines. Just select one of the engines and place it on the floor or a desk. The following image shows the yellow engine on the floor:
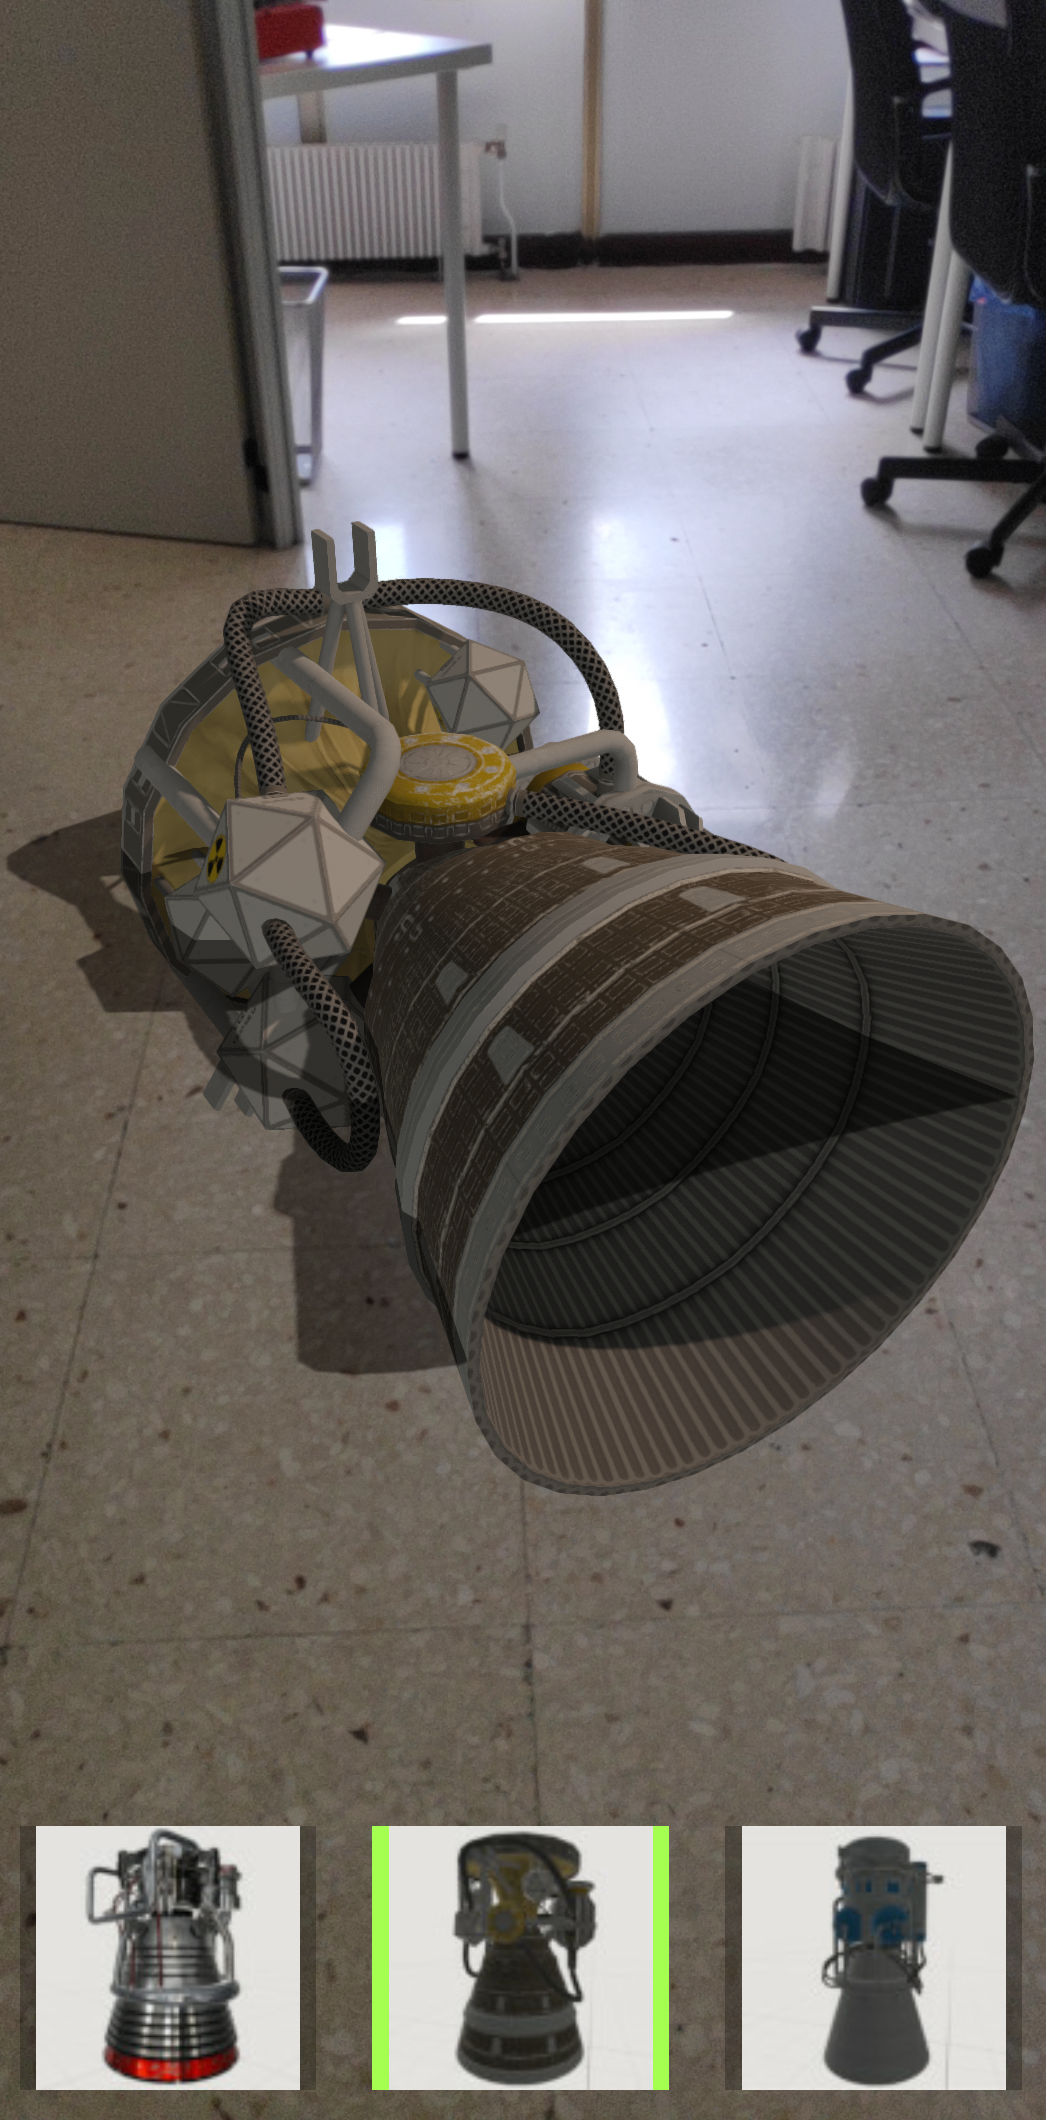
- To change the engine, just press another button and the current model will change. You can also find another spot and click on it to make it appear:

In this section, you have learned how to create a simple interface to change the models that appear in AR. With this, you now have the basic skills to go further and build more complex apps so that you can show and manipulate your own prototypes.