
Vuforia offers two different options when working with images:
- Device databases are groups of image targets that are created through the Vuforia Target Manager and then downloaded and included locally in the project.
- Cloud recognition makes reference to the hosting and managing of the image targets groups directly online.
For this project, we will be using the first option. Databases, also known as datasets in the SDK, are groups of targets. They help with the classification of large amounts of targets, as well as memory and CPU usage. Databases can be dynamically loaded/unloaded at runtime and all the targets inside a loaded database will be added to the AR search. At the time of writing this book, there is no hard limit to the number of targets inside a database, although Vuforia recommends no more than 1,000 for performance reasons.
To create our own database and targets, we will have to log into the Vuforia development portal and head to the Target Manager, as shown in the following steps:
- Go to the Target Manager page at https://developer.vuforia.com/vui/develop/databases.
- Log In or Register (if you don't have an account) to enter the page:
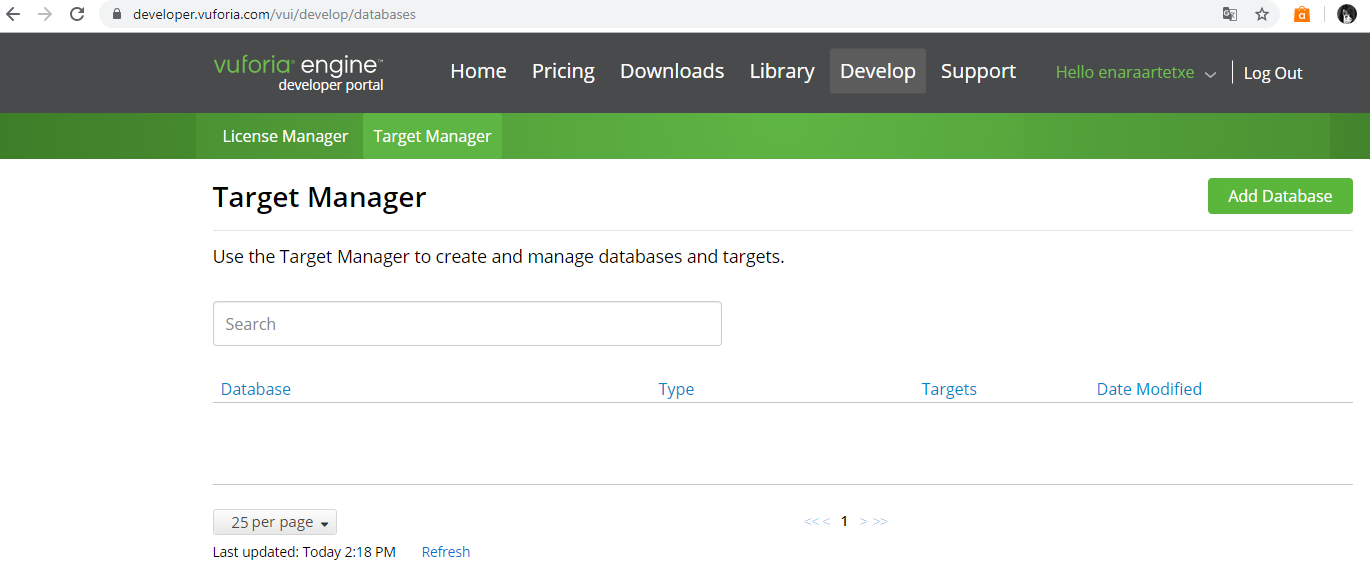
- Click on Add Database at the top right to create a new database. Because we will be using the Beetle images as targets, give the database the name Beetle:

- Now, click on the created database and click on Add Target.
- Click on the Browse button and select the Side.jpg image from the Targets folder of the project's resources. Once it's been uploaded, you will see that the Name field at the bottom will automatically be filled. Give it a Width value of 1 and click Add:

- The target will automatically be created, and next to it, you will see a number of stars, as depicted in the following screenshot. These stars indicate how recognizable the image will be by the AR software. Four or five stars are good targets.
- Repeat steps 4 and step 5 with the Back_closed.jpg and Back_open.jpg images and with the same Width of 1 so that all of them will have a similar scale in the Unity editor:

- Once the three targets have been created, click on Download Database (All), select Unity Editor, and click Download. It will download a Beetle.unitypackage file that we will import into the project.
- Double-click on the Beetle.unitypackage file to import it in Unity. You can also import it from the Unity editor by clicking on Assets|Import Package|Custom Package… and selecting the file:
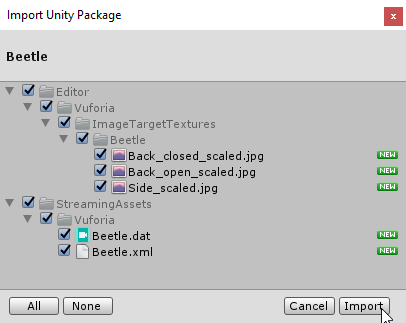
- This will add the database to a newly created StreamingAssets/Vuforia folder and the compressed images of the three targets to the Editor/Vuforia/ImageTargetTextures/Beetle folder.
Now that we have the database included in our project, we are going to add the three targets to the scene by following these steps:
- Right-click on the Hierarchy window and click on Vuforia Engine|Image. This will create an ImageTarget object in our scene:

- By default, the ARCamera and ImageTarget will be in the same position and nothing will appear on camera. Using the Rotation tab, rotate the camera by 90 in the X axis and move it upwards 3 units until the target is in view:

- Create the other two ImageTargets and move them until the three are in view. Name them Target_Side, Target_Close, and Target_Open so that you can differentiate between them:

- By default, the ImageTarget represents the first target found in the first database, sorted alphabetically. To change it, select the Target_Side in the Hierarchy window, and in the Inspector window, under the Image Target Behavior component, select its image. Do the same with Target_Open. If you want, scale the targets up/down using the scale tab and move them until they look similar and take up all the camera width for a better view:

We'll learn how to add test cubes in the next section.