
In the previous section, we learned how to create a simple AR app with EasyAR to display a cube. In this section, we are going to import our own 3D model into Unity to visualize over the target and play with its materials and textures.
For this project, we are going to work with fbx, an exported format that allows us to include materials, textures, and animations. To see a list of all the exported and native 3D formats Unity accepts, please visit https://docs.unity3d.com/Manual/3D-formats.html.
Before including the models in our project, we will make a few changes to our scene to improve it:
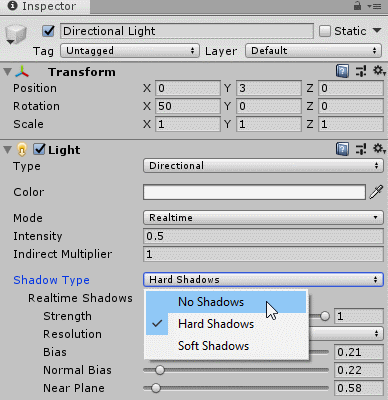
- Select Directional Light in the Hierarchy window. Then, in the Inspector window, set the Shadow Type to No Shadows. Shadows are quite resource-consuming and, in this case, the AR experience will benefit from not having shadows:
- Now, select ImageTarget and change its Transform values so it rotates on the x axis. This way, in the scene, the objects will appear to be popping up from the ground:

- Finally, select Main Camera and rotate and move it so that it's pointing at the target:

Now, it's time to include the 3D models. Let's get started:
- Delete the Cube from inside ImageTarget in the Hierarchy window by right-clicking on it and selecting Delete, or just by selecting it and pressing Delete on your keyboard:

- Drag the Models/Maia folder from the code resources provided into the Project window on @MyAssets/Models. This will import the .fbx mesh object and its texture files inside the textures folder, as shown in the following screenshot.
- Drag the maia.fbx file inside ImageTarget. Remember to make sure it's inside ImageTarget so that it appears/disappears when the target does. Move, rotate, and scale the model until it looks good over the target:

- Now, hit the play button at the top of the Toolbar to test the current scene. The moment the target is detected, the seat will appear:

- Hit the play button once more to stop the simulation and then save the scene (Ctrl + S). Connect the mobile device to your computer and press Ctrl + B, or go to File|Build Settings|Build And Run, to build the app into your device.
Now that we have our basic AR scene, in the next section, we will create our AR catalog by adding another chair and creating the UI to allow users to interact with our furniture.