
16.2. Viewing and Editing Network Interfaces
To view the interfaces that are currently active on your system, click on the Network Interfaces icon on the main page of the module. This will take you to the page shown in Figure 16.1, which lists interfaces on your system in two categories. At the top under Interfaces Active Now are those that are currently enabled and have an IP address assigned. All loopback, Ethernet, and PPP interfaces will be shown, although not all will be editable using Webmin. At the bottom under Interfaces Activated at Boot Time are those which have been configured to be activated at boot. The two lists will not necessarily be the same, as some types of interface (such as PPP) are not activated at boot time and so will not appear in the second list.
Figure 16.1. The network interfaces page.

The steps to follow to change the IP address, active status, or other details of an interface are:
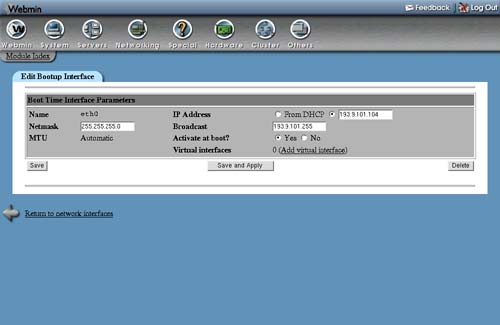
1. | If the interface appears under both Interfaces Active Now and Interfaces Activated at Boot Time (as most editable ones do), click on its name in the lower list. This will take you to a form for editing its settings, shown in Figure 16.2. Figure 16.2. The interface editing form.
|
2. | To assign a different address, enter it into the IP Address field. Or select the From DHCP option if you want the address to be dynamically assigned by a DHCP server on your network. |
3. | |
4. | When editing an active interface, the MTU and Hardware address fields will be available. You should leave the MTU alone unless you really know what you are doing, as changing it could reduce network performance or cut your system off from the network altogether. The hardware address should be changed only if you want to give your network card a different Ethernet address, which is rarely necessary. |
5. | |
6. | When done editing a boot-time interface, click the Save and Apply button to save your changes for use at bootup time, and to make them immediately active. If you are editing an active interface, just click Save to activate your changes. |
After changing any of your system's IP addresses, be sure to update any host address entries associated with them as well. See Section 16.6 “Editing Host Addresses” for details on how to do this. You may also need to update records in your DNS server as well.
An active interface can be shut down by clicking the Delete button on its editing form instead. Similarly, a boot-time interface can be removed (for example, if you have removed a network card) so that it will not be activated at startup by clicking the Delete button on its form.