
43.4. Adding a New File Share
In its usual default configuration, Samba will allow any UNIX user to log in and access files in his home directory. The special homes share provides this feature, which in many cases is all that you need for users to store their own files on the server. It is often useful, however, to share a directory that everyone has access to, so that documents of interest to the entire organization can be made available. A share like this can be set up to allow guest access (meaning that no login is required to access it), or to require a valid login to the server.
To create a file share, follow these steps:
1. | First, decide on the directory that you wish to share and create it if it does not already exist. It must be given the appropriate UNIX permissions so that users can read and/or write to it. |
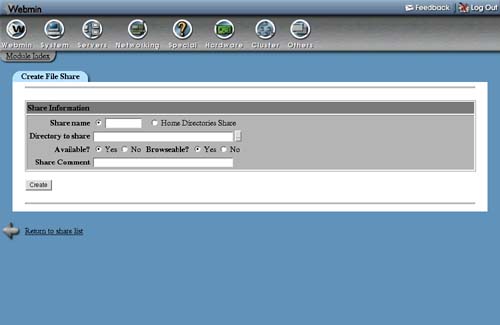
2. | On the module's main page, click on the Create a new file share link above or below the table. This will take you to the Share Creation form shown in Figure 43.2. Figure 43.2. The file share creation form.
|
3. | |
4. | |
5. | To disable this share so that it cannot be used, change the Available? field to No. This can be useful if you want to take it offline until all the options have been set properly. |
6. | |
7. | |
8. | Click the Create button to add it to the Samba configuration. Your browser will be returned to the module's main page, on which the new share will be listed. |
9. | Click on the new share name to bring up its editing page. |
10. | Click on the Security and Access Control icon to display the share's security form. |
11. | If the files in this share should be read-only, set the Writable? field to No—otherwise, make sure Yes is selected. |
12. | The Guest access? field determines if clients are allowed to access this share without logging in to the server. The available options are: None Only authenticated users will be granted access. Yes Anyone will be allowed to access the share, but unauthenticated clients will be treated as guests. Clients that log in will enjoy their normal file access rights. Guest only All clients, authenticated or not, will be treated as guests. |
13. | To set the UNIX user as whom guests read and write files, change the Guest UNIX user field. This should normally be an account with read-only access. |
14. | Click the Save button at the bottom of the form. The share is now ready for clients to use and should show up when your server is browsed. |
A share can be edited after creation by clicking on its name in the list on the module's main page to bring up its editing form, changing details like the path or description, and hitting the Save button. Or it can be deleted entirely by clicking Delete on the same form. You can also edit additional parameters by clicking on the icons at the bottom of the editing page. Later sections in this chapter explain what they do in more detail.
The homes share can be edited as well, although it does not usually have a path (or if it does, it will contain the special %U code which is replaced by the connecting user's home directory).