
38.4. Managing Email Aliases
A mail alias tells your server that mail for a particular address should be forwarded to a different destination. That destination can be another email address, a local file, a directory, or even the input to a program. They can be useful for setting up pseudo mailboxes that actually send email to a real person, such as [email protected] or [email protected]. An alias can have the same name as a UNIX user, in which case it will intercept all mail to that user and forward it to a different destination instead.
To create a mail alias using Webmin, the steps to follow are:
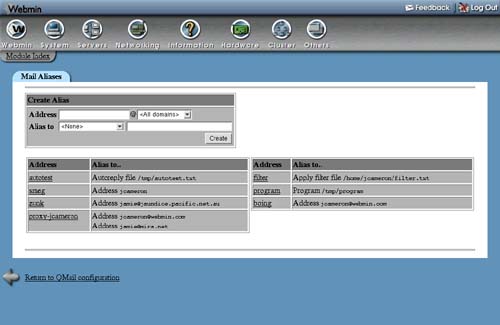
1. | Click on the Mail Aliases icon on the module's main page. You will be taken to a page listing all existing aliases and their destinations, with a form at the top for adding a new one. Figure 38.2 shows an example. Figure 38.2. The mail aliases list.
|
2. | Enter a name for your new alias, such as sales, in the Address field of the form. Leave the menu set to <All domains> for now. Its use is explained in Section 38.6 “Managing Virtual Mappings”. The special alias named default will be used for any email that does not match any other alias or user mailbox. It can be useful for forwarding all messages that would otherwise bounce to some address. |
3. | The Alias to field determines where email to this alias will be sent. The following options are available from the menu: <None> Nothing at all will be done with received email. It makes no sense to select this option when creating a new alias. Email address Email will be forwarded to the user or address entered into the adjacent field. Be careful not to set up a forwarding loop by sending email back to the alias's address again! If you are creating an alias that has the same name as a UNIX user and really do want email to be delivered to his mailbox, as well as some other destinations, enter the username preceded by a backslash (like jcameron) into this field. The backslash tells Qmail to bypass alias checking. Mail directory Email to the alias will be added to the Qmail mail directory, whose path is entered into the text box. It must contain subdirectories named cur, tmp, and new to be valid. Mail file Email received by the alias will be appended to the file whose path is entered into the text box. This should be a standard Sendmail-style mail file. Feed to program The program whose path and parameters are entered into the text box will be run and the full text, including all headers of email received by the alias, will be fed to it as input. This kind of alias is most useful to programmers who want to perform their own custom processing or filtering of email messages. The program is usually run as the Qmail UNIX user alias, not root or the user with the same name as the alias. Autoreply from file When email is sent to the alias, the contents of the file specified in the adjacent text box will be sent back to the original sender. Section 37.12 “Creating Autoreply Aliases” explains how autoreply files work in the Sendmail module, and they have exactly the same functionality in this module as well. Apply filter file Email sent to the alias will be processed according to the rules in the filter file entered into the text box, which can forward to different destinations depending on the message contents. See Section 37.13 “Creating Filter Aliases” for more details. It is possible for an alias to have multiple destinations. To add more than one, you will need to re-edit this alias after saving it, and fill in the row with <None> selected at the bottom of the Alias to table. |
4. | Click Save to have the alias added to Qmail's configuration and activated. |
As is usual in Webmin, you can edit an existing alias by clicking on its name in the list on the Mail Aliases page. This will bring up an editing form that contains all the same fields as the creation form, but has Save and Delete buttons at the bottom instead. The first of these will update the alias with any changes that you have made, while the second will permanently delete it.
If a UNIX user has a file named .qmail in his home directory, email that would normally be delivered to its mail file will be sent to the addresses listed in the .qmail file instead. If a file named .qmail-suffix exists, email to username-suffix at your server will be sent to the addresses in that file. These .qmail files have exactly the same format as those in the /var/qmail/alias directory that Webmin creates when you follow the instructions above, and thus can be used to deliver to files, directories, or programs, too.
This module does not support the editing of per-user .qmail files, though. Usermin (covered in Chapter 47) does allow normal users to edit their own forwarding files, however, using a web-based interface almost identical to the one described in this section.