
Let's say we want to create a quick mobile app for the HIMBAP Auto Service Center to create an auto service request for a customer. Let's see how quickly we can build our app using PowerApps Studio, by following these steps:
- Click on the Dynamics 365 Home button (from where we selected Flow earlier) and select PowerApps.
- Click on Create and select Canvas app from blank, and let's name our app Auto Service Request.
- After clicking on OK, PowerApps Studio will open a new app that will have one screen by default.
- Click on the right-hand side of Screen1 and select the Rename option from the drop-down menu. Let's rename it Service Request.
- Let's add the following controls to our screen, and name them as follows:
- Label: topiclbl
- Text: topictxt
- Label: customerlbl
- Dropdown: customerdll
- Label: vehiclelbl
- Dropdown: vehicledll
- Label: issueifanylbl
- Text: issuetxt
- Label: bookingdatelbl
- Date Picker: bookingdate
We can add these controls from the Insert menu by following the numbering sequence shown in the screenshot that follows:

Let's place these controls on the screen as per the preceding screenshot. Now, let's add a Dynamics 365 CE data source to get data from Dynamics 365 CE entities, as follows:
- Click on the View menu and select Data Sources.
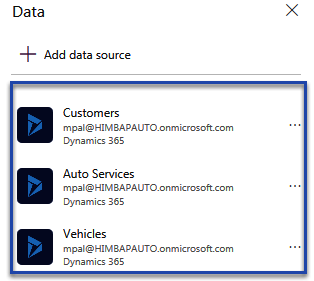
- Click on the + Add data source button and select our current Dynamics 365 CE connection. Once it is connected, we need to select the following three entities, like so:
- Now, let's bind our Customer dropdown to the Dynamics 365 CE customer entity, as follows:

- Next, we want to show the customer vehicle in the Vehicle dropdown, so we need to configure it by following the numbered steps shown in the following screenshot, after selecting the drop-down control from the screen. First, we need to select the Vehicles entity, and after that, we need to select the Vehicle Name field. Later, we can configure the Depends on options for this dropdown:

- Next, let's use the Reset method to clear all the fields with a click of the New button. We can select the New button and use the Reset method on the formula bar, using the following number sequence:

- We need to write code for the Save button to store the current screen data to the Auto Service. We can select the Save button and write the following code for the OnSelect event of the button:
Patch('Auto Services',Defaults('Auto Services'),{name:topictxt.Text},{currentsituation:issuetxt.Text},{him_servicebookingdate:bookingdate.SelectedDate},{_parentaccountid_value:customerddl.Selected.Account},{_him_vehicle_value:vehicledll.Selected.Vehicle});
In the preceding code, we are using the Patch method, which is used to create or update a record. When we want to use Patch to create a record, we need to use it with Defaults, which takes the table name as a parameter. In the preceding code, we have passed in the Auto Service entity name. Further, we can pass all the field names that we want to set.
- Now, press F5 to run our application. As soon as we select a customer name, we will be able to see their vehicle under the Vehicle dropdown, as in the following screenshot:

- When we click the Save button, we will be able to see a record created in Dynamics 365 CE, like so:

Finally, we can publish our app, and it can be used from a mobile device. To access our application, we first need to download PowerApps, and from there, we can access our PowerApps applications. This is a simple sample application, but we can create complex canvas apps in a similar way.