
The Dynamics 365 CE import wizard is a good option for importing a small amount of data. We can use this wizard to create or update Dynamics 365 CE data. To create new data, we can download data import templates from the Data Management area by taking the following steps:
- Navigate to Settings from the top navigation bar and select Data Management, or log in to admin.powerplatform.microsoft.com. Select your environment, then click Settings | Templates for Data Import templates.
- When you click on Templates for Data Import, a dialog window will open, as in the following screenshot, where we can select our entity name from the drop-down list:

- When we click on the Download button, it will download an Excel template that includes all the fields that are available on the main entity form. While trying to download the data import template, keep in mind that your entity should not have two fields with the same display name; otherwise, you will get an error.
Let's say we want to import data into our Year entity. We can take the following steps to import data:
- Download the data template from the Data Management section by selecting the Year entity from the dropdown.
- Open the Year.xlsx file, fill in the year details under the Name column, and click on Save.
- Navigate to Settings | Data Management | Import.
- Click on the Import Data button on the command bar.
- Click on Choose File and browse our Year file, as shown in the following screenshot:

- Click on the Next button to go to the next screen, which is shown in the following screenshot:

On the preceding screen, we can select an option for the Allow Duplicates question. If we select No, it will validate data based on the duplicate detection rule created for the current entity. It will mark all the records that are duplicates based on the duplicate rule conditions. But if we select Yes, it will bypass any duplicate detection rules and will import data as it is in our import file. We can also configure the owner of the records here.
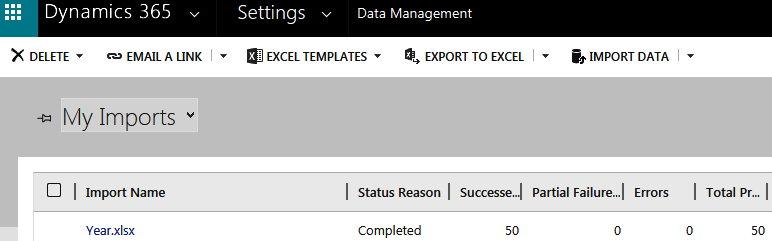
- Click on the Submit button and it will start the import process. We can track our import process from the My Imports view, as follows:
This is how we can use the data import template to import data into Dynamics 365 CE. Now, let's see how we can import our comma-separated values (CSV) files into Dynamics 365 CE. This is useful if we are getting flat files from customers and we don't have time to put that data into the data import template, so we need to import those files directly. Let's say we want to import data into the Make and Model entity using CSV files. As discussed earlier, in order to import data with a reference, we need to make sure the reference data is available in Dynamics 365 CE, or we can import both pieces of data at the same time. For example, in our Model file, we have a column for Make, so we have two options—either we can import Make data before importing Model to resolve the reference correctly, or we can import both files at the same time using a ZIP file. Let's say we have combined both Make and Model into a ZIP file named AutoMakeAndModel.zip. Let's see how we can do that here:
- Navigate to the Import area from Settings | Data Management | Import and click on the Import Data button.
- Browse our AutoMakeAndModel.zip file and click on the Next button.
- The next screen will show us all the files under the ZIP folder, as follows:

Under Delimiter Settings, by default, a comma will be selected, but if we have used any other delimiter, we can select that from the dropdown.
- Click on the Next button and select OK in the confirmation dialog for the delimiter.
- The next screen will show us all the Data Maps available under Dynamics 365 CE. If we created a data map earlier, we can select it to map the field for the entity; otherwise, we can select the Default option, as in the following screenshot:

The Default option selects the field mapping between our CSV file and entity based on the field display name.
- Click on the Next button and select the mapping for the entity, as in the following screenshot:

- Click on the Next button and set the field mapping for all entities. We can select the source field from our CSV file and the target field from the right-hand side of the Dynamics 365 CE entity, as shown in the following screenshot:

- Click on Next twice and click on Submit on the last screen. We can also store our field mapping, as follows:

Now, next time we need to reimport this ZIP field, we can select this mapping on the Select Data Map screen.
Now, it will import both files. So, this is how we can use the data import wizard to import data into Dynamics 365 CE. The main difference between using the data import template and CSV files is mapping. In the case of the data import template, Dynamics 365 CE automatically does mapping for the entity and its field, whereas in the case of CSV files, we need to do mapping manually.