
Auto Deploy installation is a way to PXE boot your ESXi hosts from a central Auto Deploy server. This method is based on the use of master images with some set of rules to deploy ESXi with the desired specifications. Auto Deploy can also be used with the vSphere Host Profile feature (this will be detailed in Chapter 5, Configuring and Managing vSphere 6.5), to customize all ESXi hosts, ensuring a consistent configuration within the infrastructure. In a large environment, setting up the vSphere Auto Deploy feature to handle ESXi installations is the most efficient and suitable method to use.
Auto Deploy relies on several components and the configuration required is more complex. A vCenter Server must be already present in the vSphere infrastructure to provide the Auto Deploy feature. You need also a DHCP service, and a Trivial File Transfer Protocol (TFTP).
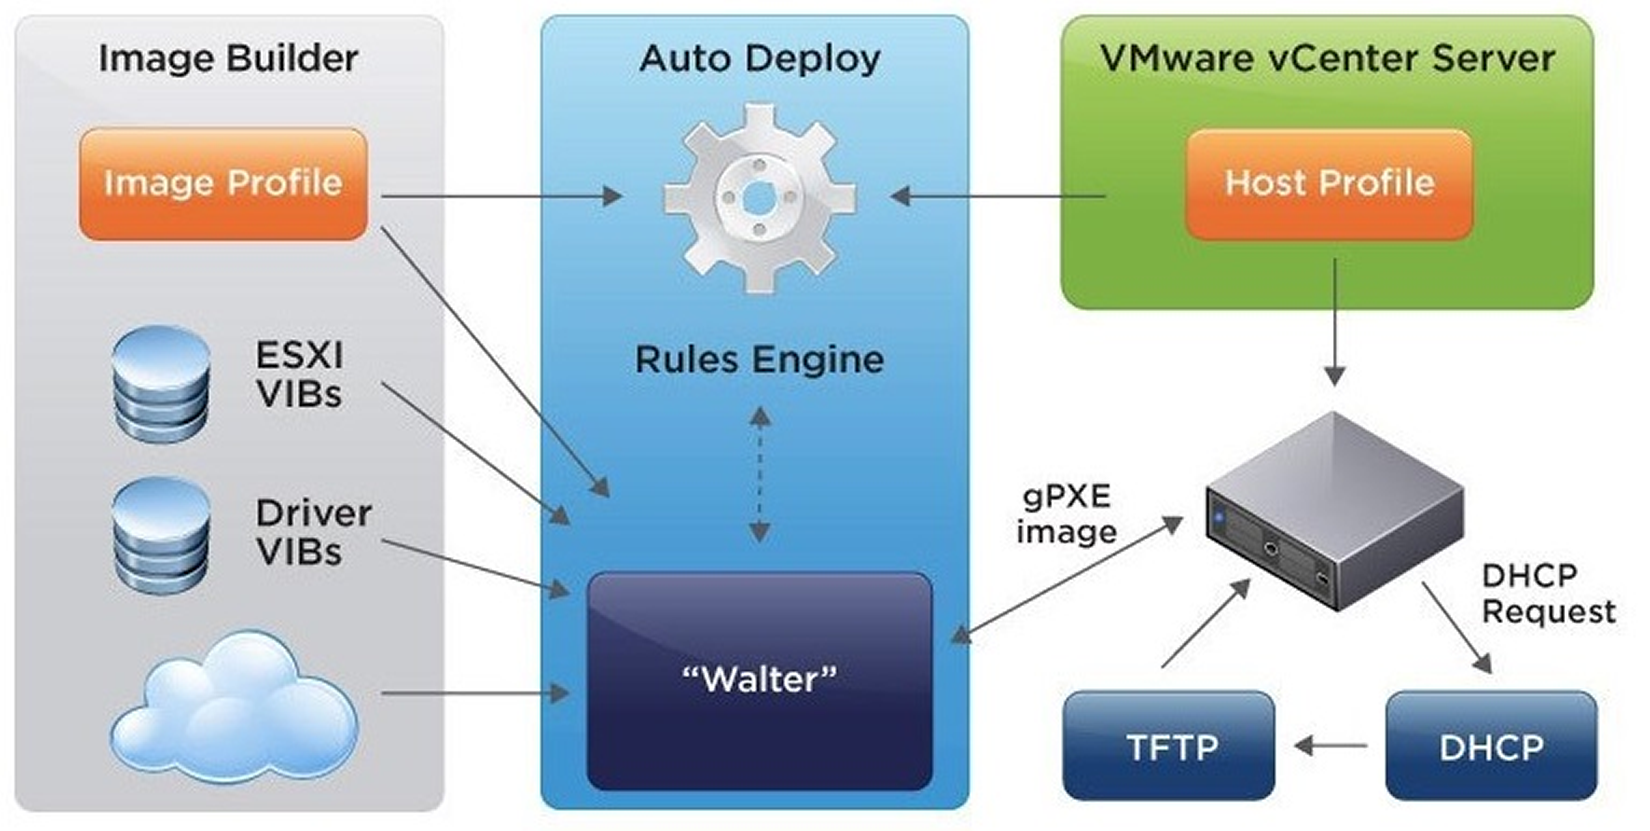
The following figure outlines involved components and tasks used during vSphere Auto Deploy:
The Auto Deploy feature in VMware vSphere 6.5 introduces a new graphical user interface for managing ESXi images and deployment rules that reduces complexity and helps users during the configuration. PowerCLI is still available and in version 6.5 has been enhanced with the new script bundle that allows administrators to add a post-deployment script once all the configurations have been applied to a stateless ESXi host:

An additional new feature of Auto Deploy is the ability to interactively deploy new hosts without first creating a rule. When a new host is PXE booted on the Auto Deploy network, it checks in with Auto Deploy for instructions. If the host doesn't match any deployment rule, it is registered as a Discovered Hosts waiting for commands:
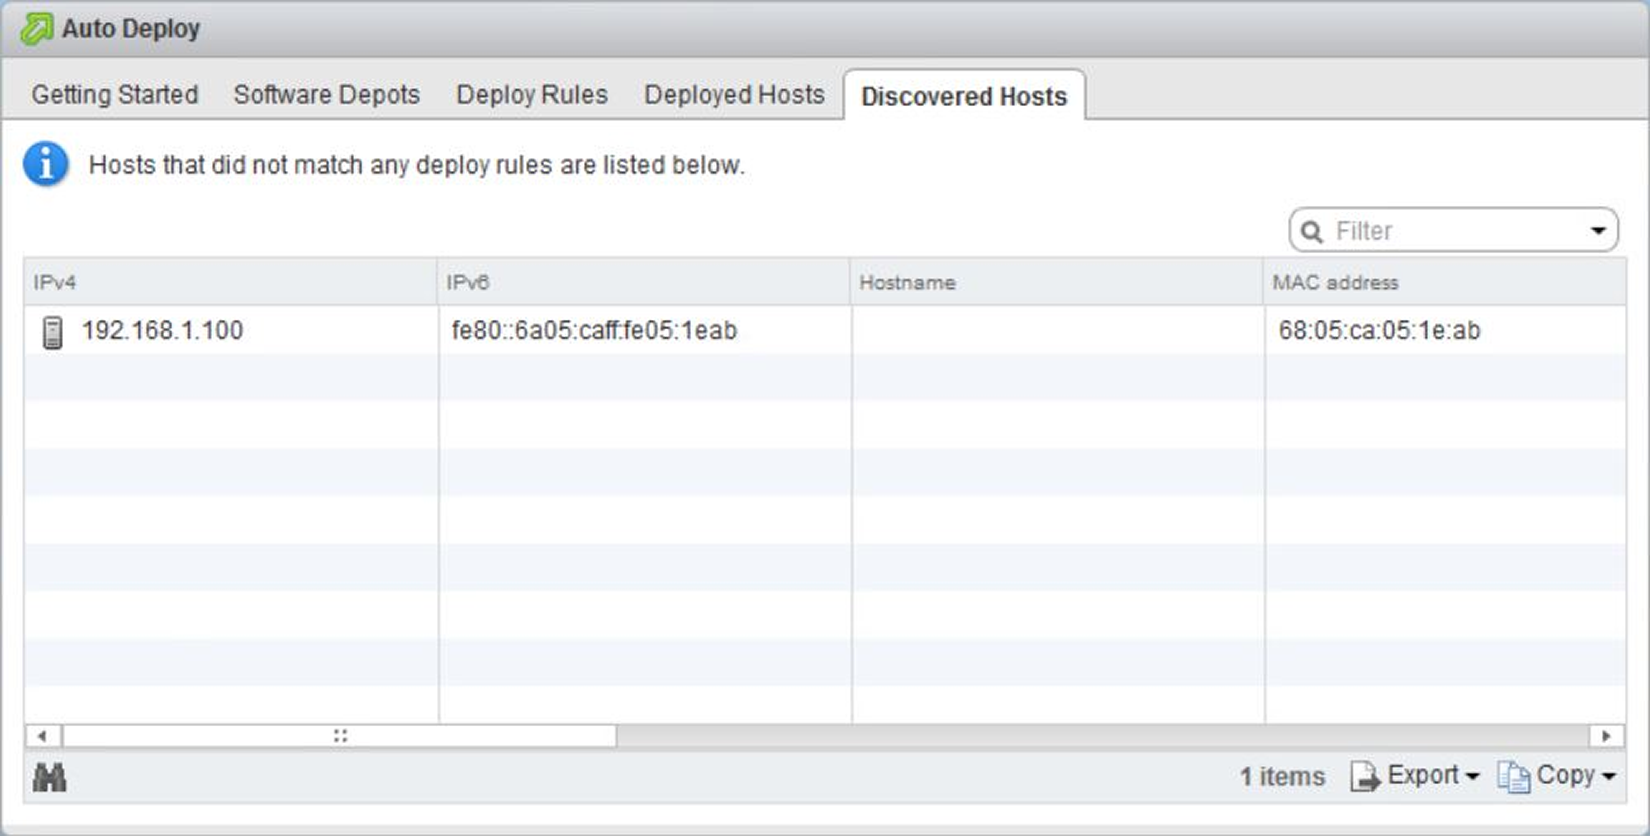
With the new graphic, administrators can easily discover available hosts in the network and create new deployment rules or deploy without creating a rule. To deploy discovered hosts without any rule, simply select one or more hosts from the list and click the Add to Inventory button. A wizard will start in order to specify the parameters needed to deploy the selected hosts—ESXi image, host profile, and location.
The Auto Deploy feature is installed with the vCSA but by default is disabled. To use this functionality, you need to enable the service.
To enable the Auto Deploy feature, you should perform the following steps:
- Go to Home | Administration | System Configuration.
- In System Configuration, select Services to display the list of available services.
- Select the Auto Deploy item and, from the Actions menu, select Start to start the service:

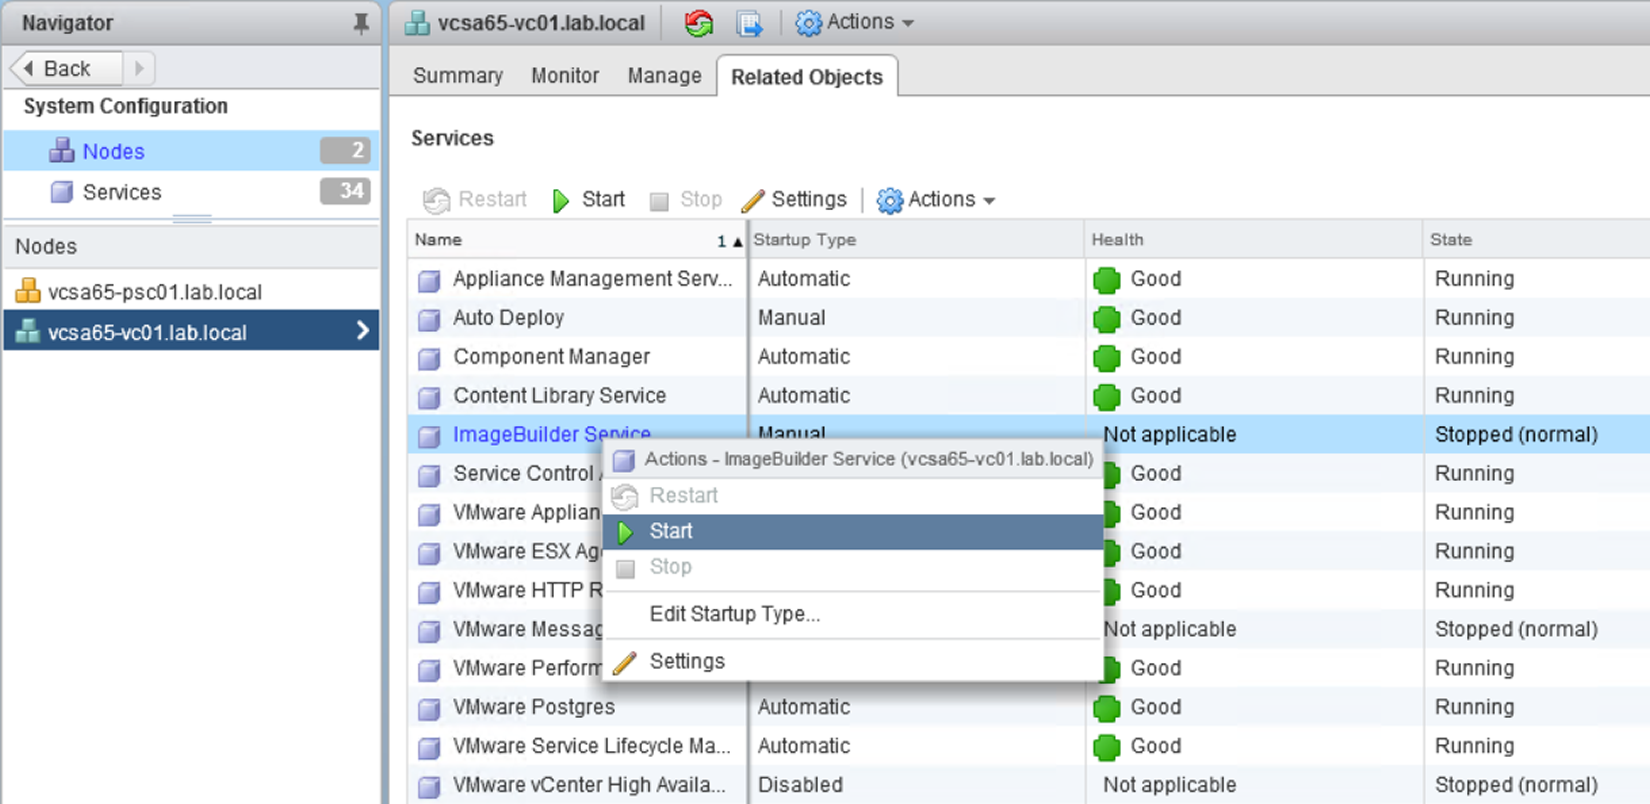
If both Auto Deploy and ImageBuilder services are not started, the Auto Deploy UI may not be visible in the vSphere Web Client. If the Auto Deploy service has already started, follow these steps to start the ImageBuilder service:
-
-
- Log in to the vSphere Web Client as [email protected].
- Go to Administration | System Configuration | Nodes, highlight the vCenter Server node and select the Related Objects tab on the right pane.
-
- Right-click ImageBuilder Service and select Edit Startup Type.
- Choose Automatic and click OK.
- Select ImageBuilder Service and choose Start:
-
-
-
- Log out of the vSphere Web Client and log in once again. The Auto Deploy icon should now be visible.
-
Before digging in the installation procedure, let's see how vSphere Auto Deploy works and the configuration of the required components (DHCP, TFTP).