
Installing NSX is really easy because you can deploy only one virtual appliance in OVA format, that is the NSX Manager. The installation and configuration steps are:
- Deploy NSX Manager: Use the vSphere Web Client to deploy the virtual appliance. Assign the complete network configuration (IP address, netmask, gateway, DNS servers).
- Log in to the NSX Manager: When the VM is ready, use a web browser and connect to URL NSX manager for the first configuration.
- Register NSX Manager with vCenter Server: You have to configure the relationship with the vCenter server by providing the right credentials:

Registration page vCenter Server
- Back up the NSX Manager configuration: During the first configuration NSX, it's very important to configure a backup policy, to make possible use of the future configuration restore:
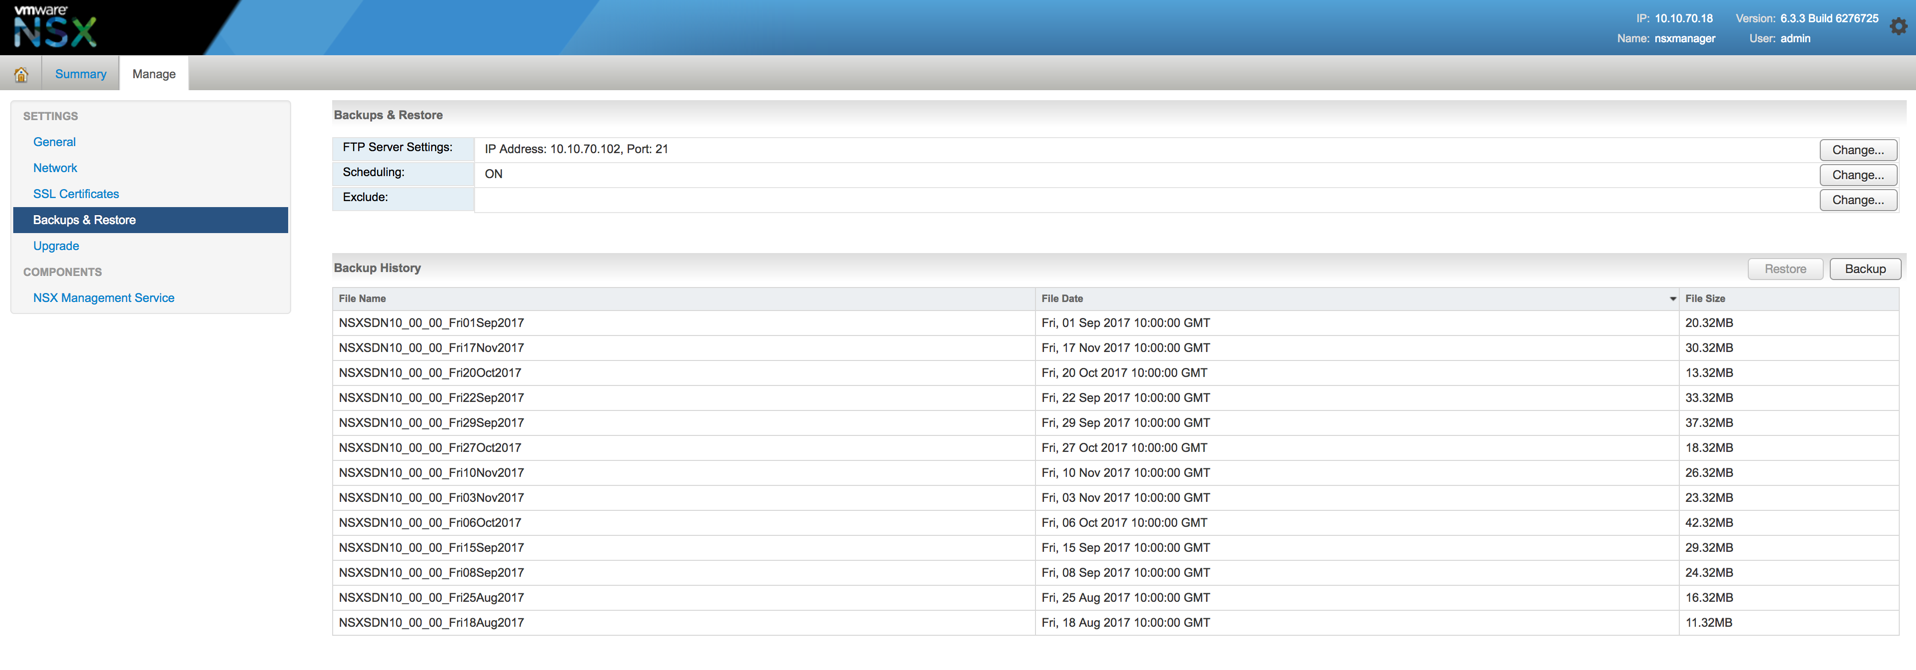
Backup configuration
- Deploy NSX Controllers: At this point, you must change the UI and login with your vSphere Web Client. You can now use the new registered plugin for NSX (Networking and Security) shown as follows:
Plugin for NSX in vSphere Web Client
This plugin is your main administration for NSX Domain. You can still use central CLI and REST API. Go to the installation part and click on the green plus in NSX Controller nodes part. Deploy a cluster with all three controllers. You deploying three controllers is the minimum and maximum for a production environment. After deployment create the DRS anti-affinity rule.
When you want to test NSX in the lab, you can use only one controller, but only for testing.
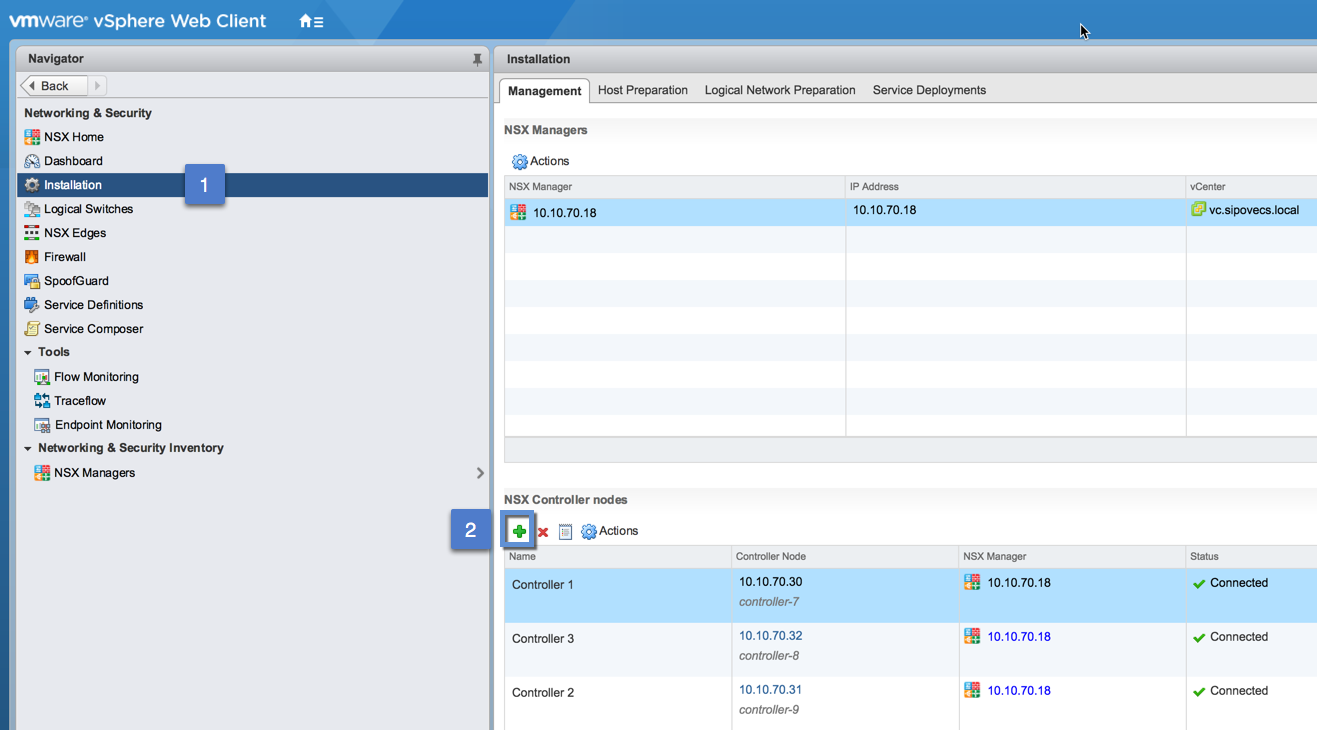
Installation NSX Controller nodes
- ESXi host preparation: The Host Preparation tab will help to add NSX VIBs on all cluster hosts:
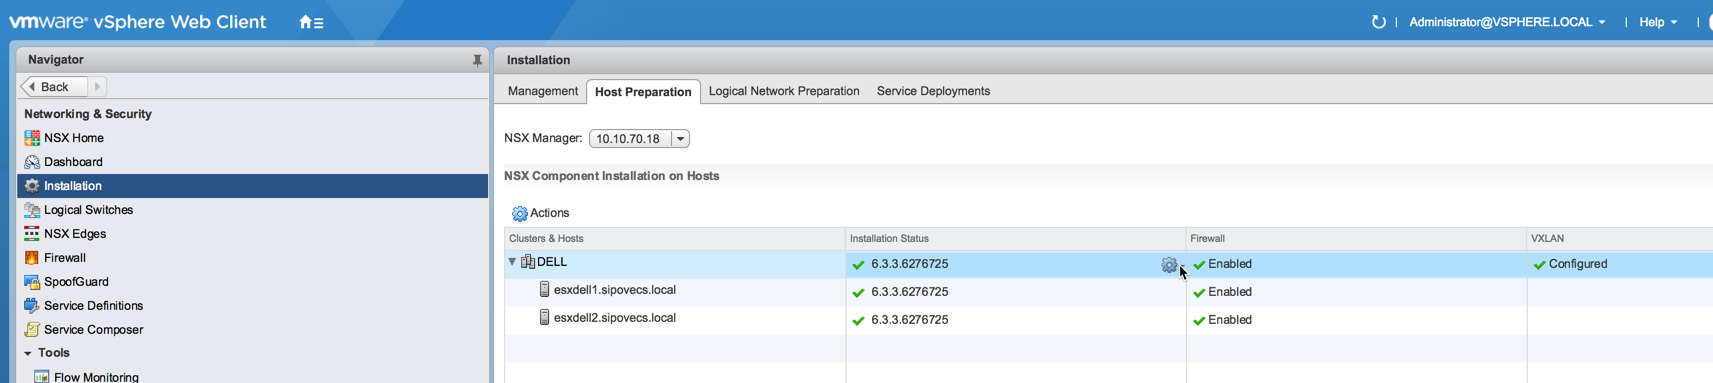
Host preparation
- Configure the VXLAN transport: The next step is to configure VXLAN and VTEP, which is used for encapsulation and de-encapsulation. Each VTEP is a VMkernel interface that must have an MTU of 1,600. The MTU must be set on VMkernel, virtual switch, and also on the physical network and it's important because, during encapsulation, the VXLAN header is added to the standard layer 2 frame. VTEP configuration could be performed in the Logical Network Preparation tab, and it checks correct create VTEP vmk interface on every host:

VXLAN-VTEP information
- Define the VXLAN segment ID range: VXLAN packets require an ID (similar to the VLAN ID). You need to add a segment ID range, starting from 5,000; this ID is used for VXLAN Network Identifiers (VNI), your logical switching:

Segment ID-VNI
- Define the transport zones: The transport zone defines the boundaries for the logical switch and logical routing:

Transport Zones