Printing a collection of photos in a small, labelled format on a single sheet of paper is often a practical way to search for and select images, or to produce a DVD mini-catalog for friends or customers.
Photoshop versions up to and including CS3 have their own contact sheet functionality built in (File ▸ Automate ▸ Contact Sheet II), but this was farmed out to Bridge in CS4. The tool allows you to select files in your file system’s explorer and to print them using custom numbers of rows and columns per sheet (Figure 11-45).
It is much easier to view and select images in Bridge, making it a better starting point for creating and printing contact sheets.
Most all-in-one workflow tools and image management programs include contact sheet functionality. Lightroom’s contact sheets are saved as user-configurable presets in the program’s print dialog.

The Bridge tool generates a PDF document that can be printed by Acrobat Reader or used as a slideshow. The steps involved in creating a new contact sheet are as follows:
Select the images you want to include in your contact sheet in the Preview workspace and sort them using your mouse (View ▸ Sort ▸ Manually).
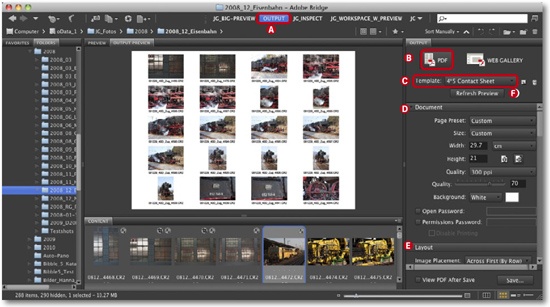
Activate the Output Workspace A and, in the right-hand panel of the Output menu B, select PDF output mode. Select a suitable preset in the Template menu C. Print details are then selected using the Document, Layout, Overlays, Page Number, Header, Footer, and Watermark tabs (callable from menu D). Click the Refresh Preview button (Figure 11-46) to display the effects of your chosen settings in the Preview window.
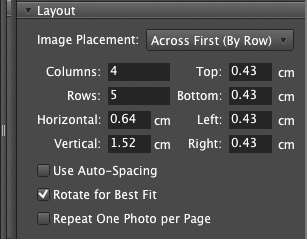
Select the basic format for your contact sheet in the Document panel D and your chosen number of rows and columns, borders settings, and image positioning in the Layout panel (Figure 11-47).
The parameters in the Overlays panel (not shown here) determine which filename, filename extension, and header/footer information is printed on each page. You can also add a watermark (to the contact sheet, not the individual images) in the Watermark panel.
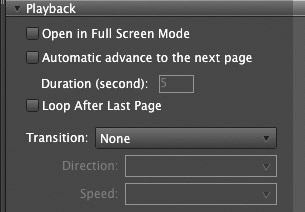
Use the settings in the Playback panel if you want to create a slideshow instead of a contact sheet (Figure 11-48).
Once again, click Refresh Preview to verify your final layout. If everything is OK, check View PDF After Save and click the Save... button. This automatically starts Acrobat Reader and displays your contact sheet, which you can then print.
You can also create a PDF slideshow, but section 11-11 explains a better way.