
The basic image selection and conversion steps involved in creating a digital slideshow are the same as for generating a web gallery. The resulting sRGB JPEG images should be of a size that fits well on a monitor (1024 × 768 or 1280 × 1024 pixels are suitable resolutions).
If you have already saved EXIF or IPTC title and description data with your images, this can be automatically integrated into a slideshow.[172]
You can also create a title page with your own text and adjust the background settings the same way as we described in the previous section. Background settings are especially important for portrait-format images that don’t completely fill the monitor screen.
Quality slideshow software also allows you to adjust the display duration and the transitions between slides.
Slideshows that are created in PDF format are very flexible and can be presented on just about any computer using the free Acrobat Reader. The PDF format also allows you to embed custom typefaces, and Acrobat Professional includes reliable color management functionality. Unfortunately, Photoshop sound synchronization support and transition effects are quite limited.
Note
![]() A number of image browsers and all-in-one workflow tools include automatic slideshow functionality that display the images in a single folder or collection in full-screen mode on a black or gray background without any further intervention. This is great for taking a first look at freshly downloaded images. Usefully, some auto slideshows even allow you to add star ratings to the images during display.
A number of image browsers and all-in-one workflow tools include automatic slideshow functionality that display the images in a single folder or collection in full-screen mode on a black or gray background without any further intervention. This is great for taking a first look at freshly downloaded images. Usefully, some auto slideshows even allow you to add star ratings to the images during display.
Some dedicated slideshow solutions provide wide-ranging configuration options, but require proprietary playback software that isn’t always available for all popular platforms.
Many image management programs and some of the all-in-one workflow tools we have already described include basic slideshow functionality. However, to produce high-end presentations, you need dedicated solutions such as Boinx FotoMagico [58] (for Mac), or AV Stumpfl’s Wings [106] or m.objects [87] for Windows. Wings supports multiple parallel soundtracks and synchronized control of multiple (digital and analog) projectors. This type of software can cost anywhere between $30 and $300 dollars. Most presentation software manufacturers also offer free players for their proprietary formats.
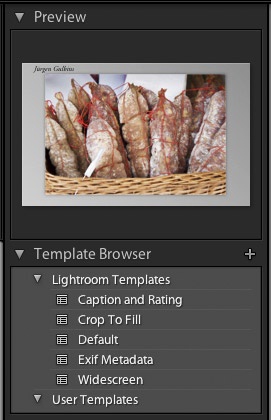
Figure 11-55. Moving your mouse over a template title shows the effects of that template in the preview window.
The following is a description of how to create a simple slideshow using Adobe Lightroom:
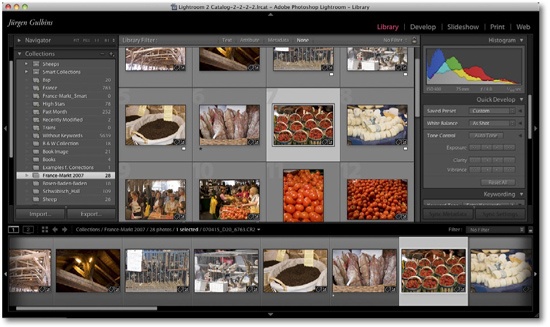
Select your images in Library mode, orient them correctly, and group them as a collection.
Order your images in Grid view (Figure 11-56) using View ▸ Sort ▸ User Order
Switch to Slideshow mode and select a template in the Template Browser panel. The Preview window updates in real time if you move your mouse over each template title (Figure 11-55).
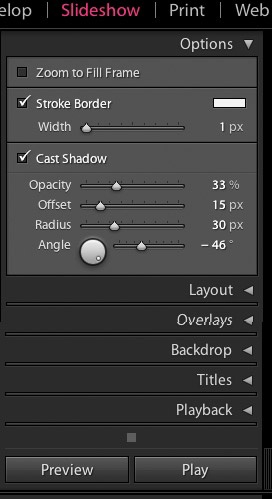
You can now fine-tune your slideshow using the options listed in the Options, Layout, Overlays, Backdrop, Titles, and Playback panels (Figure 11-57).
Figure 11-56. Group your images in a collection and sort them in Grid view using View ▸ Sort ▸ User Order.
You can select just about any color for the background, the image frames, and the text labels.
Use the Overlays editor (right-click the arrow icon in the Identity Plate) to enter the title and other EXIF or IPTC data. You can also drag this information to any desired position in the preview window using your mouse. Enlarging the text box by dragging its corners also enlarges the type size. We prefer to position all text outside the image area, and if necessary, reduce the size of the image (using the guides in the Layout panel) to allow text to fit into the available space.
The Titles panel allows you to create Intro and Finishing screens and to set a single image as a background for all other slides in the show. Individual captions can be entered in the Caption or Title IPTC data field for each image (in the Metadata panel in Library mode).
Use the Playback panel to define the slide display and transition duration as well as the transition colors. Checking the Soundtrack option allows you to navigate to your chosen music file.
Clicking Preview starts the slideshow in the Lightroom preview panel and clicking Play starts the slideshow in full-screen mode.
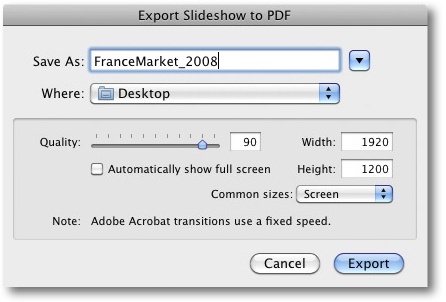
A click on the Export PDF button (at the bottom left corner of the Navigator panel) displays the save options, which include the JPEG image quality and size, and the PDF file location (Figure 11-58). You can also save your slideshow as an MP4 video file.
You can now play back your slideshow (without sound) on any Acrobat Reader-compatible computer or other PDF-compatible application.
The MP4 version of your file can be played back using Apple Quicktime, Adobe Media Player, or Microsoft’s Windows Media Player.
Lightroom offers flexible slideshow functionality with slight shortcomings in its support for transition effects and sound synchronization.