
Photoshop Layers, with their adjustment layers, Smart Objects, and selective correction tools are a great way to perform complex, non-destructive image corrections outside of your RAW editor. This chapter describes how to further refine some of these techniques and introduces a number of other tools that we use regularly in the course of our workflow. These ideas include new variations on themes we have already discussed. By the time you reach the end of this chapter, we hope that you will be able to work even more effectively with Photoshop’s extensive tool kit of correction and optimization tricks. Many imaging challenges can be solved in a number of different ways, so you will need to find the tools and techniques that best suit your working style and, of course, your budget.
Sometimes, color saturation in digital photos needs tweaking, and there are many actions and filters available for doing just that.
Analog films like Fuji’s Velvia often produce highly saturated, “larger-than-life” colors that drown out other more subtle, natural-looking colors. If you compare two otherwise identical photos, the one with more highly saturated colors will always draw your attention. But does that imply it’s better? Not necessarily. Always consider adjusting contrast before you increase saturation. Applying S-curves is a great way to reach this kind of compromise.
What is the best way to go about increasing saturation in situations that absolutely demand it? Ben Willmore’s article, “Saturate Your World” in Photoshop User magazine has an excellent tutorial on the subject that has certainly changed our views on color saturation. Ben’s “Use selective saturation in Photoshop” message sounds pretty obvious but addresses a technique that is fairly complicated if you approach it without his guidance. His writings provide a wonderful practical tutorial on how to master the art of selective saturation.
Any article by Ben Willmore is worth checking out: www.digitalmastery.com/companionsite/magazine/psuser34.pdf
Global saturation enhancement is often inappropriate, and the following example shows how to apply saturation enhancements selectively:
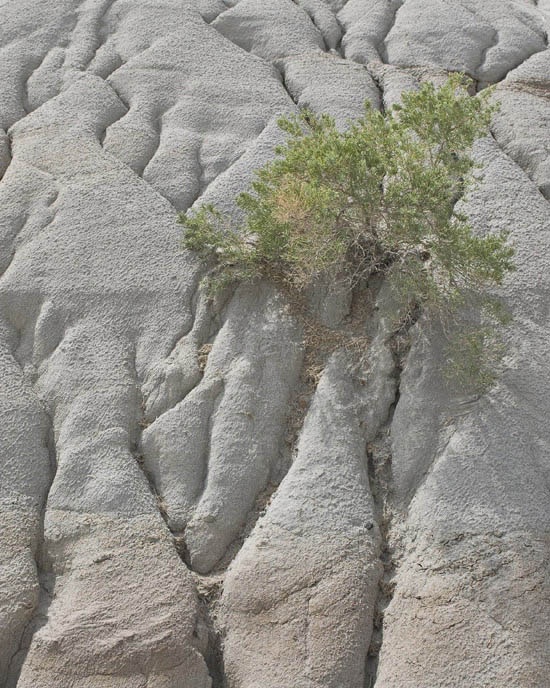
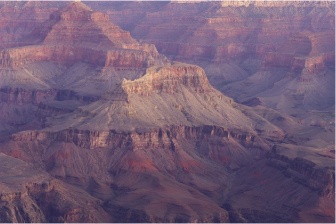
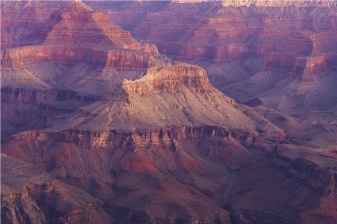
Our initial image is shown in Figure 8-1. Here, we want to increase saturation in the upper part of the image and leave the lower part as is.
As usual, our first step is to duplicate the background layer.[120] We then create a Hue/Saturation adjustment layer and add a layer mask like the one shown in Figure 8-2 (with a gradient in the lower third). The black area protects the image from the effect of our Hue/Saturation adjustments.
In the Hue/Saturation dialog (Figure 8-3), we leave the Master setting untouched. We then gradually increase the saturation of the red tones by selecting Reds (B) and increasing the Saturation value. Experiment to see how the various sliders affect the colors in your images.

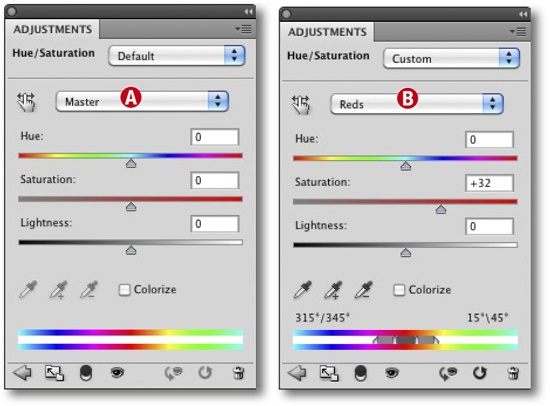
Figure 8-3. We increase saturation for the red tones using a Hue/Saturation adjustment layer. The layer mask means this adjustment is only applied to the upper part of the image.
Figure 8-5 shows the result of this operation, which is still a little too heavy-duty. We could simply reduce the saturation setting but instead we reduce the Opacity of the adjustment layer to about 43%, giving us the result shown in Figure 8-6.
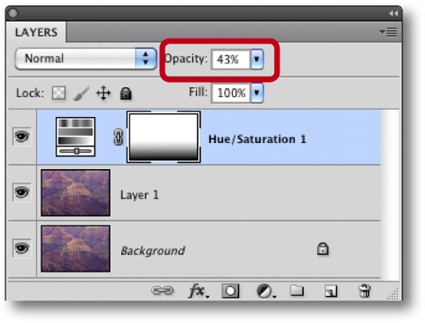
Figure 8-4. The Layers stack after our adjustment using Hue/Saturation with a gradient layer mask and reduced Opacity.

The difference is subtle, but that is precisely what selective correction is all about.