So what is a photo workflow exactly? All we really want to do is take great pictures and reproduce them in the best way possible. But doing so actually involves a whole series of steps, from transferring the image files to a computer, to file naming, file format conversion, image optimization, and finally preparing the images for printing or other forms of presentation.
These steps are the basic components of a digital photo workflow, and will ideally be:
Fast
Affordable
Capable of delivering optimum image quality
A workflow requires knowledge, experience, and planning to function properly. Because different images require different treatment, it needs to be adaptable too. A photographer’s equipment, ideas and personal style all influence the choice of steps involved in the workflow. Here, we will show you the basic concepts and specific steps involved, and give you the necessary know-how to adapt the digital photo workflow to your own needs and shooting style. We will begin with a brief description of our aims and follow that with a discussion of how to proceed and which tools to use.
The workflow includes every step of the photographic process, from the moment you release the shutter to the moment when you hold a print in your hand or save your image to an archive.
Unfortunately, there is no golden rule for achieving consistently great results but what we aim to do in the course of this book is to present you with a proven workflow that will help you to:
Improve the quality of your digital images and
Save time and costly trial runs
We will use the simplest possible methods to help you achieve these aims. We don’t intend to turn you into a Photoshop expert, but we do intend to show you how to use the tools you need to process your images effectively – with a little practice, but without too much experimentation. We will be using our own experience along the way, and we will sometimes make value judgements. You should nevertheless consider whether our judgements are relevant to your own situation and experiences.
The overview that follows will help you to better understand the later chapters. The digital photo workflow has three major creative phases:
Composition and shooting
Digital image processing
Presentation (print, slideshow, Web gallery, etc.)
This book is mainly dedicated to discussing phases B and C, and only addresses phase A when technical aspects of composition and shooting affect our approach to phase B. Alongside creativity, technical aspects are highly relevant to the whole process – although if phase A is not successful, these too become irrelevant, in spite of the fact that they themselves contribute to the overall success of phase A! The emphasis of this book is on the technical aspects of the process, but don’t forget to be creative along the way.
You can, of course, leave phase C to others (a photo lab or an online print service), but if you do, you will waste another chance to be creative.
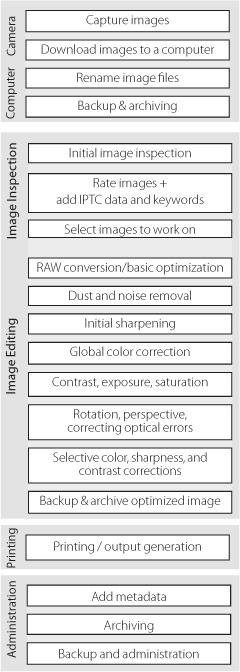
Figure 1-1 is an overview of the basic steps involved in our workflow. It lists some of the things you must bear in mind if you want to consistently create high-quality photos. Not all of the steps listed are necessary for every single image, so don’t be discouraged. We will introduce you to the entire process step by step. One of the great advantages of the digital photographic medium is that you can continually improve your technique but still produce great images while you are learning.
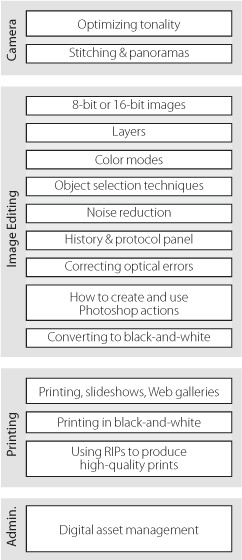
Once you know what you have to do, the next step is learning how to do it (Figure 1-2).
There are usually several “right” ways to approach your work, and you will have to adapt the way you work to account for the job itself, your aims, the available tools, and your own personal preferences.
Our workflow illustrates the aspects of the process that have helped us to achieve great results. You can use these as a basis for developing your own methods.
New tools and new versions of older tools also require you to adapt your methods. Using new tools and learning from the experiences of others helps to keep your work fresh.
There are many techniques that you don’t yet know and which you don’t yet need. We will address these later as part of the iterative learning process. You should learn the workflow step by step (Figure 1-3).
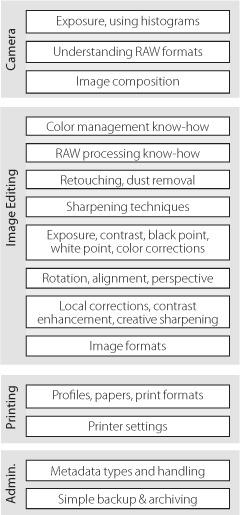
Including all currently available image processing techniques would make this book impossibly large and expensive. Once you have learned to use the techniques we do describe, you will be able to use these as a basis for your own experiments with techniques you can pick up from the Web, from other books, and from talking to like-minded people. The www.outbackphoto.com website [1] is also full of new ideas for you to try out.