We learned the following technique for increasing image brilliance (luminance) from Katrin Eismann. As we have already seen, a mask is nothing more than a grayscale image, and a luminosity mask is actually a monochrome image created from an existing color image using grayscale values that represent the colors present in the original. A luminosity mask is easy to create.
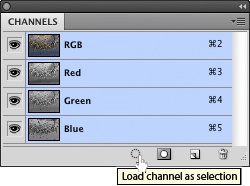
We open the Channels panel, select RGB, and load the selection by clicking on the
 icon. (To change the luminance of a single channel, select the Channels panel and use it for your selection or mask.)
We then save the selection (Select ▸ Save Selection) and name it Luminance. This creates an alpha channel with the luminance mask.
All corrections made using this mask are stronger in the lighter areas than in darker areas. In order to invert the effect, simply load the selection, invert it (using ![]() ), and save in as a new mask.
), and save in as a new mask.

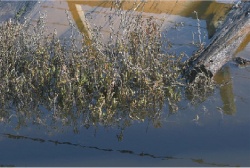
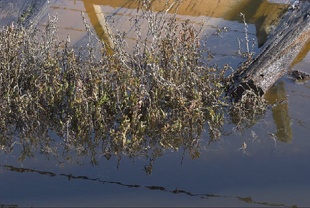
We want to darken the highlights and brighten the shadow in the photo shown in Figure 8-56, an everyday digital workflow task.
First, we create a luminance mask as described above.
We then save the mask using Select ▸ Save Selection.
Now, we load the mask as a selection (Select ▸ Load Selection).
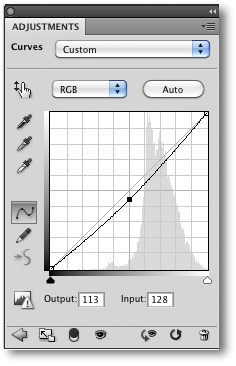
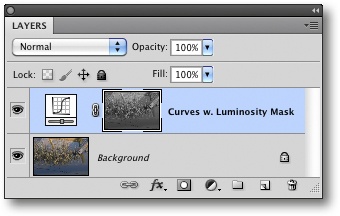
We create a new Curves adjustment layer for the active selection. The curve shown in Figure 8-57 darkens the highlights and midtones. Figure 8-58 shows the resulting Layers panel.
We change the Blend if options of the new layer (using the Blending Options command in the Layers panel menu
 ) to limit the adjustment to the upper midtones and highlights (Figure 8-59). Here, we use the
  key to separate the left and right halves of the layer blend slider. Our final selection causes the adjustment layer to cover the range of luminance values between 128 and 255 while producing a soft transition to the lower values.

We then brighten the shadows as follows:
We load our luminance mask as a selection and invert it immediately using the Invert option in the selection dialog.
We then create a Curves adjustment layer. The active selection automatically creates a layer mask for this new layer. The resulting curve, shown in Figure 8-61, brightens the shadows and gives us the Layers stack shown in Figure 8-62.
As before, we change the blending options of the new layer, but this time we restrict the effect to the midtones and shadows using an Opacity value of about 40% (Figure 8-63).

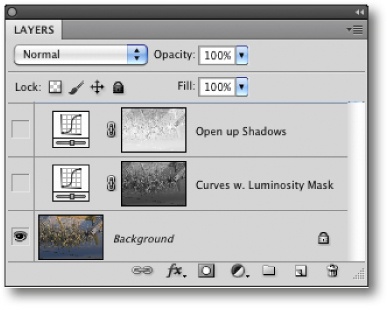

Figure 8-65 shows our final result. The differences between the original image in Figure 8-64 and our corrected version are subtle, but nevertheless important.