If you need greater depth of field in a photo, the usual solution is simply to close down the aperture. Unfortunately, the laws of optics mean that there are limits to the depth of field you can produce with any one lens. Stopping your lens down beyond a certain point (known as the “optimum aperture”) reduces contrast as well as visible sharpness. This image quality drop-off is caused by the diffraction of light rays hitting the edges of the aperture blades on their way through the lens.
Other factors influencing depth of field are the size of the individual light-sensitive elements making up the image sensor, as well as the focal length and the reproduction ratio of your lens.[130] The optimum aperture (for producing the best possible depth of field and contrast using a standard focal length) is usually somewhere between f5 and f6 for compact cameras and between f8 and f11 for APS-C or high-resolution, full-frame cameras. This value can be even larger for medium-format cameras.
If you need to produce more depth of field than your camera allows – as is often the case for architectural or macro photos – you can use focus stacking techniques to work around the limitations of your equipment. This technique involves taking multiple shots focused at different points and merging them together using specialized software.
We already demonstrated an example of this technique using Photoshop CS4/CS5 in Loading Image Files into a Stack and Aligning Layers. The Photoshop version of this technique is, however, still relatively new and not suitable for use in all photographic situations.
A better alternative is the standalone program Helicon Focus (manufactured by HeliconSoft [76]). The program is available in 32-bit and 64-bit versions), for Windows as well as for Mac OS X.
Note
![]() The Windows and Mac versions of Helicon Focus tend not to be in step. The Windows version is more advanced.
The Windows and Mac versions of Helicon Focus tend not to be in step. The Windows version is more advanced.
It is advisable to switch off as many of your camera’s automatic functions as possible when shooting photos for focus stacking, just like when you are shooting for panorama applications,
Use manual shutter speed, aperture, and ISO settings; plus use either a preset color temperature setting for JPEG and TIFF images, or automatic white balance if you are shooting RAW images. You can then set the same white balance value later using your RAW editor.
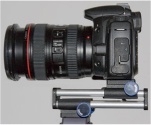
You will, of course, have to switch off autofocus, and you should shoot your image sequence in identically-sized focus steps from front to back (or vice versa). Make sure that the field of focus between shots overlaps. We recommend that you use a macro focusing rail for shooting macro focus stacking shots (Figure 9-28), as it will usually enable you to focus more precisely than the focus ring on your lens.
Make sure that all images in your sequence have the same color temperature, using either a RAW editor or an image processing program. It is generally best to leave sharpening until after you have merged your images, although we do sometimes perform slight compensatory sharpening and (if necessary) chromatic aberration correction in our RAW editor before merging. We perform all other optimization steps including vignetting after merging. If, however, your RAW editor offers profile-based automatic lens corrections,[131] apply these corrections before merging.
Helicon Focus supports a number of RAW formats, but RAW conversion is nevertheless not one of its strengths. If we shoot our source images in RAW format, we convert them to 16-bit TIFF for merging.[132] If your computer has limited memory capacity, you can also try using 8-bit TIFF source material.
Our example uses the 4.2 Mac version of Helicon Focus. Although the user interface is slightly different from the Windows version, the functionality is largely identical and intuitive to use. The program’s online help is also quite comprehensive. Figure 9-29 shows our four source files of a withered tulip, which we prepared as described above.
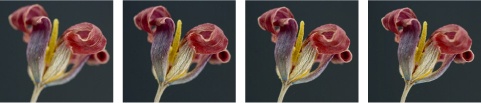
Figure 9-29. Four images focused at differing distances but using the same aperture and exposure values
Once the program is running, we open our images using the File ▸ Add Images command. You can also select your images in your image management program (in our case Lightroom) and simply drag them to the Helicon Focus window (Figure 9-30). You can select or deselect individual images by clicking on the tick mark next to each preview image. Clicking on an image in list B displays it in the program’s preview pane. You can zoom in using ![]() or the zoom-in button
or the zoom-in button ![]() , while
, while ![]() or
or ![]() zooms out.
zooms out.
As in our previous examples, you should make sure your images are loaded in the order they were shot and/or focused. And remember, only images with a checkmark will be processed.
We now activate the Focus button A and set the processing parameters C. The Mac OS version offers two processing methods (Method A and Method B). The best method to use depends on the type and content of your images. We generally achieve better results using Method B.
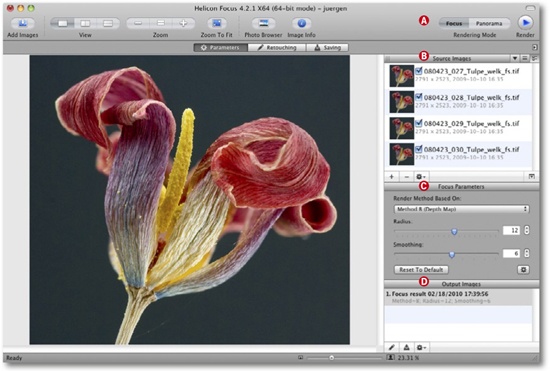
Figure 9-30. Our first merged image displays improved depth of field. This image is now included in the list D.
The Radius parameter determines the breadth of the pixel range which is considered by the program to be sharp and which is therefore included in the final, merged image. The Smoothing parameter determines how the program combines the focused parts of the individual images: the lower the value, the sharper the resulting image will be, but the more likely it is to display image artifacts. A larger value produces smoother transitions that tend to look “softer”.
Further settings are available under the Autoadjustment tab in the Preferences dialog (Figure 9-31). You will generally only have to make settings here when you start the program for the first time or if you are processing images that are not precisely aligned. Increasing these values can produce better results but slows down processing.
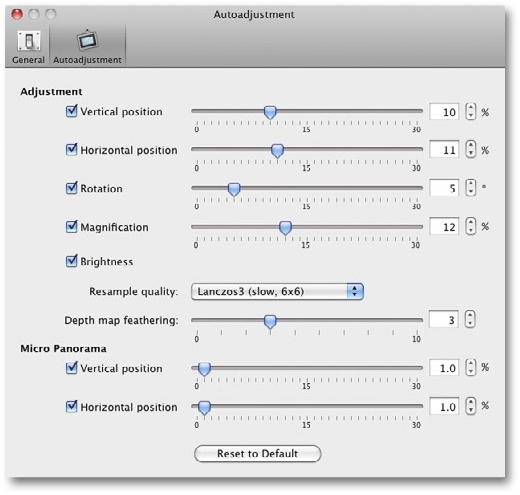
Figure 9-31. Autoadjustment tab in the Preferences dialog. The lower two parameters are only relevant if you are processing photos shot using a microscope.
Clicking the Render icon ![]() (or pressing
(or pressing ![]() ) starts the merging process. Although we used large, 16-bit TIFF files, the process was very quick using the Pro version of the software and our 8-core Mac. The combined image is then included in the list of output images in list B and is automatically displayed in the preview window (Figure 9-30). You can then compare the merged image with one of the source images by clicking on the source image of your choice, and you can zoom in and out using the slider at the bottom of the preview pane.
) starts the merging process. Although we used large, 16-bit TIFF files, the process was very quick using the Pro version of the software and our 8-core Mac. The combined image is then included in the list of output images in list B and is automatically displayed in the preview window (Figure 9-30). You can then compare the merged image with one of the source images by clicking on the source image of your choice, and you can zoom in and out using the slider at the bottom of the preview pane.
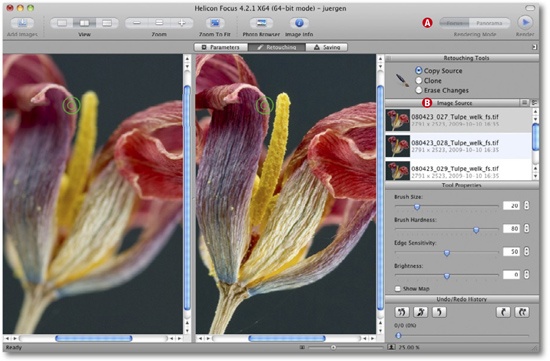
Helicon Focus also allows you to retouch unwanted image artifacts using the tools under the Retouching tab (Figure 9-33). The merged image is displayed on the right, while the selected source image is shown on the left. You can then use the Clone Brush to select the parts of the source image that you want to copy to the merged image. You can select the brush size and hardness, as well as the brightness of the applied pixels. Activating the Show Map option uses a black mask to display the parts of the source image that are used in the merged image. It helps to zoom right in and set a high Edge Sensitivity value when making these types of changes.
You can even copy blurred areas to “blot out” merging artifacts, although this wasn’t necessary for our example.
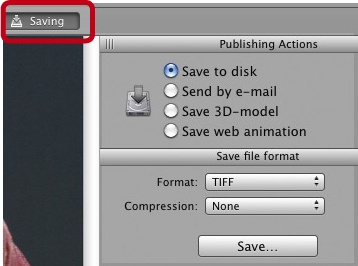
Finally, you can save your results in a number of ways (Figure 9-32). The formats available depend on the format of the source images. Our source images were 16-bit TIFFs, so we use a 16-bit TIFF for our output too. The Program is basically unbeatable for this type of merging application, and every serious macro photographer should own a copy.