
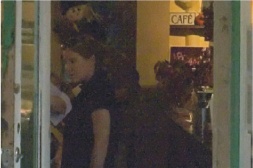
Image noise often only affects certain parts of an image, as our example in Figure 8-110 shows. To clarify the effect we are trying to achieve, we have reproduced the noisy image detail enlarged and slightly brighter in Figure 8-111. We will use a layer mask to selectively remove this noise.

You can use your noise reduction tool of choice for this type of correction. We recommend Neat Image [79] or Dfine [75]. (For more information, see Reducing Noise Without Losing Detail.)
First, we copy the background layer (either by dragging it to the
 icon in the Layers panel or using
  ).
).We now reduce noise on the new pixel layer, usually using either Noise Ninja [80] or Dfine [75], although the Photoshop Reduce Noise filter also produces perfectly adequate results.
The noise-reduced version of our image now covers the original version but has lost an unnecessary amount of detail in non-noisy areas.
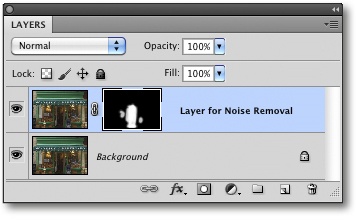
To make our effect selective, we create a new, black layer mask for the noise-reduced layer by
 -clicking the
  button at the bottom of the Layers panel or by filling the existing white layer mask with black using the Paint Bucket
  . This results in only the original, noisy image being visible.
We now remove the noise, either using the Eraser or a soft brush with 15% opacity. The finished mask then looks like the one in Figure 8-112.
The noise-reduced image layer becomes visible where the eraser produces white areas in the mask. We have now combined the non-noisy parts of the original image with the selected, noise-reduced parts of the new layer. The resulting slight blur is not important in the darker parts of the image.
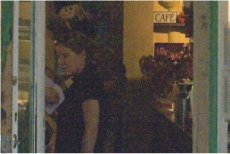
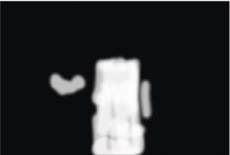
Figure 8-112. The finished “noise erase” layer mask. The white areas un-protect the noisy parts of the image and make the appropriate parts of the noise-reduced image visible.
These steps represent just one of many different approaches to reducing digital image noise. Nik Software’s Dfine [75] supports working directly in layer masks, theoretically saving a step – although the Dfine mask also has to be created using a brush.
Adobe introduced a noise reduction filter with Photoshop CS2 (Filter ▸ Noise ▸ Reduce Noise). If applied selectively to the darker parts of an image, the filter generally preserves brighter image details. This process also requires you to create an interim layer, either by duplicating the uppermost pixel layer or by combining the existing layers into one (using the keyboard shortcut ![]() or
or ![]() ). The Reduce Noise filter is then applied to the new layer.
). The Reduce Noise filter is then applied to the new layer.
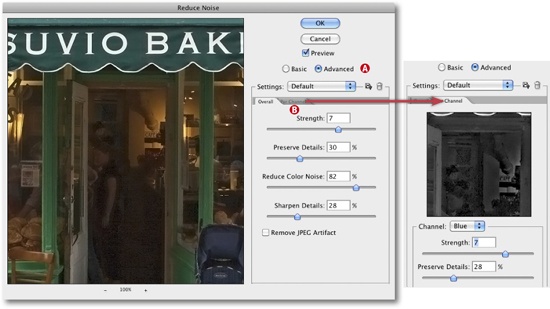
The Advanced option A enables you to apply different settings to individual color channels. Usually, the blue channel contains more noise than red or green, making it prudent to apply stronger noise reduction to the blue channel. This is achieved by activating the Per Channel tab B and selecting the appropriate channel (Figure 8-115).
You can convert your layer into a Smart Object (as explained in Smart Objects and Smart Filters) and apply the filter to the new object, allowing you to readjust your correction at a later stage. You can also use layer masks to apply the filter effect selectively (Figure 8-116).
