
In addition to the built-in Photoshop tools we have already described, there are a number of plug-ins available that do a more professional job of simulating a real monochrome photographic workflow. These include Black & White Studio from Power Retouche [83] and Exposure 2 from Alien Skin Software [56]. The Nik Software Color Efex suite [75] also includes some very nice black-and-white filters.
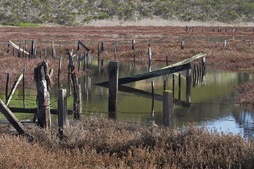
Our current favorite black-and-white conversion plug-in is Nik Software’s Silver Efex Pro. We will use it to convert the photo in Figure 10-33.
We optimize our color image and make sure that the top layer (where the filter will be applied) is a pure pixel layer. Selecting Filter ▸ Nik Software ▸ Silver Efex Pro opens the dialog in Figure 10-34.
The interface might appear complex at a first glance, but it’s quite simple to understand with some practice. The screen is divided into three main areas:
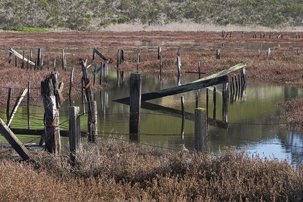
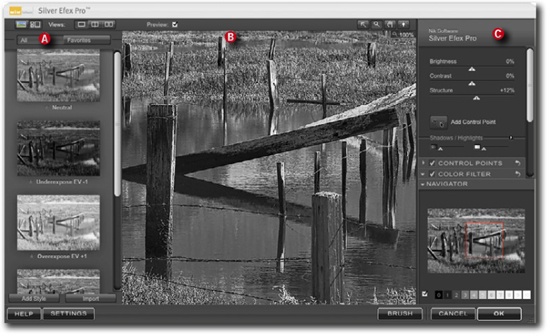
Figure 10-34. The Nik Silver Efex Pro Photoshop plug-in appears complex, but is relatively simple to use after a short orientation phase.
The Style Browser (which can be hidden) contains preset styles for direct application to your image. This is also where you can save and name your own styles.
The Preview Window where you can zoom in and out and set various before/after split screens.
The Control Panel contains various groups of controls for different aspects of the conversion process (Figure 10-35).
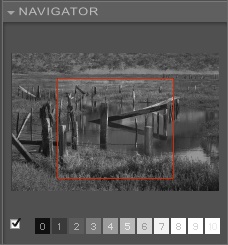
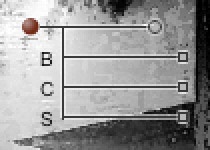
The Navigator can be shown or hidden at the bottom of the control panel. This is where you can shift the zoom detail, and it’s also where the application’s unique zone system map is located. This tool is based on Ansel Adams’ 11-zone system—clicking on one of the zones highlights all areas within the preview image with the same tonal value as the selected zone.
Figure 10-35. This view of the Control Panel shows all menus collapsed and the Navigator Loupe activated.
If you zoom out to a full-frame view of your image, the Navigator window serves as a loupe and displays the area around the current mouse position at 100% magnification. Clicking the Push-pin icon
 fixes the current position of the loupe within the frame.
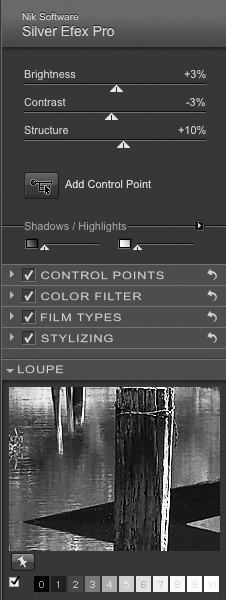
The major adjustment sliders at the top of the control panel are Brightness, Contrast, and Structure. The latter is actually a tool for controlling local microcontrast.
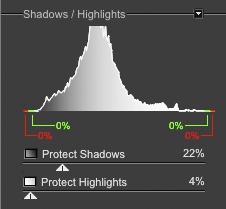
The Shadows/Highlights tool protects shadow and highlight detail from clipping and includes a histogram of the protected areas.
The Color Filter panel (Figure 10-38) allows you to apply various simulated analog color filters, such as a red filter for darkening blue skies. You can also adjust the characteristics of individual filters using the Hue and Strength sliders that are located in the Details bar.

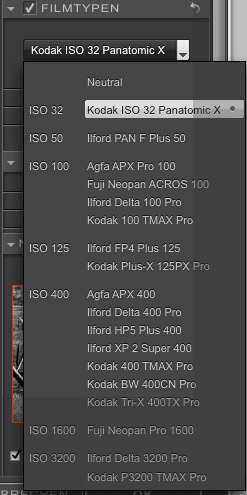
The Film Types section includes various traditional black-and-white film looks that you can apply digitally to your image (Figure 10-39).
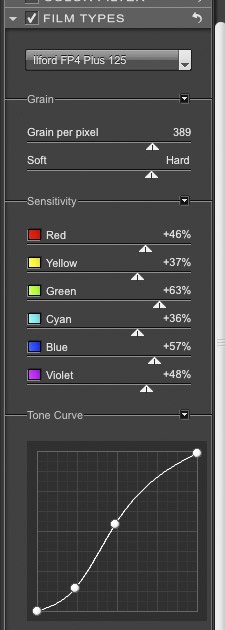
If you can’t find the look you want in the presets, you can also adjust the grain, color sensitivity, and tone curve for each individually (Figure 10-40).
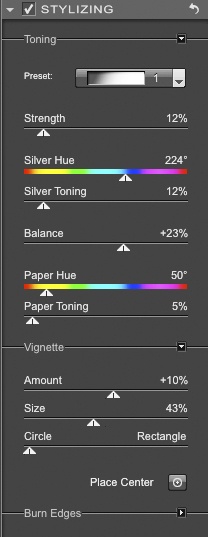
You can also stylize your converted image in a number of ways:
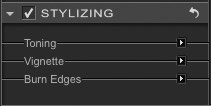
You can tone your image (Figure 10-42) in the shadows (here called Silver Hue) or in the highlights (Paper Hue). The tool also offers a Vignette section for applying a vignette effect to the entire image or for burning the edges separately.
All of the adjustments mentioned so far apply to the entire image, but you can also use the program’s patented Viveza™ UPoint Control Point technology to place selective corrections anywhere in the image frame. We describe this technique in more detail in Selective Adjustment Using U Point Control Points. The slider functions are limited to a control set that makes sense in a monochrome context, namely Radius, Brightness, Contrast, and Structure (microcontrast) (Figure 10-43).
The filter allows you to decide whether to perform your adjustments on the selected layer or on a new layer created specially for the adjustment. The Brush function allows you to create a new black layer mask, in which you “paint” the areas where you want the conversion to take effect. The resulting image is still in RGB mode.
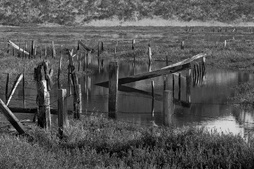
This tool allows us to quickly and easily convert our image to black-and-white and to optimize it too. Once we have performed the basic optimization steps on our color image we can use Silver Efex Pro to convert and fine-tune it. The only steps we can’t perform using Silver Efex Pro are scaling and sharpening for printing.
To achieve the result in Figure 10-45, we brightened the image slightly and improved local contrast using the Structure slider. We used the Kodak Panatomic X (ISO 32) film type filter and activated the blue color filter with opacity reduced to 63%.
Silver Efex Pro is available as a plug-in for Windows and Mac, but it only works properly with newer versions of Photoshop (CS3 and later). The software is also available as a plug-in for Apple Aperture and Adobe InDesign.
The plug-in is powerful and versatile, and the ability to save preset Styles makes working with it very efficient. The only real drawback is the $200 price tag, but even that is quickly amortized if you use the software regularly.
Nik Software offers the much simpler B/W Conversion filter as part of its Color Efex Pro [75] package. DxO [68] offers a good tool called DxO Film Pack; it does a fine black-and-white conversion by simulating a number of BW films, and is available as a Photoshop plug-in as well as an addition to the DxO Optics Pro RAW converter. Uwe’s DOP B & W Resolver[143] is a great Photoshop script for performing black-and-white conversions. Alien Skin’s Exposure 2 [56] produces very nice results with its many different film simulations and adjustment settings. The only disadvantage is the relatively high price.