
Almost all photos require sharpening before printing. We always sharpen our images using a separate layer for the following reasons:
Layers can be more heavily sharpened and the final effect more finely regulated using layer Opacity. If we are not happy with the result, we can simply start again without changing the original image data.
We can switch our sharpening layer to Luminosity blend mode and thus prevent unwanted color shifts during sharpening.
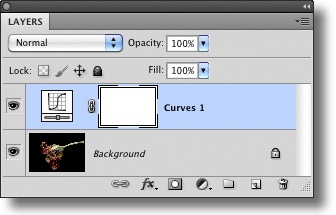
At the start of our sharpening sub-workflow, the Layers panel looks something like the one in Figure 8-72.
If the uppermost layer is a pixel layer, we duplicate it using
 or by dragging the layer onto the
  icon at the bottom of the Layers panel. We then jump to step 3.
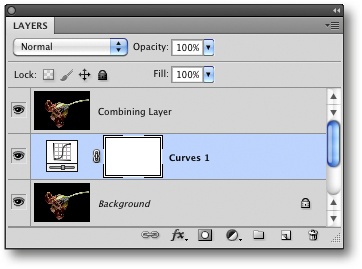
If the uppermost layer is an adjustment layer or an incomplete (or reduced opacity) pixel layer, we create a combined interim layer using
 (Mac:
(Mac:  ). The resulting Layers panel is shown in Figure 8-73.
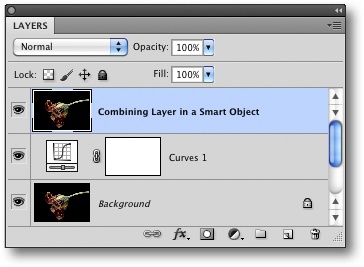
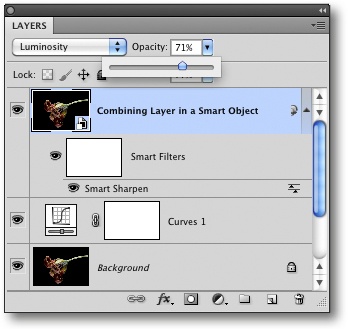
Usually, we then convert the combined layer into a Smart Object (via Layer ▸ Smart Objects ▸ Convert to Smart Object), giving us a Layers panel that looks something like the one in Figure 8-74.
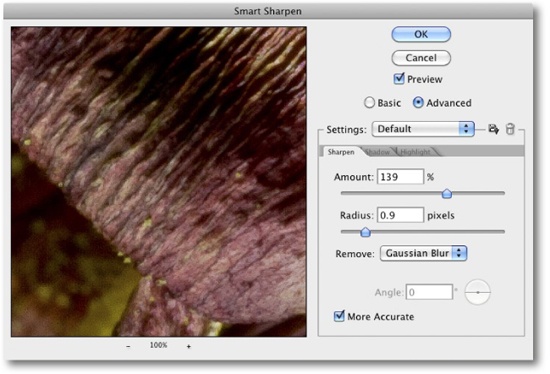
We can now apply any of our favorite sharpening techniques and tools to the new layer/Smart Object. In our example, we use the Smart Sharpen filter (Figure 8-75). A radius value between 0.8 and 0.9 usually produces acceptable results for 8–12 megapixel images.
Figure 8-75. We used the Smart Sharpen filter for this example. The filter enables us to sharpen selectively for shadows, highlights, and midtones.
If we are using Smart Sharpen, we usually set the Remove option to Gaussian Blur. For images shot at high ISO speeds, we often reduce shadow sharpness slightly using the Fade slider (found under the Shadow tab, Figure 8-77), helping to combat the increased noise that sharpening often produces in the shadows.
Slight oversharpening is usually not a problem, as the effect can be reversed by reducing layer opacity.
If individual areas are oversharpened (as is often the case for blurred image details), we create a new layer mask and mask the oversharp areas with black or gray.
If we are sharpening a Smart Object and we don’t like the results, a simple double-click on the sharpening entry in the Layers panel reactivates the sharpening dialog.

Some sharpening techniques are more effective if applied to enlarged images, although larger images can significantly increase processing time.
In our example, we begin by upsizing our image to 200%:
Note
![]() Sharpening produces less obvious artifacts if applied to a softer image that has been enlarged to 200% of its original size.
Sharpening produces less obvious artifacts if applied to a softer image that has been enlarged to 200% of its original size.
If necessary, we create a combined layer using
(Mac: ), select the content of the top layer ( ), and copy it to the clipboard (
 ).
).We create a temporary, empty image using
 and paste the contents of the clipboard (
 ) into it.
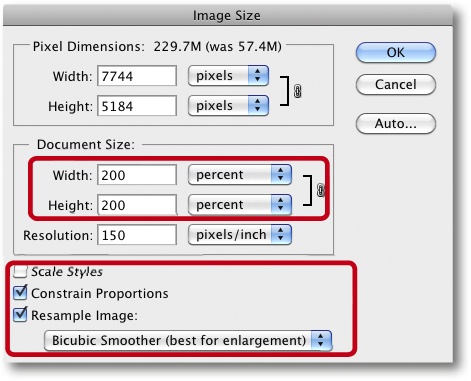
We then upsize our temporary image to 200% using the Photoshop Bicubic Smoother interpolation method (Figure 8-78).
The next step is to sharpen the image strongly using any conventional sharpening tool.
We then downsize our image by 50% using Bicubic Sharper interpolation, producing a sharpened image that is the same size as our original.
We select the entire image (
), copy the selection to the clipboard (), and close our temporary image without saving it (we no longer need it).Finally, we paste the contents of the clipboard into the uppermost layer of our source image using
.
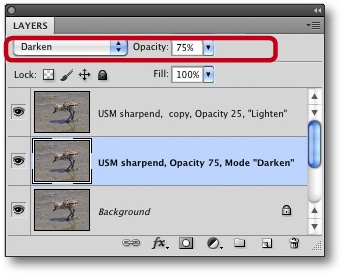
Many sharpening techniques produce color errors and artifacts at object edges. These are known as halo effects. Bright edge artifacts usually irritate the viewer more than darker artifacts. The following steps will help you eliminate halo effects.
Create a new sharpening layer and apply your preferred sharpening tool.
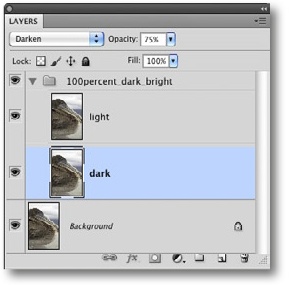
Set the lower layer to Darken blend mode, and reduce Opacity to about 75% (Figure 8-79).
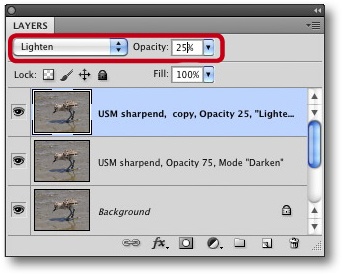
Set the upper layer blend mode to Lighten, and reduce Opacity to about 25% (Figure 8-80).
Now, simply adjust the Opacity of both layers until you achieve the result you want.
We usually create these two layers using a custom Photoshop action (100percent_dark_bright; see Uwe’s DOP Sharpening Frame Action) and turn them into a layer group. This way, you can vary the strength of your sharpening effect by adjusting Opacity for the group.
Often, only the edges of a subject need sharpening. The method we describe here is one of many that you can use to sharpen edges, and it’s effective and easy to apply.
If necessary, combine your currently visible layers into a new top layer (using
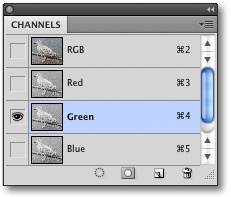
, Mac: ).Select the new top layer and the Green channel in the Channels panel (see Figure 8-82). The green channel usually contains the most image data – if a different channel shows more detail, use that one.
Navigate to Filter ▸ Stylize ▸ Find Edges. This filter looks for edges by comparing the contrast of neighboring pixels and creates a monochrome image from the results (Figure 8-83).
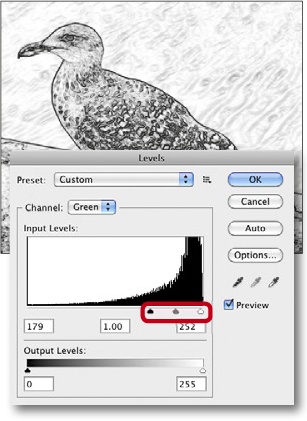
Increase contrast on the same layer by using Image ▸ Adjustments ▸ Levels (Figure 8-84).
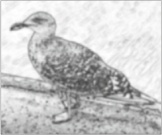
Use Filter ▸ Blur ▸ Gaussian Blur to create a smooth transition between sharpened and unsharpened areas (Figure 8-85). Use a Radius setting between 3 and 7 pixels, depending on your image size.
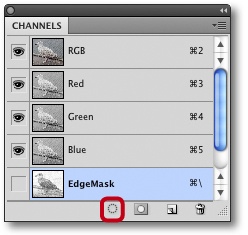
In the Channels panel, select the mask channel established in step #2 and load it as a selection by clicking the
 button at the bottom of the panel (Figure 8-86).
Invert your selection (Select ▸ Invert Selection or
 ). All black areas of the mask will be sharpened while the white areas will remained protected and unsharpened.
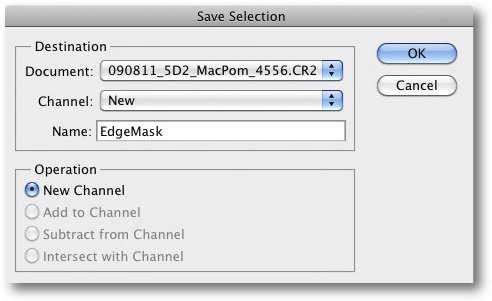
Save your selection (Select ▸ Save Selection) and apply a descriptive name (Figure 8-87).
Select the RGB channel in the Channels panel, switch to the Layers panel, and delete the top layer (the one containing the inverted contour layer).


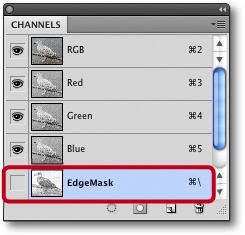
The purpose of these initial steps is to create an alpha channel containing an edge mask of the image (Figure 8-88). This mask can now be applied (normally or inverted) to any image layer.
The actual sharpening steps are as follows:
Duplicate your previous top layer (if it’s a pixel layer) or, once again create a combined pixel and adjustments layer.
Load your edge mask as a selection (Select ▸ Load Selection).
Select the top layer in the Layers panel (the one containing the image you want to sharpen) and click the Create New Layer icon
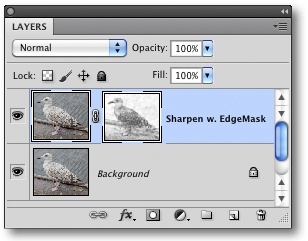
 at the bottom of the panel. This creates a new layer mask using your current selection (the edge mask in Figure 8-89).
Any sharpening is now only applied to image areas where the layer mask is white. The sharpening effect is weaker where the mask is gray.
Now you can really go to town with your sharpening tool and fine-tune the results using the Opacity setting for your sharpening layer. This process is, admittedly, a little complex, but nevertheless universally applicable.
You can automate the preparation of an edge sharpening layer by recording the steps we have described as a Photoshop action.
You can use Uwe’s dop_sharpening_frame actions as a basis for trying out our methods or for developing your own. The actions can be downloaded from: http://books/outbackphoto.com/DOP2010_03/

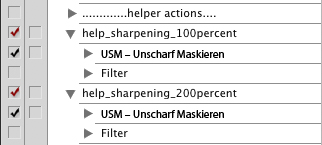
This action set is designed for use with your own preferred sharpening tool and consists of two subsets:
help_sharpening_100percent
help_sharpening_200percent
Simply select the Unsharp Mask step, record your favored sharpening tool into the action, and then deselect the USM step.
We use the help_sharpening_100percent action when we want to sharpen without enlarging our image.
The help_sharpening_200percent action upsizes the image to 200% before applying your chosen sharpening tool and downsizing the image back to its original size. This action is designed for applying strong sharpening effects.
The following is a short description of the individual actions in each:
100_percent_edgemask
(Figure 8-92) creates an edge mask and uses the 100% sharpening process. The Levels dialog appears during this action.
100_percent_dark_bright
(Figure 8-93) uses the 100% sharpening process on a set of layers aimed at bright or dark object edges. This action does not create an edge mask.
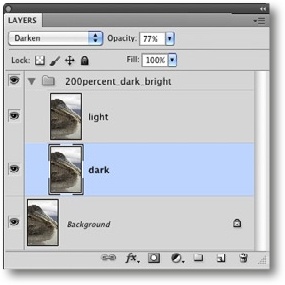
200_percent_no_edgemask_dark_bright (Figure 8-94) doesn’t use an edge mask. It simply upsizes the image to 200% and performs the 200% sharpening process.
Clarifier This is an additional action that uses mild sharpening in conjunction with a large radius value. This combination improves microcontrast. It is basically a simplified version of the technique we explain in Enhancing Local Contrast.

Download our actions and start experimenting! The actions are compatible with all newer Photoshop versions.
We will use the photo of a dandelion shown in Figure 8-95 to show you how to:
Sharpen the dandelion, and
Defocus the background in order to emphasize the subject.
These are the steps we take:
We start by duplicating the selected background layer (
or by dragging it to the icon at the bottom of the Layers panel). As usual, if we have already made layer-based adjustments, we create a new, combined layer using (or on a Mac). In order to be able to manipulate our layer, we then convert it into a Smart Object (Layer ▸ Smart Objects ▸ Convert to Smart Object).Now, we apply Filter ▸ Other ▸ High Pass to the Smart layer. This filter reduces the layer’s tones to neutral gray and then looks for edges the same way the Find Edges command does (Figure 8-96).
The best Radius value to use depends on the degree to which we want to sharpen (i.e., strengthen our edges), the textures in our image (fine textures require lower Radius values), and its size and resolution. Generally, values between 1.5 and 2.5 do the trick. You can see our result in Figure 8-97.
To perform the actual sharpening, we set the layer blend mode to Hard Light. If the result is too harsh, we either reduce Opacity for the sharpening layer or double-click the High Pass icon in the Layers panel to open the filter and reduce the Radius value. It is also worth testing the effects of the other, similar blend modes in the Hard Light group (such as Vivid Light, Linear Light, or Overlay). Here, we found that Vivid Light and 82% opacity produced the best result (Figure 8-98).
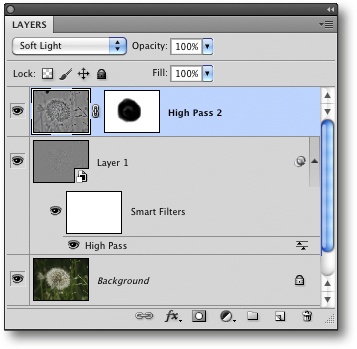
In order to defocus the background and increase emphasis on the subject, we again create a new, combined layer (
or on a Mac) and use the High Pass filter, but this time we set Radius to a value between 15 and 25 pixels.We invert the freshly created relief layer (
 ) and use the Soft Light blend mode. The background is now pleasantly blurred.
To keep the dandelion in focus, we create a layer mask using soft black brush strokes.
The mask and the original image are shown in 8-99. Here too, we can regulate our layer effect by adjusting layer opacity. Figure 8-100 shows the resulting Layers stack.
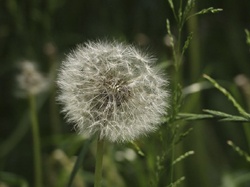
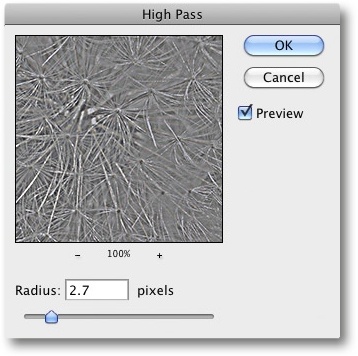
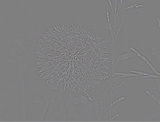
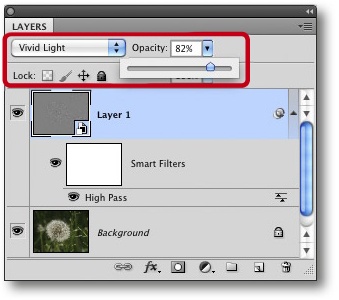

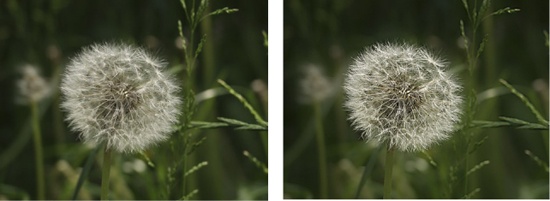
Figure 8-99. The original image is on the left. The right-hand image shows the result of sharpening the subject and blurring the background
The Lens Blur filter is possibly even better than the steps 5 and 6 described above for defocusing selected image elements. It has additional features for fine-tuning blur effects.
5. | To use Lens Blur, we create a combined layer and a layer mask in which the areas we want to protect are colored black. The mask is critical to the success of this method, as it not only protects certain image elements from the effects we apply, but also determines the distance between the focal plane and the affected areas within the filter’s depth-of-field simulation. Here, the filter’s various settings turn our mask into a complex tool. To get a better view of the mask we are painting, we switch to Quick Mask mode by |
6. | We select the image (but not our layer mask) in the Layers panel and navigate to Filter ▸ Blur ▸ Lens Blur. We begin by selecting Layer Mask in the Source menu A (Figure 8-101). |
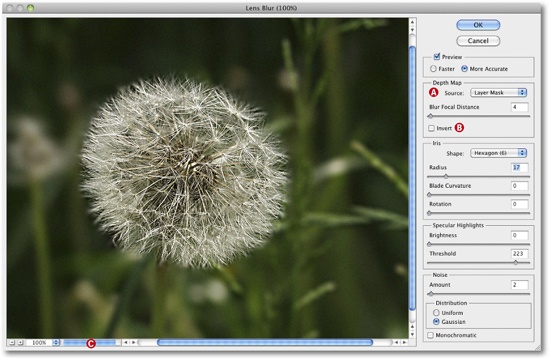
Figure 8-101. This filter is quite complex, and preview updates can be slow. The progress bar C indicates how long you will have to wait.
Provided an image is not blurred due to camera shake, the shape and size of the lens aperture determine the degree of blur in the resulting image. These characteristics are collectively described as the Bokeh of a lens. The Lens Blur filter includes settings for the shape and position of its own virtual aperture opening in the Iris panel. It is worth experimenting with different combinations of settings – we find an octagonal iris produces the most pleasing bokeh effects. This setting is less important in images that have little or no background light sources. The same is true for the Specular Highlights settings. If you are adding a high level of blur to your image, it can help to introduce some artificial noise to soften the hard transitions that blur can cause.