

O ONE OF THE MOST REQUESTED features from animators over the years has been the addition of a camera in Flash. Having the ability to build scenes involving a background, midground and foreground has always been a part of the production process. With a camera comes the ability to zoom and pan easily through a scene, requiring the movement of only one single object (the camera) instead of simulating a camera by moving all the contents around the stage.
Cameras only work in 3D environments and Flash, up until now, has never supported 3D except for ActionScript-generated 3D engines. But if you are like me, that level of ActionScript prowess is beyond reach.
Flash CS4 doesn’t include an actual camera but we do have the next best thing: 3D Position and View, specifically a “Z”-axis that we can now utilize to simulate a virtual 3D stage more effectively than with previous versions of Flash.
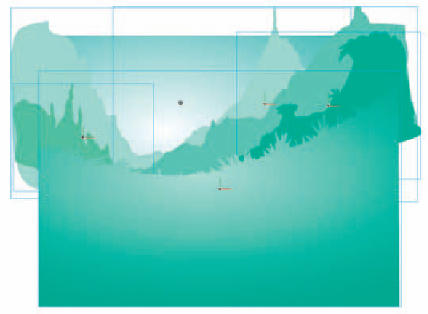
1 Setting up your “stage” is the most time consuming part of the process. The more elements in your scene, the more convincing the 3D effect will be. Here I have built a landscape consisting of background and midground elements, all converted to Movie Clip symbols and each residing on its own layer.
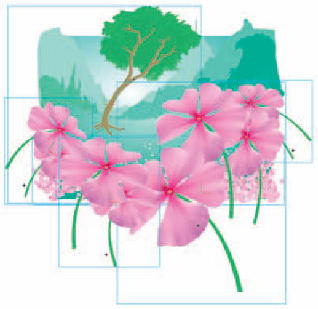
2 To suggest an even more convincing sense of depth I have included several foreground objects by adding several instances of a movie clip containing the flower graphic from Chapter 1.
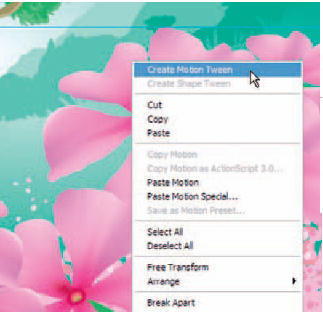
3 Detirmine what frame you want the “camera” zoom to begin in and insert keyframes for all of the layers containing the objects that will eventually be moved along the Z-axis. Apply Motion tweens to each of the movie clips.
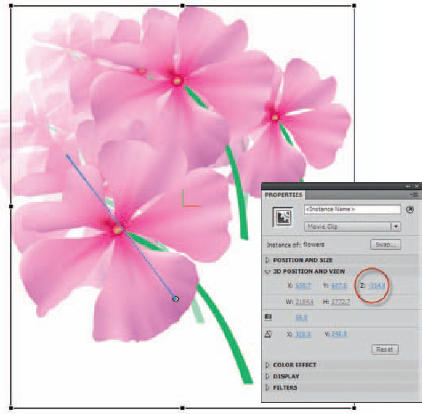
4 With the playhead in the last frame of the Motion span and the Properties panel open, select each movie clip individually and use the “Z”-axis hot text slider to scale and position each object outside the stage. You will likely need to edit the X and Y axes to position the object precisely where you want it.
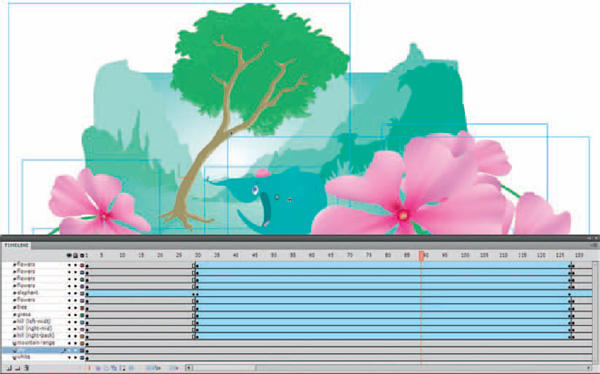
5 For this shot we are simulating a camera zoom, meaning the shot will move us into the scene. Since Flash doesn’t have a true Camera, we simulate a zoom by scaling each object from its original size to a larger size. The direction of the zoom is dictated by the final position of each Movie Clip. The key to the success of this effect is how much the objects move in relation to each other. Foreground objects move faster and scale larger than the objects furthest away from us in the background. The sky and largest mountain range do not move at all while the flowers closest to us move and scale the most. This is what gives the viewer a sense of true depth in the scene.


Hot Tip
Locate this source file on the CD in the back of this book. It is called “landscape.fla” and it is located in the folder named “Chapter 14”. Scrub the timeline with various layers turned on and off to see just how each object is animated relative to other objects on other layers. It is a sophisticated effect when completed and will make much more sense by playing with the original source file.
![]()