

TO SYNCHRONIZE A NESTED ANIMATION inside a Graphic symbol with the main timeline, select the Sync option in the Property Inspector. Sync is a feature that is available when a motion tween is applied. Select a keyframe with a motion tween to find the Sync option in the Properties panel. What this means for nested animations is that the nested frames will be synchronized with the main timeline.
In Flash CS3, Sync was inconsistently on or off depending on how you applied a motion tween: If you applied a tween from the drop-down menu in the Properties panel, then Sync was UNCHECKED. If you applied a motion tween via the right-click context menu, then Sync was CHECKED. The Sync feature was indicated on the timeline when a keyframe was followed by a vertical line.
Flash CS4 consistently turns on the Sync feature by default no matter how the motion tween is applied.
So when would you use Sync? When would you want to avoid it? Let’s first take a look at a situation where Sync would not be useful.

1 In order for you to see the effectiveness of the Sync feature, you need a nested animation to work with. A mouth symbol with several mouths on diferent keyframes will do just fine. Thumbnail views of each frame were selected using the Frame View drop-down menu in the upper-right corner of the timeline panel (to the right of the frame numbers). This is a handy way to see the contents of each frame.

2 The Frame View drop-down menu offers several choices for you to customize the way your timeline looks. My personal favorite is the “Short” setting, which lowers the overall height of each layer.

3 You can take lip syncing a bit further by tweening the mouth on the main timeline. This adds a second layer of animation since this mouth symbol contains nested mouths as well.
4 Using the Free Transform tool, scale and/or skew the mouth depending on the vocal sound and apply a motion tween. The Sync option becomes a factor when motion tweens are applied.

5 When you apply a motion tween and want the ability to control the frames nested inside graphic symbols, select a keyframe in the tween and turn off the Sync feature via the Properties panel. Note that this only applies to Classic tweens in CS4 and not the new Motion Model.
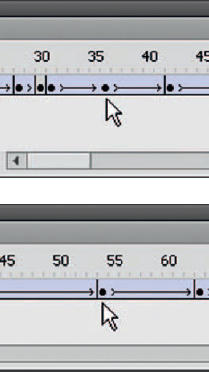
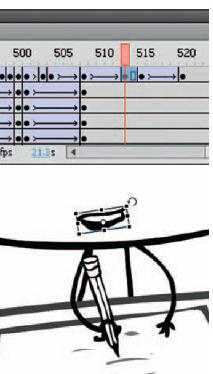
6 In the timeline, the top image indicates a keyframe with Sync turned on. The bottom image indicates a keyframe with Sync turned off.

7 Having the ability to assign a specific frame number is critical for lip syncing. If Sync is selected, you will not be able to edit the current frame number. Once Sync is turned off, you are free to change the frame number pertaining to the nested animation.

Hot Tip
Check out the “Extending Flash” chapter, specifically the AnimSlider Pro by Warren Fuller and the FrameSync extension by Justin Putney. They are very useful extensions for controlling nested graphic symbol animations and, personally, my favorite tools for Flash.
![]()